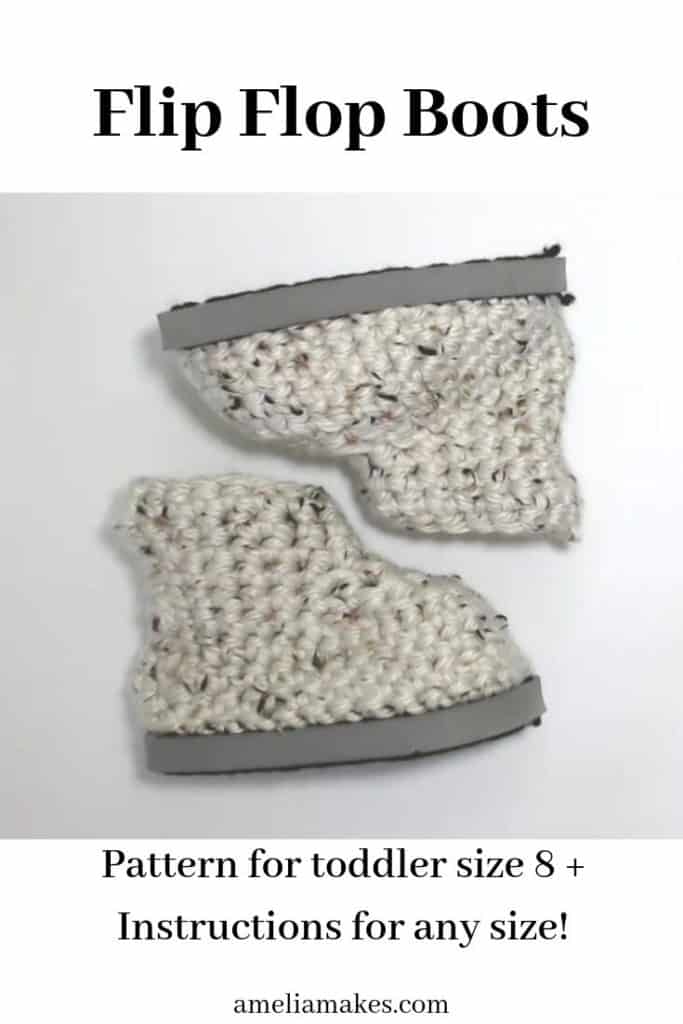
Turning Flip Flops into crochet boots or booties is a simple way to end up with shoes that you can actually wear outside. Here I make a set for my baby/toddler, but the steps can be used for any size.
A year or more ago, I saw a really cool idea for crocheting your own fall and winter boots using flip-flop soles.
Although I didn’t make them for myself at the time, this idea has really come in handy for my little one!
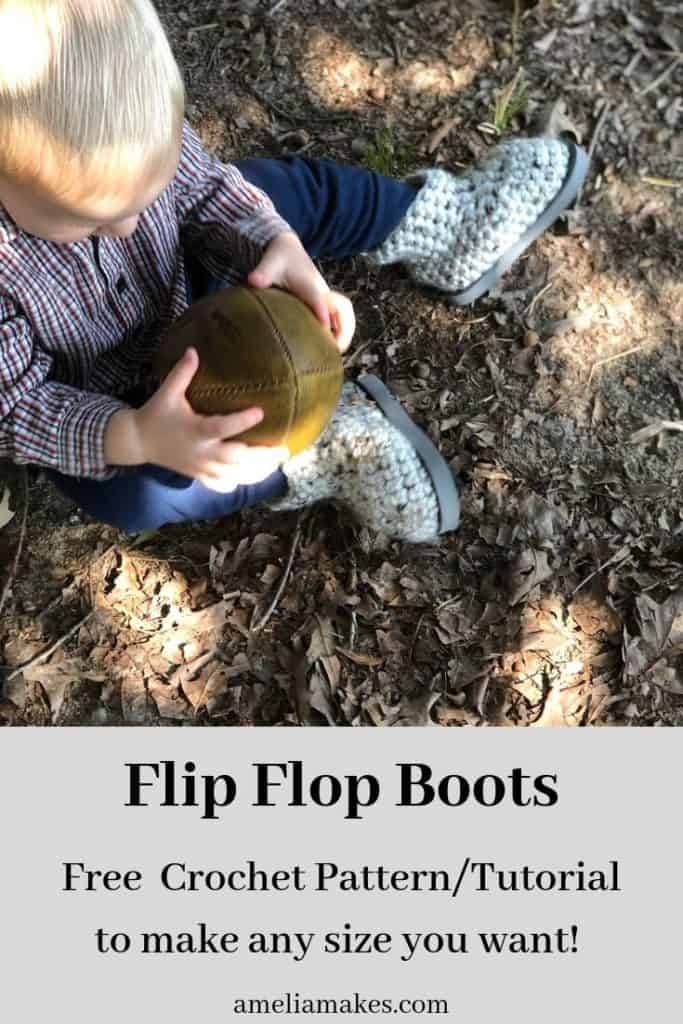
After knitting and crocheting all of my son’s booties during the first year of his life, I knew I couldn’t really do that this season with a very active and walking toddler. Knowing he needed hard soles on any footwear but also still wanting to crochet him cute booties is what made me remember this flip-flop idea.
Keep scrolling down and you’ll find the step-by-step video tutorial of this pattern as well.
So here, I’ll be sharing how I made his size booties by crocheting over some inexpensive flip flops, plus how you can make these in any size.
(Note: This post contains affiliate links, meaning that if you make a purchase it may benefit me at no extra cost to you. You can read all of my affiliate disclosures and other disclaimers on the disclaimers page. )
Prefer the PDF Version?
Grab the ad-free, printable PDF pattern.
You can view it on your computer, phone or tablet or download and print it at home.
Crochet Booties Video Tutorial
Below, I’m going to go through how I made these simple boots for my boy. If you’d also like to watch the process, you can take a look at the video version below, which highlights all the steps in my version of crochet boots from flip flops. You’ll get to see all the steps of crocheting some toddler size.
Side note: In my written tutorial I’m making some size 8 toddler shoes, but in the video the pair you see made are size 7. The steps are all the same but my row and stitch counts will be different.
But, the really nice thing about these instructions is that you don’t have to make the same size I am. Instead of just making a specifically sized pattern, I’ve created this to be a tutorial for any size that you can tweak to get the best fit for you and for the soles and yarn you are working with.
Sound good? Keep reading! Whenever you see the specifics of my baby boots project in bold, that will let you know that there is some data you would need to note for your own boots project in different sizes.
But first, the video!
How to Use This Tutorial
In making this project, my goal is to not only give you a pattern for making the same size boots. If you do want to make the same size crochet boots from flip flops, all of my stitch counts and specific steps have been included. So you can certainly go step-by-step following what I did to make a size 8 in baby boots. There’s also a specific download available in the resource library for that pattern.
But for anyone who wants to make a different size of boots (even possibly in adult sizes) I’d also like this to be more of a tutorial that you can follow and tweak to get the best results for you. For that reason, the process of making these boots is broken down into different sections. No matter what size you’d like to make, noting how many stitches and rows you use to make the boots just right in your project will help you create your own pattern
For baby size 8 flip-flop booties
The first download is simply a straightforward pattern for these boots the exact way I made them for my little one. If you know you want to make the same size as I have featured here(size 8 in baby/toddler shoes) then this is for you. Even though you can absolutely follow along with the rest of this post to re-create this size, the pattern will put all of that information together for easier reading. (Plus, you can work on it offline!)
For crochet boots from flip-flops in any size you need
The second download in the resource library for this is a customizable “boot template”. This is meant to make it easy for you to customize this boot tutorial and make crochet flip-flop boots in whatever size you need. Going section by section, there are places for you to record what you do each step of the way, so that you end up with a pattern that you can use over and over. Plus, you can use it to make sure that both of your boots will be made identically!
Materials needed
Supplies
- Pair of flip flops
- Hot glue
- Strong yarn
- Tapestry needle
- Scissors
- Crochet hook for your yarn of choice
To make these boots, you’ll need a pair of flip flops in the appropriate size. Since I knew I wanted to make these crochet boots and create the tutorial, I bought several pairs of flip flops in different sizes when Old Navy had them for a dollar each. End of the summer sales or just dollar store options are other ways to grab your “boot soles” for relatively cheap.
I also wanted to plug up the holes left in the soles of my flip-flops after I removed the straps. Hearing that hot glue (the first thing I thought of) would come out, I grabbed some of this sealant to use instead, and it’s working great! Be mindful though, it’s really thick and heavy duty.
In addition to the flip flops, you will also needs some strong string or yarn. This is for threading through the soles, and I opted to use something a little tougher than the yarn for the rest of the boots, so that the whole project would last longer. Any strong string that’s not too thick, and that you can easily knot will do the trick.
You’ll need a tapestry needle (or just a sewing needle that will fit the string you are threading).
Finally, you will need a pair of nice, sharp scissors, and a hook for your main yarn of choice (see below) as well as something smaller if you opt to start with slip stitches in the sole.
Yarn for crocheting these boots
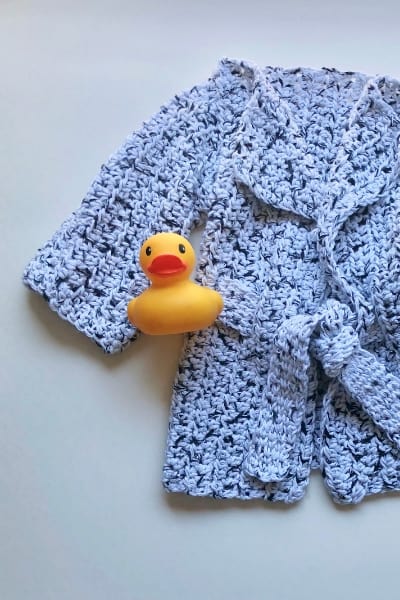
For your boots, you can use whatever yarn you would like. Just keep in mind that the amount of yarn you will need will vary, depending on the size of boots you are making and the size of yarn you choose to use. Also, you will want to decide on your yarn based on texture: while a very soft yarn might be very comfortable, a less plush yarn may last longer in this project.
For my boots In these photos, I am using this super bulky yarn. If you’d like, you can also take a look at the colors that come in the solid version of this yarn. (In the video tutorial, I’m working with two strands of aran weight yarn).
Total, I ended up using about 60 yards for these toddler boots, which is almost one skein.
Note: To make my stitches a little tighter (and therefore help these boots last longer) I sized down with my crochet hook, and used a size K hook instead of the recommended size J for this yarn. I also picked out a nylon-blend string, that I already had, to thread the soles with.
After you have chosen and gathered your materials, we can finally get started!

Crochet Boots Tutorial
Preparing the soles
Strap removal and sealant
The very first thing to do in prepping the flip flops for this crochet project is cutting off the straps that come on them and getting all the pieces off. After cutting off the straps of your flip flops, you’ll be left with three holes in each sole.
Although it’s not strictly necessary, I wanted to fill these holes back up. If you’d like to do that as well, simply take your sealant and pipe some into the holes, wiping off any excess so that it dries nice and even with the sole(on the top especially). Leave to dry/cure overnight or for the recommended time frame.
Don’t forget to give yourself adequate ventilation for that step!
Putting holes in your soles
After the straps and holes are taken care of, we then need to thread our soles to create stitches that we can crochet into. Admittedly, this is not the most fun part of this project, but it does make the rest of it much easier.
Start by making a series of holes around the outside of the soles. Try to space them evenly and about a half inch from the edge of the flip flops. But, know that it doesn’t have to be perfect.
To make my holes I used the tips of my little sharp scissors. There are, of course, other tools you can use for making these holes, but these worked just fine.
Keep in mind that your holes do not need to be super close together. Mine turned out about ¾ of an inch apart, and they could have been even a little further apart.
Once all of your holes are made, you can move on to stitching in them with your tougher string/yarn:
Threading the soles
After you have prepared your holes, threading them with your strong string or yarn is simply a matter of stitching all the way around each sole.
To create a nice solid line of stitches, I used a back stitch using my large needle threaded with my choice of string. This allows me to start my first crochet row easily because I can place stitches pretty much anywhere. The goal is to get a nice solid stitch, and a continuous line of stitching into the sole sets us up to do just that.
For help with the hand sewing portion, you can check out this post on the back stitch.
Alternatively, you can also use a small enough crochet hook and simply slip stitch around the soles. Both methods worked equally well for me, but you may prefer one over the other.
Whichever you choose to do, make sure that you don’t make these sole stitches TOO tight-you will need to be able to get your hook in there in the next step to start crocheting the boot body. Remember to knot/tie of your string nice and securely when you are finished threading the soles.
Crocheting up from the boot toe
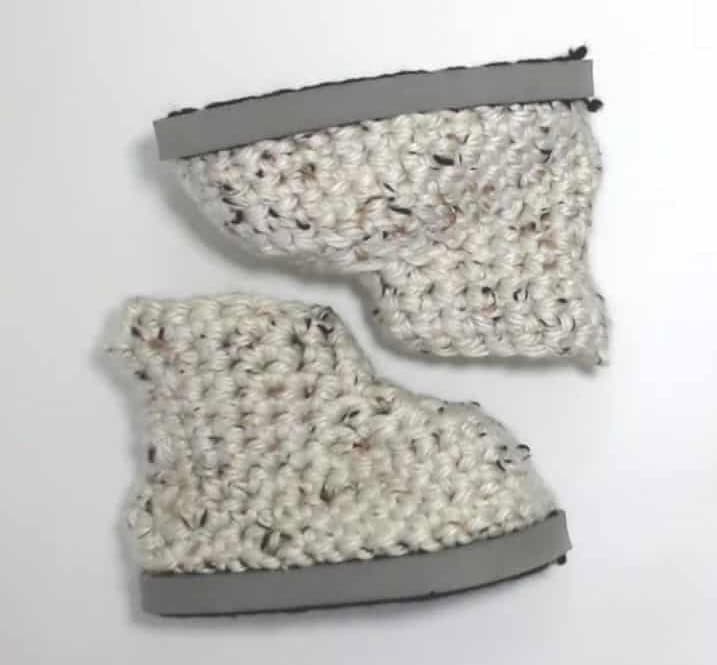
Now that our sole stitches are done, we can move on to actually crocheting our boot. This is where things really start to go more quickly, and this part is more fun in my opinion. We will start with doing a section of rows that simply work straight up from the sole.
Note: I would suggest starting your rows right at the middle of the heel/back of the boot. This will make it easier to mark and evenly work on your decreasing in the next sections.
Your first row of stitches is going to be worked right into the stitches that we sewed through our flip flop soles. You may take a little extra time on this first row, to ensure that your stitches are evenly spaced. After each round, join with a slip stitch.
In my size 8 boots and using my bulky yarn, I only needed 4 rows of single crochet working around the sole in this way. Each row turned out to be 33 stitches around.
Decreasing the toe area
After the boot is tall enough for the toe area, It’s time to decrease to close up the toe. From what I have tried, closing up the front half of the boot (and leaving the back half for our boot shaft) turns out working well.
To stay consistent with where you decrease, consider putting stitch marker on either side of the boot where you want the toe portion to begin and end, and then move the markers up with each row.
To actually work the decreases, I just worked two stitches into one around the toe area, trying to keep the stitches nice and tight to avoid gaps. I repeat this for every decreasing row (until the toe area is sufficiently closed up).
As we close up the toe, each row will need fewer decreases. My size 8 baby boots only needed 3 decreasing rows.
Working the Cuff Rounds and ribbing
With the toe area done, its time to work the tall portion of our boot(s). This step is similar to when we are just starting the boot, since we are just focusing on working in rounds and keeping the same number of stitches. All of the shaping is already done.
So after the last decreasing row, each row of making the top portion of each boot is simply working into each stitch that you have left. My boots have shafts that are 17 stitches around.
The number of rounds you do in this final step for the boot body is completely up to you and how tall you would like your finished boots to be. I ended up crocheting 4 rounds for the top of each of these boots, which gave
them a cute final look and proportions. An added bonus was that I was able to get both boots out of one skein of yarn, with just a tiny bit left over.
As an option, you can also work all or part of your boot top in ribbing, using front post and back post stitches. I had planned to crochet the last 1-2 rounds of these boots in ribbing, but decided against it at the end because of how bulky the yarn already is. Depending on the yarn you are working with, your sizing, and the look you want to achieve, some ribbing around the tops of these boots could give them a very nice finish.
Final Tips
Once you are finished crocheting your boots, all that is really needed to do is weave in the couple of ends that you may still have. You can also add whatever embellishments you want such as ties, bows, buttons, or pom poms.
If the holes from the flip flop straps are an issue for you, you might consider plugging the holes with a hot glue gun, or some other type of strong glue.
And finally, enjoy your boots!
Finally, don’t forget to Pin this for later on your favorite crochet or DIY board!
Keep the crafting delightful,
Amelia
This boot tutorial using flip flops will help you create your own crochet
boot patterns in any size!