
The Grit Stitch is an Easy Crochet Technique that Creates a slightly different Texture than Normal Single Crochet
One of the most fun things to do with crochet is to experiment with new stitches and textures. This skill is almost limitless when it comes to the amazing thinks that people can make out of yarn.
At the same time, crochet can be comfortably repetitive and simple. Being able to grab just a hook with your yarn and work on an easy project on the go is another aspect of crochet that makes it so accessible.
Today, it’s a pleasure to share with you how to crochet the grit stitch, which can be used for all manner of projects to add something different but still keep things simple.
(Note: This post contains affiliate links, meaning that if you make a purchase it may benefit me at no extra cost to you. You can read all of my affiliate disclosures and other disclaimers on the disclaimers page. )
The Grit Stitch is basically a v-stitch done with single crochet, and it’s a great way to mix things up if you want a little variety in your crochet texture.
Here, we’ll look at some of the many uses for the grit stitch, and you can see both written directions as well as a full video demonstration. Even if you still consider yourself a beginner, I’m sure you’ll be cranking out projects in grit stitch in no time!
Uses for the Grit Stitch
In my personal opinion, the grit stitch is one of those stitches that can be used in virtually any type of project. In the suggested gauge of your yarn, it can easily be used as a substitute for single crochet to create relatively warm or solid items.
Items like blankets, wall hangings, and other home items would be easy to work up in this stitch, and since it does use a simple repeat (over just two stitches) it can actually make it easier to keep the correct stitch count and keep your edges straight.
The texture of this stitch also lends itself very well to wearable items. Baby items, sweaters, accessories, etc. would all benefit from this stitch.
As you’ll see below, the grit stitch can create a slightly eyelet-like texture and be just a little bit lacy in a looser gauge. Using a larger hook size for your chosen yarn could open up even more options for this stitch for more open or summery results.
How to Crochet the Grit Stitch
The Grit Stitch is very, very easy and only requires you to be familiar with chaining and working single crochet stitches. If you are interested in advancing your crochet skills by learning new stitches and stitch combos like this, check out our full list of stitch tutorials.

Abbreviations
Really quickly, here are the abbreviations I am using below to explain the grit stitch:
- ch-chain
- sc-single crochet
- st-stitch
- rep-repeat. Repeats are shown inside a pair of asterisks (**).
- sc2- work two single crochet stitches into the same stitch
Crocheting the Grit Stitch with an Even Number of Stitches
While simple, crocheting the grit stitch really lends itself best to working with an even number of stitches. With this in mind, both the written directions and video focus on having an even stitch count. However, I’ve also included some notes to help you work with an odd number of stitches in case you are working with increases or decreases, or just really need/want an odd number.
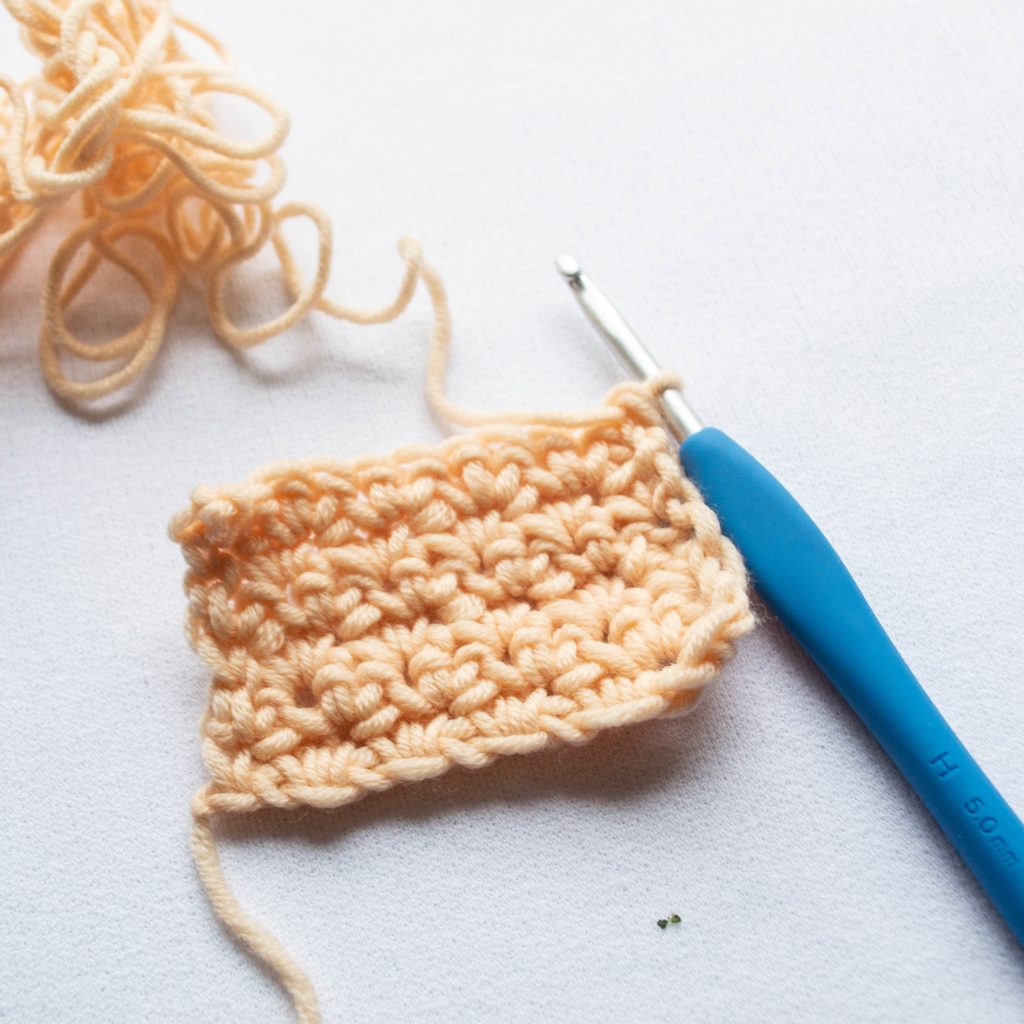
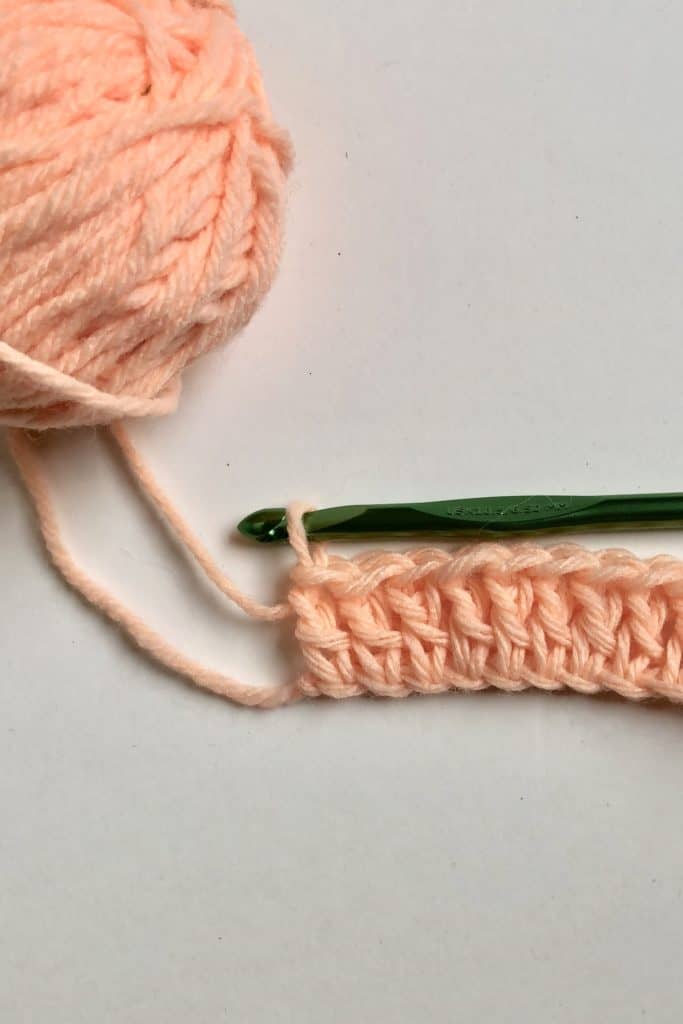
The core repeat of the grit stitch is to skip one stitch in between sets of two single crochet stitches worked in the same stitch. This is basically the same thing as a v-stitch, but it’s just done with single crochet stitches instead of double crochet.
I find it helpful with these kinds of patterns (where stitches are grouped together) to use:
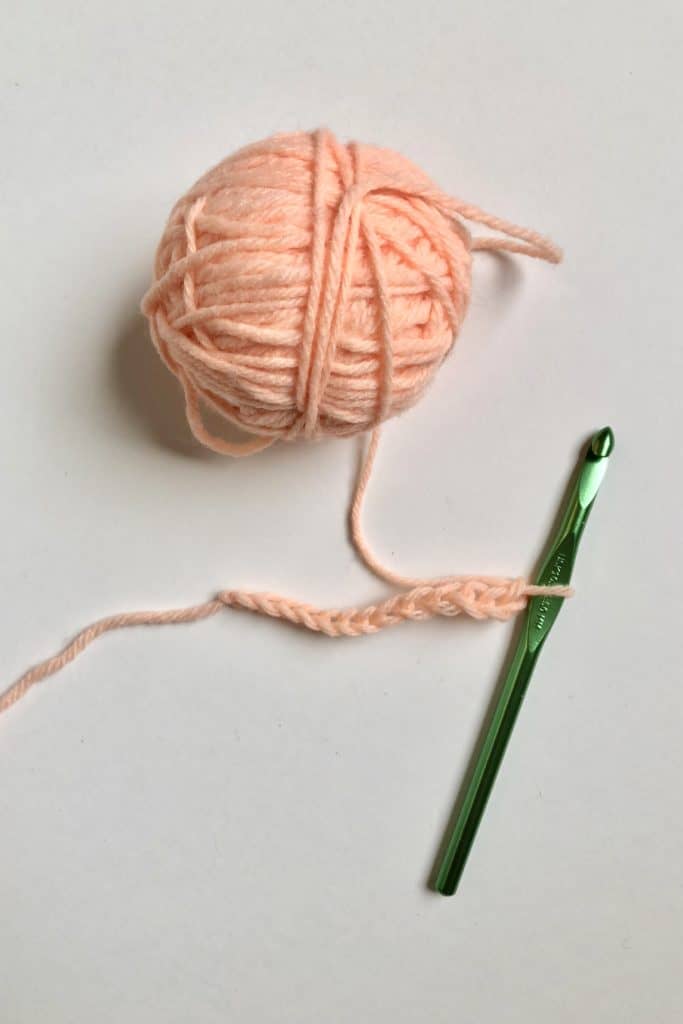
- Chain an even number of stitches.
- Row 1: Skip the first ch and sc. *skip a st, sc2* rep across the row to the last two stitches. skip a st, and then sc.
- Ch2 and turn.
- Row 2: sc. *skip a st, sc2* rep across the row to the last two stitches. skip a st, and then sc.
Keep repeating row 2 as many times as you need to, starting each row with a turning chain of two. After at least three rows, the “eyelet” pattern of this stitch will start to show up.
Adding a turning chain of two is what worked best for me with this stitch, and oftentimes it looked like my final stitch in each row was being worked right into the edge. If that doesn’t work out as well for you, you can try starting with an extra foundation chain, and/or trying a different number of stitches in the turning chain.
Crocheting the Grit Stitch with an Odd Number of Stitches
If you find it necessary to work in the grit stitch with an odd number of stitches, there are a few ways you could do this.
Firstly, you could only have a single border stitch on one side of your work to get an even number. If working with some kind of symmetrical piece you could also keep a single stitch in the middle of your row. You could add a stitch to your border stitch or put one in the “skipped” stitch in certain rows to get the right number of stitches when increasing or decreasing. And finally, you could only sc one instead of two in the first set of repeating stitches to get the stitch count that you need in decreasing rows.
While that can all seem rather complicated, I look at it as simply finding a way to add or lose stitches at the edge of your work. the most important thing is to keep the repeat of skipping and sc2 consistent along the whole middle part of your rows.
Video Tutorial
You can see this stitch in action in my video tutorial below. If you need to slow it down, just click on the little gear-shaped icon in the bottom right corner (next to “Youtube”) and click on “playback speed” to make the video faster or slower.
And in case you are interested in the supplies I’m using, you can find Clover ergonomic hooks here and the super-soft, luxurious merino wool from Sugar Bush Yarns here.
Enjoy!
Final Thoughts
So what do you think-is this one of your new favorites? I would love to hear about your experience with the grit stitch and what project(s) you’ll use it for.
And if you liked learning along with me with the grit stitch, be sure to get on the email list here at Amelia Makes so that you can be the first to hear about new tutorials!
Thank you for spending your precious crocheting time with me!
Amelia
Learning How to Crochet the Grit Stitch will give you a Sweet and Simple Crochet Texture that can be used Pretty Much Anywhere.

Hi, Amelia! I really love your videos! I’m from Brazil, and I taught myself how to crochet when I was only 7 years old, just watching my mother crochet. You are an inspiration for me!
That’s about how old I was too! I cannot say I taught myself though- that is very impressive. Thank you so much!