
Crocheting an envelope style pillowcase uses a very simple rectangle and removes the need to use zippers or buttons as a closure.
If crocheting projects for your own home is something you are interested in, cushion covers are a great way to get started. While they are larger than some things like coasters or dishcloths, pillows are still on the smaller side and don’t take too long to make.

Perhaps the best part of crocheting pillows is that they are so visible. You can show off whatever colors or stitches make you the most happy, and a cushion will become an instant focal point while adding comfort to your room.
If made to be removable, crochet cushion covers can be taken off for washing or for seasonal changes whenever you’d like.
But while crocheting a pillowcase can be a very fun and quick project, it can be difficult to know how exactly to finish your crochet piece so that it can actually go on your pillow form. Adding buttons or a zipper are both great ways to finish pillows, but both can be daunting if you’ve never done it before.
On the other hand, stitching your pillow all the way around is convenient and simple, but it means that you’ll have to wash the whole pillow together if it needs it.
As an alternative, making an envelope-style cushion cover gets rid of all of these problems. The design needs no “extra” skills, but still creates a removable cover.
Prefer the PDF version?
Grab the ad-free, printable PDF pattern.
You can view it on your computer, phone or tablet or download and print it at home.
Basic Crochet Pillow Construction
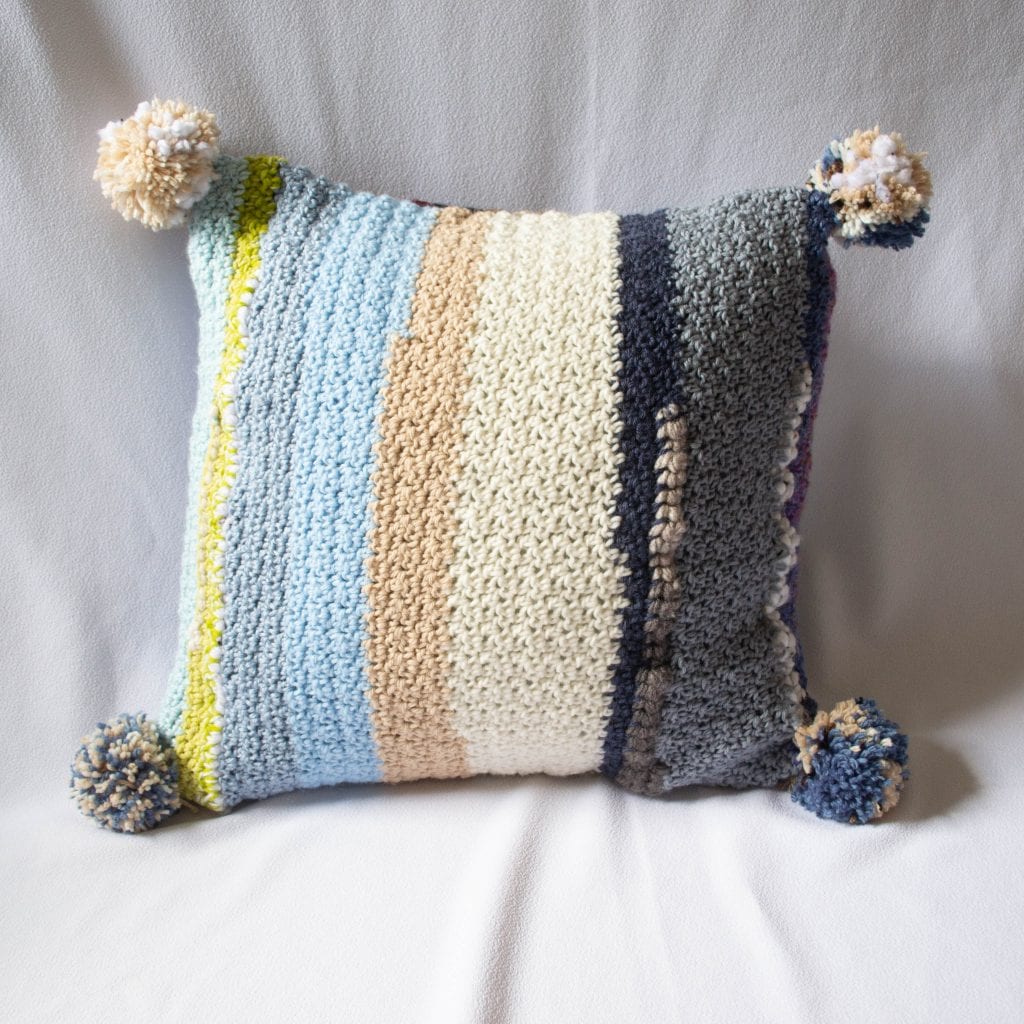
The pillow I’m showing here was a stash-busting project that I made originally as a CAL (Crochet ALong) with readers. It fits an 18” pillow and uses the Griddle Stitch.
Envelope pillows can be made in any size or stitch pattern, but if you’d like the exact pattern that we used in our CAL, then check out the pattern below!
For the rest of this post, I am specifically covering how to crochet an envelope pillow cover out of one rectangular piece. While you can absolutely crochet an envelope-style cover out of multiple pieces, motifs, or any number of shape combinations, this is the most simple way and will hopefully help you get familiar with this design.
Consider it a starting point for your own imagination!
Join My Crochet Maker’s Vault
FYI, if you’re interested to join my Crochet Maker’s Vault, which gives you access to all of my 80+ patterns, you will also get exclusive access to video tutorials for a number of patterns that are perfect for the summer and winter months!

Making the Right Size Cushion Cover
To figure out how large of a piece to crochet, start by looking at the size of the pillow form you want to use. You will want to crochet a cover that is a little wider than the width of your pillow form. This provides a little bit of extra space for your seams.
In addition, making an envelope style pillow case means that your work will overlap in the back, so this means you will need to crochet a piece that is probably longer than you expect. Since the back should overlap by at least a couple of inches, you can use a tape measure or piece of yarn to estimate how long your crocheted piece needs to be.
Often, it needs to be a little longer than you think.
Use these measurements to determine what dimensions your cover piece should be. I suggest that you make a swatch to check your gauge and figure out how many stitches wide and how many rows long your rectangular crochet piece will have to be to make a nice-looking pillow cover. This will help set you up for success as you work.
Getting a neat pillow opening
As you start your crochet piece, I recommend using a slightly smaller crochet hook for the first few rows. This is to create a tighter edge, which will keep your pillow opening a little tighter when it all gets put together.
Do the same thing at the other pillow end, for the same reason.
Checking Your Pillow Cover’s Fit
Once you have a long enough rectangle to make your pillow (40-42”) I recommend you take your pillow form and wrap your cover around it to get an initial idea of what it will look like. Try to arrange it about as tightly as the cover will/should be. The two ends of your pillow cover should overlap on one side (the back).
Based on your own preferences and all the colors in your cover, you can decide at this point whether the opening in your pillow will be exactly in the middle of the pillow, or offset slightly to the top or bottom.
You have some flexibility for at least a couple of inches each way, and this way you can work with what looks best to you.
Once you have it the way you want it, you’ll need to take your pillow form back out of your cover to seam it up. However, you need a way to remember exactly where to fold it.
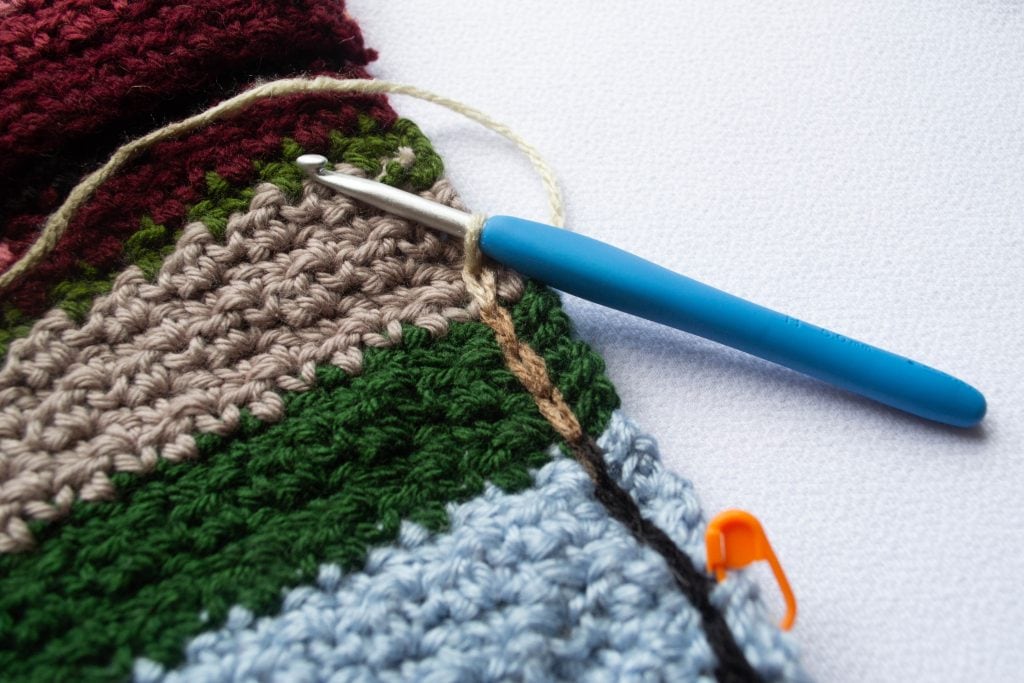
To accomplish this, I took stitch markers and put one marker on either side of the very top and very bottom of the pillow, to mark my fold lines. I recommend you put your markers right at the edge so they can be easily seen from either side of your work. Take the pillow form out once you have something like this in place.
At this point, take just a moment and think about whether or not you have a front side, or favorite side of your work. If your color transitions consistently look better from one side, or if all your ends are on the same side, then that would probably be better as the “wrong side” of your pillow.
Seaming
A few yards of yarn are needed for seaming up the sides. I used simple slip stitches along the sides of the cover once it is folded the way you want for the pillow. This means the edges should still be overlapping.
For the same reason, decide which end of the cover you want to show, and put that one on the bottom of the overlapping opening as you seam up the pillow sides. When you turn the cover right side out it will be on top.
I recommend using stitch markers to connect the sides of the pillow along both edges and especially where the opening is at the back.
Even though the section exactly in the middle of the cover is technically supposed to be the front of the pillow, you can adjust this somewhat by shifting the opening at the back of the pillow up or down a little, until you find what you like best.
Now it’s time to turn this rectangle into an actual cover!
Lay your cover on a flat surface with the right side facing up. Fold the two ends towards the middle so that your folds are at the markers you placed for the top and bottom of the pillow. The two ends should overlap by several inches.
Just like you decided which side of your work is the front, decide now which end of the cover you want to show. Put that end of the work on the bottom of the overlapping opening for when you stitch the pillow sides up, and it will show when you turn everything right side out.
Once you’ve got your cover re-folded, you may want to attach the layers of crochet together at the corners (with locking stitch markers, or safety pins, etc) so that they don’t shift as you are stitching.
With everything set up, make a line of slip stitches down the edge of your pillow to make secure seams.
When finished, turn your whole pillow right side out and check it with the form inside if you want.
Materials Needed
- H/5mm hook
- 18″ Pillow Form
- About 600 yards of medium weight yarn for the pillow body, plus about 125 yards for 4 large pom poms.
- Pom-Pom maker (either a store-bought one or a DIY version).
Abbreviation Used
- ch-chain
- dc-double crochet
- sc-single crochet
- ss-slip stitches
Gauge
12sts by 10 rows in the griddle stitch makes a 4″ square for this project.
Directions
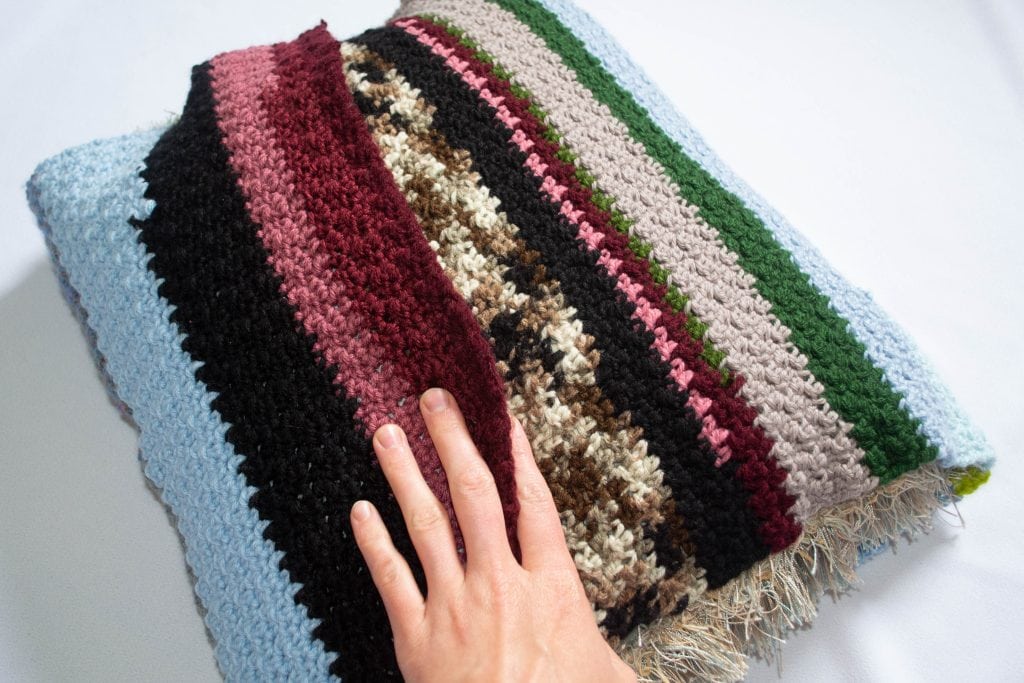
To get started on this project, I suggest getting together a lot of the yarn that you would like to use up(like my pile above). Even if you don’t want to measure the exact yardage of what you have, you can put together the color combinations that you want and arrange your yarns in order.
To make it easier for you to just keep going once you start crocheting, you may want to join a bunch of yarns into one large ball. The Russian Join and the Magic Knot are both great methods for connecting pieces of yarn together.
You can also look on the last page for information about using yarns with different weights.
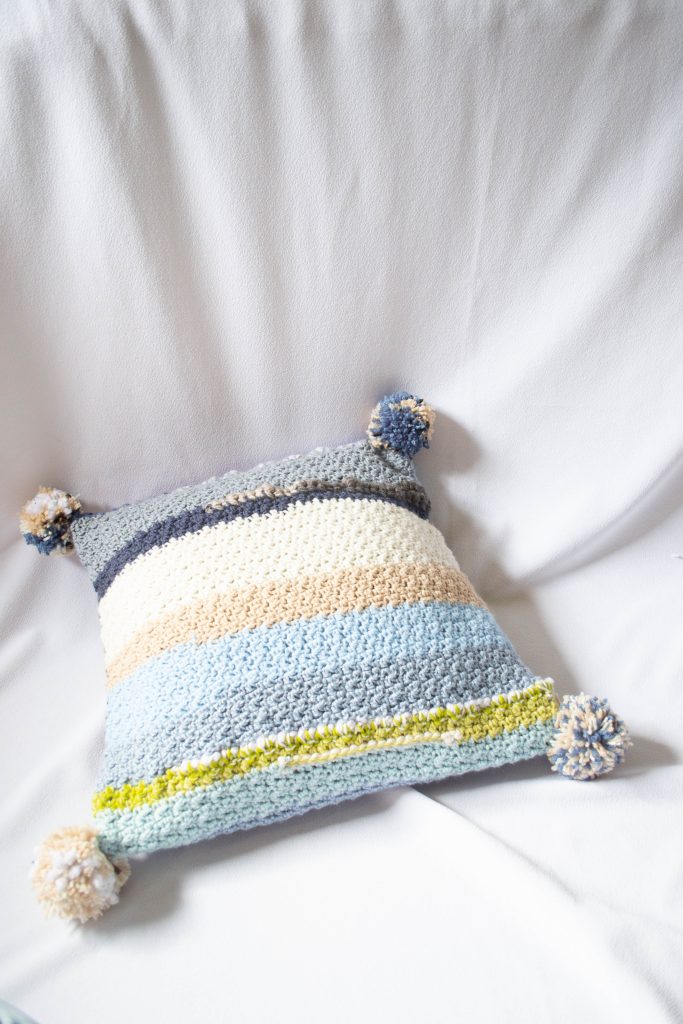
There are two things that you may want to consider if you want to think about where different colors end up. First of all, if you know you are planning to make and add pom-poms to your pillow, you may set aside specific yarns just for those.
Secondly, the middle section of the piece that you crochet for the pillow will end up being the front. In my own pillow, I tried to put my favorite colors towards the middle of the pillow and coordinate the ends of the pillow somewhat.
The ends will end up together as the pillow gets stitched. Once you have possibly arranged and/or planned out how to use your different yarns, the real fun begins.
Crochet the Main Piece
Actually crocheting the pillow is all done in one rectangular piece and is really quite simple. For an 18″ pillow, you want to create a piece that is about 19″ wide and 40-42″ long.
We are going to overlap the back of the pillow, so we need some extra!This entire pillow design is done in Griddle Stitch, which creates a nice squishy texture with a very easy repeat.
To get started, ch 55. We are going to skip a stitch in the first row and have 54 stitches in the finished row and all other rows.
Row 1: skip a ch. *sc, dc* repeat across the row. Ch1 and turn. (54 sts)
Rows 2-100(or more): *sc, dc* repeat across the row. Ch1 and turn.
Important Tip: While we always strive to keep our edges nice and even, this project is very forgiving. If you find you get off by only 1-2 stitches, you can increase/decrease to get back to the correct stitch count but leave the rows you have already done. Seaming up our pillow sides will take care of edges that are slightly uneven.

Pillow Construction
Once you have a long enough rectangle to make your pillow(40-42”) I recommend you take your pillow form and wrap your cover around it to get an initial idea of what it will look like. Try to arrange it about as tightly as the cover will/should be. The two ends of your pillow cover should overlap on one side(the back).
Based on your own preferences and all the colors in your cover, you can decide at this point whether the opening in your pillow will be exactly in the middle of the pillow, or offset slightly to the top or bottom.
You have some flexibility for at least a couple of inches each way, and this way you can work with what looks best to you. At this point, take just a moment and think about whether or not you have a front side, or favorite side of your work.
If your color transitions consistently look better from one side, or if all your ends are on the same side, then that would probably be better as the “wrong side” of your pillow. Put the wrong side on the outside for right now so that you can seam up your pillow from the wrong side.
Once you have the pillow piece arranged/folded the way you want it, you’ll need to take your pillow form back out of your cover to seam it up. However, you need a way to remember exactly where to fold it. To accomplish this, I took stitch markers and clipped the sides near the top and bottom on both sides.
I recommend you put your markers right at the edge so they can be easily seen from either side of your work. Take the pillow form out once you have something like this in place.
Seaming up
Now it’s time to turn this rectangle into an actual cover!
Lay your cover on a flat surface and make sure the top and bottom of the pillow cover are both straight and folded where they should be. The “wrong” side of your work should be facing outward.
Now let’s take care of positioning our pillow opening the way we want it Just like you decided which side of your work is the front, decide now which end of the cover you want to show at the back of the pillow. Put that end of the work on the bottom of the overlapping opening for when you stitch the pillow sides up, and it will show when you turn everything right side out. Once you’ve got your cover re-folded, you may want to attach the layers of crochet together at the corners(with locking stitch markers, or safety pins, etc) so that they don’t shift as you are stitching.
With everything set up, make a line of slip stitches down the edge of your pillow to make secure seams.
When finished, turn your whole pillow right side out and check it with the form inside if you want.
Adding Details and Finishing
After your Pillow cover is done, there are still several finishing touches that you can add if you want. Tassels, pom-poms, and crochet appliques are just a few ideas.
Final Thoughts
I hope you find these processes and tips helpful as you create your own crochet envelope pillow. If you would like to hear about new projects, patterns, and tutorials on a regular basis, be sure to sign up for updates from Amelia Makes! As a bonus, I’ll send you 3 popular PDF patterns straight to your inbox!
Keep crochet delightful,
Amelia
Crocheting a pillow with an envelope design is an easy way to get into creating your own home décor and using whatever yarn you want!
Pingback: 5 Easy Crochet Projects for the Home ~ Amelia Makes