
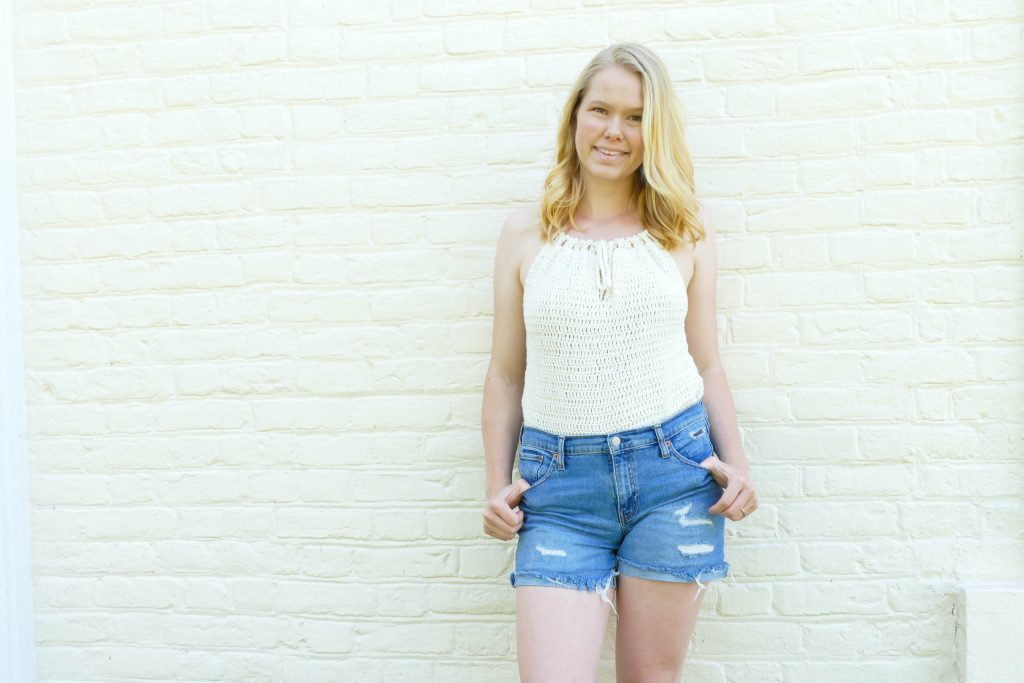
This easy going crochet summer top is comfortable, easy to make, and suitable for beginner crocheters
Today’s pattern, the Summer Ties Tank Top, is intended to be a beginner-level and above pattern that is not only flattering and comfortable, but is also simple to assemble!
Something that seems very common among crocheters is feeling intimidated by clothing. Most of the time the idea of creating a wearable project sounds amazing, but it’s intimidating enough to keep a lot of us from trying it-oar at least, not attempting it for a long time. Is the hesitancy justified?
Thankfully, no it’s not. There are plenty of easy garment patterns out there for even beginner-level crocheters. Since they do tend to be larger projects, it makes sense that these patterns may take longer, but they’re not necessarily harder.
(Note: This post contains affiliate links, meaning that if you make a purchase it may benefit me at no extra cost to you. You can read all of my affiliate disclosures and other disclaimers on the disclaimers page. )
Prefer the PDF Version?
Grab the ad-free, printable PDF pattern.
You can view it on your computer, phone or tablet or download and print it at home.
About this project
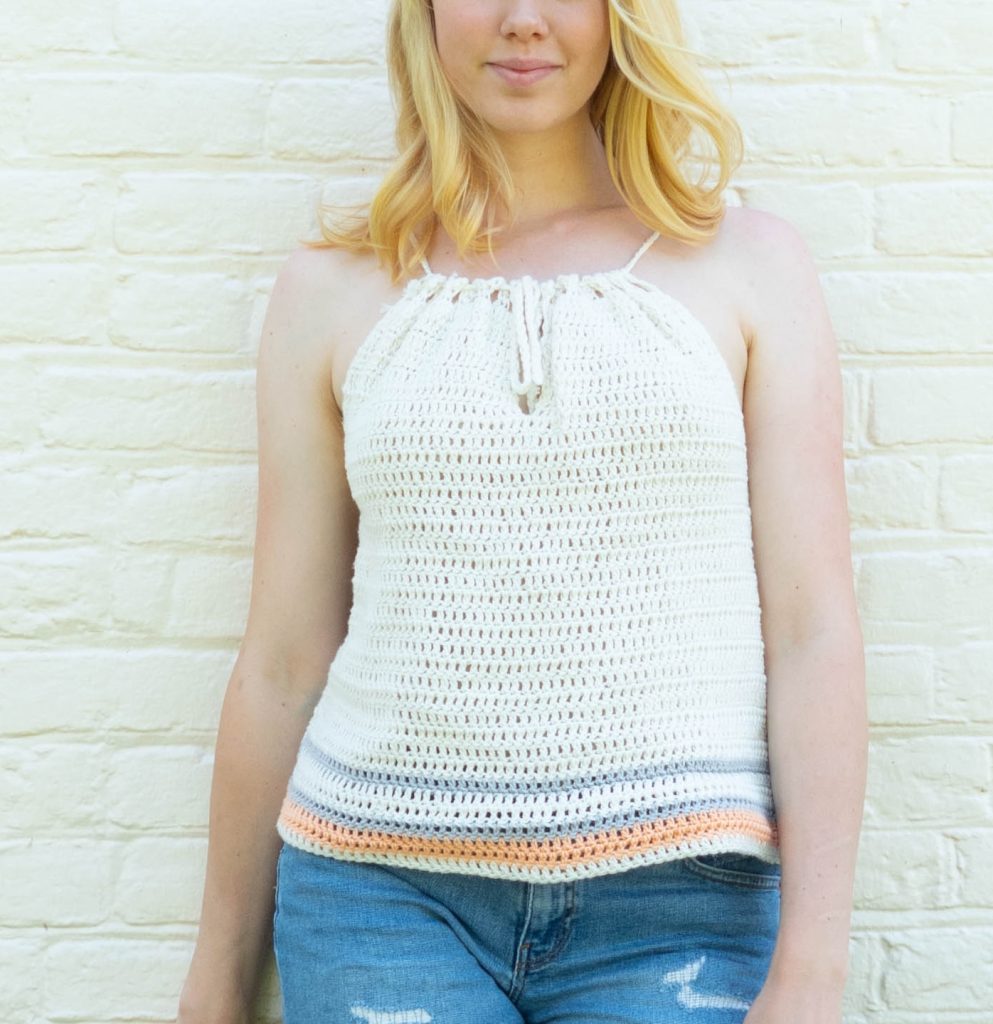
The Summer Ties Top has a very simple construction-just a front, a back, and one “drawstring” that get’s woven through the top and acts as the straps. An easy stripe pattern adds a little extra color and interest.
Material Needed
- F/3.75mm hook
- DK yarn-one main color (color one) and two accent colors (colors 2 and 3) for the bottom stripes. Yardages for each color in all the sizes are shown in the pattern download. The total yardage ranges from 410-1,277 yards
- Scissors
- Tapestry needle (for weaving in ends)
Skill Level
This top is good for ambitious beginners. Only a few stitches are used (mostly double crochet) with very few increases. The front and back panels even share most of the same directions, with the front having a few rows that get worked separately to create a keyhole
Tip: If you want to make this top even easier, you can simply make two back panels and skip the keyhole in the front that gets joined together!
Sizing
This top is intended for adult women sizes xs-5xL. This goes by bust measurement, and the pattern download includes a more specific breakdown size by size.
Gauge
The gauge for this project is in double crochet, with 14 stitches and 7 rows making a 4×4” swatch.
Other Pattern Notes
- Like all of my designs, this pattern uses US terms.
Abbreviation Used
- ch: chain stitch(yarn over, draw a loop through)
- Ch-space: chain space(the space made in a previous row with chain stitches).
- dc: double crochet(yarn over, insert hook, draw up a loop, yarn over, draw through 2 loops, yarn over, draw through two loops.)
- Fdc: foundation double crochet(chain 2, insert the hook through the first chain, draw up a loop, yarn over, draw a loop through, yarn over, draw through 2 loops. Repeat by inserting hook through the bottom of the previous stitch instead of chaining 2.)
- sc: single crochet(insert hook, draw up a loop, yarn over, draw through 2 loops.)
- st/sts: Stitch/stitches
Pattern Directions
Back Panel
Start with color 1
Row 1: fsc 44 (52,60,68,76,84,92,100,108). Ch1 and turn.
Ch 45 (53,61,69,77,85,93,101,109)
Alternatively:
Row 1: skip the first ch and sc into the second ch from the hook, and in every other ch for a total of 44(52,60,68,76,84,92,100,108)sts. ch1 and turn.
Row 2: *sc, Ch2, Skip 2sts and sc* rep across the entire row. You should still have a total of 44(52,60,68,76,84,92,100,108)sts. ch1 and turn.
Row 3: dc across the entire row, working one stitch into the top of each sc and two stitches into each ch-space. Ch1 and turn.
Row 4: dc in every st. Ch1 and turn.
Row 5: dc, 2 dc in next st, dc in every stitch until the last 2sts. 2 dc in next st, dc. You should now have a total of or a total of 46(54,62,70,78,86,94,102,110)sts
Rows 6-9: dc in every st. Ch1 and turn.
Row 10: dc, 2 dc in next st, dc in every stitch until the last 2sts, 2 dc in next st, dc. You should now have a total of or a total of 48(56,64,72,80,88,96,104,112)sts. Ch1 and turn.
Rows 11-14: dc in every st. Ch1 and turn.
Row 15: dc, 2 dc in next st, dc in every stitch until the last 2sts. 2 dc in next st, dc. You should now have a total of 50(58,66,74,82,90,98,106,114)sts. Ch1 and turn.
Rows 16-19: dc in every st. Ch1 and turn.
Row 20: dc, 2 dc in next st, dc in every stitch until the last 2sts, 2 dc in next st, dc. You should now have a total of or a total of 52(60,68,76,84,92,100,108,116)sts. Ch1 and turn.
Rows 21-24: dc in every st. Ch1 and turn.
Row 25: dc, 2 dc in next st, dc in every stitch until the last 2sts, 2 dc in next st, dc. You should now have a total of or a total of 54(62,70,78,86,94,102,110,118)sts. Ch1 and turn.
Rows 26-29: dc in every st. Ch1 and turn.
Row 30: dc, 2 dc in next st, dc in every stitch until the last 2sts, 2 dc in next st, dc. You should now have a total of or a total of 56(64,72,80,88,96,104,112,120)sts. Ch1 and turn.
(Add rows here if extra length is needed-7 rows/4” are left in the directions.)
Switch to color 2.
Row 31: dc in every st. Ch1 and turn.
Switch back to color 1.
Rows 32-33: dc in every st. Ch1 and turn.
Switch back to color 2.
Row 34: dc in every st. Ch1 and turn.
Switch to color 3.
Row 35: dc, 2 dc in next st, dc in every stitch until the last 2sts, 2 dc in next st, dc. You should now have a total of or a total of 58(66,74,82,90,98,106,114,122)sts. Ch1 and turn.
Row 36: dc in every st. Ch1 and turn.
Switch back to color one
Row 37: dc in every st. Ch1 and turn.
Bind off.

Front Panel
Top sections (make two)
Start with color 1
Row 1: fsc 24(28,32,36,40,44,48,52,56)sts. Ch1 and turn.
Alternatively:
Ch25(29,33,37,41,45,49,53,57)sts
Row 1: skip the first ch and sc into the second ch from the hook, and in every other ch for a total of 24(28,32,36,40,44,48,52,56)sts. ch1 and turn.)
Row 2: *sc, Ch2, Skip 2sts and sc* rep across the entire row. ch1 and turn.
Row 3: dc across the entire row, working one stitch into the top of each sc and two stitches into each ch-space. Ch1 and turn.
Rows 4-8: dc in every st. Ch1 and turn
Bind off for the first side. When finished with the second side, continue to row 9 and connect your two sides.
(Row 9 connects your left and right sides)
Row 9: Lay your left and right sides flat beside each other, so your working yarn from your second side is where you can begin working row 9.
Dc in every stitch from your second side, and then immediately go on and dc into every stitch of row 8 in the first side as well. You should have a total of 48(56,64,72,80,88,96,104,112)sts. ch1 and turn.
Row 10: dc into every stitch. ch1 and turn.
Rows 11-37: Repeat rows 10-37 of the back panel. Bind off.

Seaming up Finishing
Line up the finished front panel on the back panel, on a flat surface. Using slip stitches, seam up both sides from the bottom edge up to a point a couple of inches lower than the front opening. Bind off after you’ve checked the fit with the straps and decide if you want more or less room for the arm openings.
Drawstring Straps
Make a long chain(anywhere from 1 yard long for size xs to 2 yards long for the larger sizes). Turn your chain and ss into every stitch back to the beginning of the chain.
To finish the drawstring, bind off and weave in the ends(though this can be done after you check that the length is good).
To add your cord to the top as straps, start at the opening at the middle of the top front and begin to weave one end in and out of holes in the top edge(the chain spaces from row 2). At the side seams, leave some extra to serve as straps.
Continue all the way around the top so that both of your drawstring ends are at the front of the top. Adjust the drawstring/straps until everything is to your liking.
Keeping the top adjustable will allow you to change the way the neckline hangs on different days. Or, If you want to keep the top from shifting you can use small slip stitches to attach the drawstring to the top at the front and back corners.
Bind off your side seams after finalizing the stopping point for arm openings. Weave in any remaining ends, and enjoy your work!
Before You Go
I hope you enjoy this design, make it your own, and feel great wearing it! Don’t forget to grab your free pattern bundle before you go, and be sure to reach out to me if you have any questions!
Keep the crafting delightful,
Amelia

