
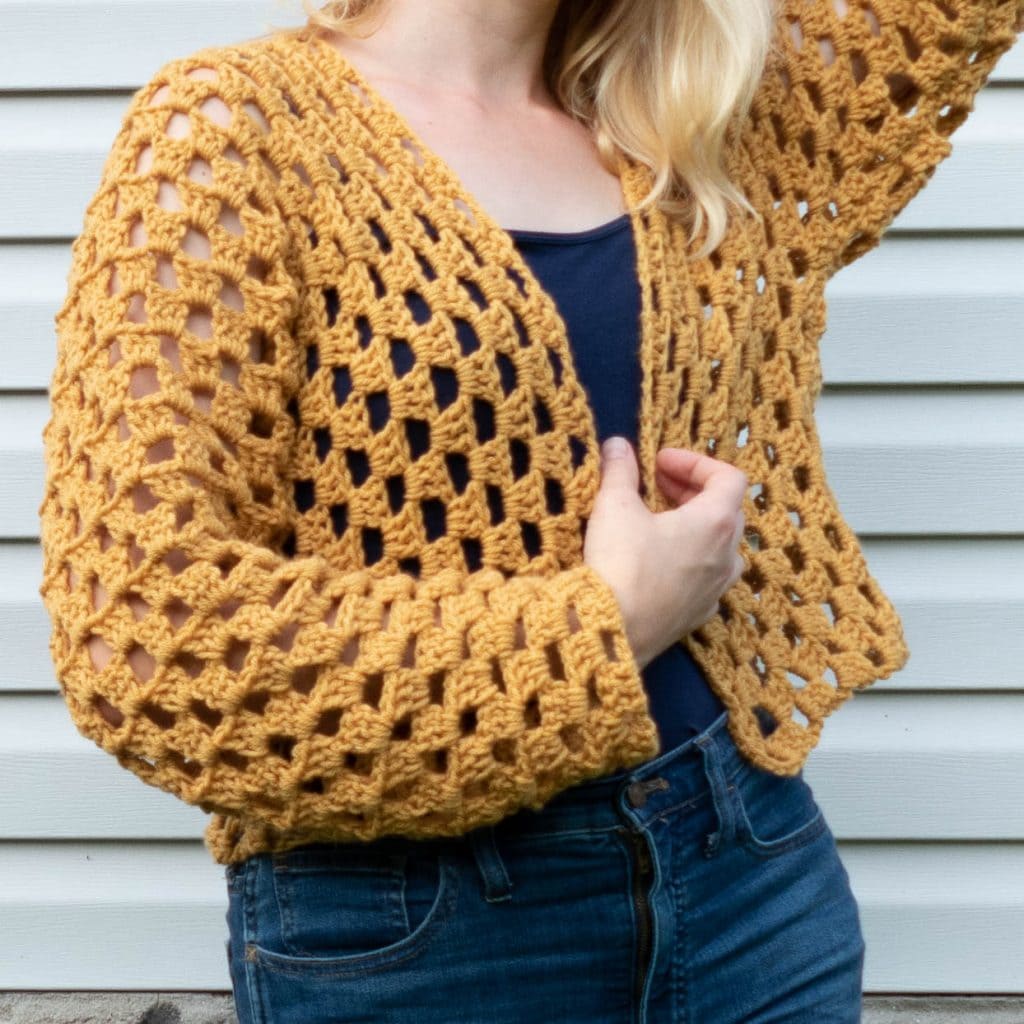
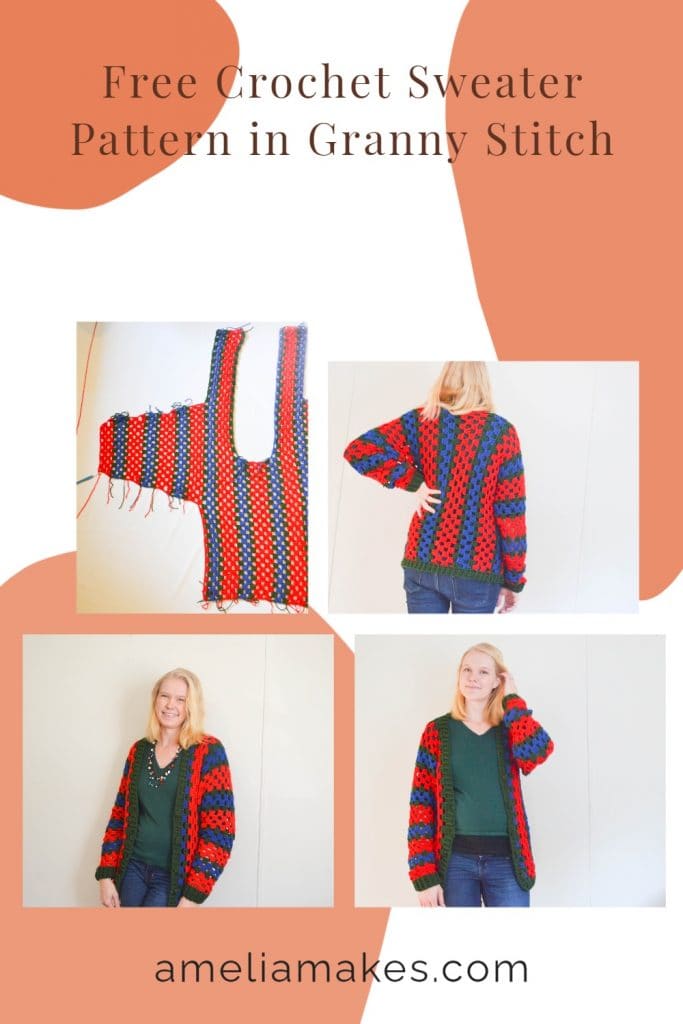
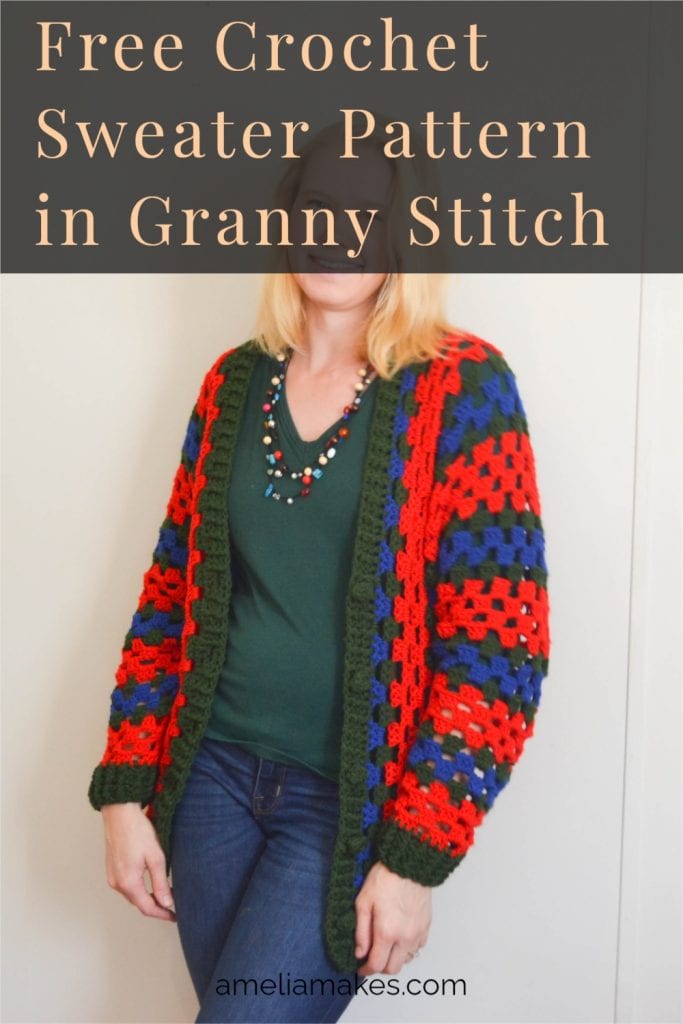
The Granny Stitch Cardigan is a quick crochet sweater design that is worked in one piece, using a simple granny stitch worked in rows.
Making a full crochet sweater can be intimidating. Sizing, finishing something larger, and following a more complicated pattern are all factors that make this kind of a project seem like something only experienced crocheters tackle.
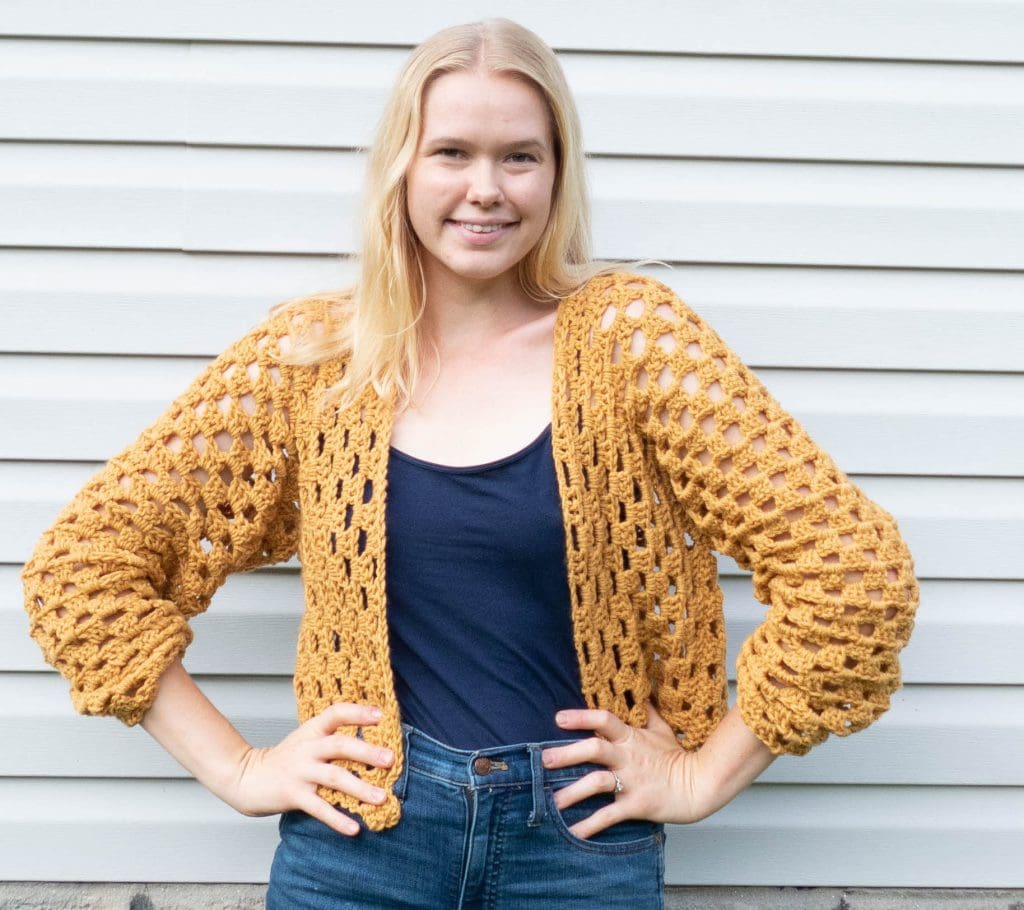
In this post, I am so excited to share a design with you for a cardigan or sweater that will hopefully make the whole idea of crocheting women’s garments more approachable!
Note: You can also purchase the PDF pattern for the granny stitch cardigan below!
The simplicity of this design can make it a good first sweater project for a crochet beginner, or simply provide a quick and easy option no matter how experienced you are.
To try it for yourself! You can access the free pattern in size Small, or you can purchase the PDF pattern below and it includes all sizes!
(Note: This post contains affiliate links, meaning that if you make a purchase it may benefit me at no extra cost to you. You can read all of my affiliate disclosures and other disclaimers on the disclaimers page. )
Prefer the PDF Version in All Sizes?
Grab the ad-free, printable PDF pattern in sizes XS to XL.
You can view it on your computer, phone or tablet or download and print it at home.
Jump to:
- The Granny Stitch Cardigan is a quick crochet sweater design that is worked in one piece, using a simple granny stitch worked in rows.
- Prefer the PDF Version in All Sizes?
- Other Beautiful Granny Stitch Patterns to Start Now
- About Granny Stitch Sweater for Adults
- Gauge
- Abbreviations Used
- Prefer the PDF Version?
- Pattern Directions For Size Small
- Seaming Up Your Sweater
- Body Ribbing
- The Granny Gifts cardigan is a one-piece crochet sweater pattern in five sizes. It uses a granny stitch variation with minimal shaping. The result: an easygoing, cozy layer that is quick to work up and fantastic for gifting or for wearing yourself!
Other Beautiful Granny Stitch Patterns to Start Now
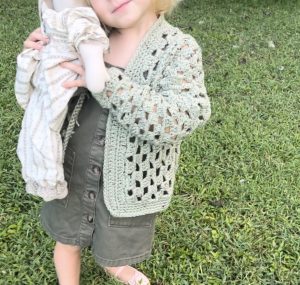
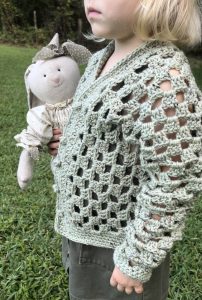
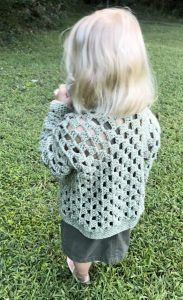
Granny Stitch Cardigan/Sweater for Kids
If you love this granny stitch cardigan, then you’ll love the matching pair for kids. It can even be worn as a mother and daughter set or as a special gift for a loved one.

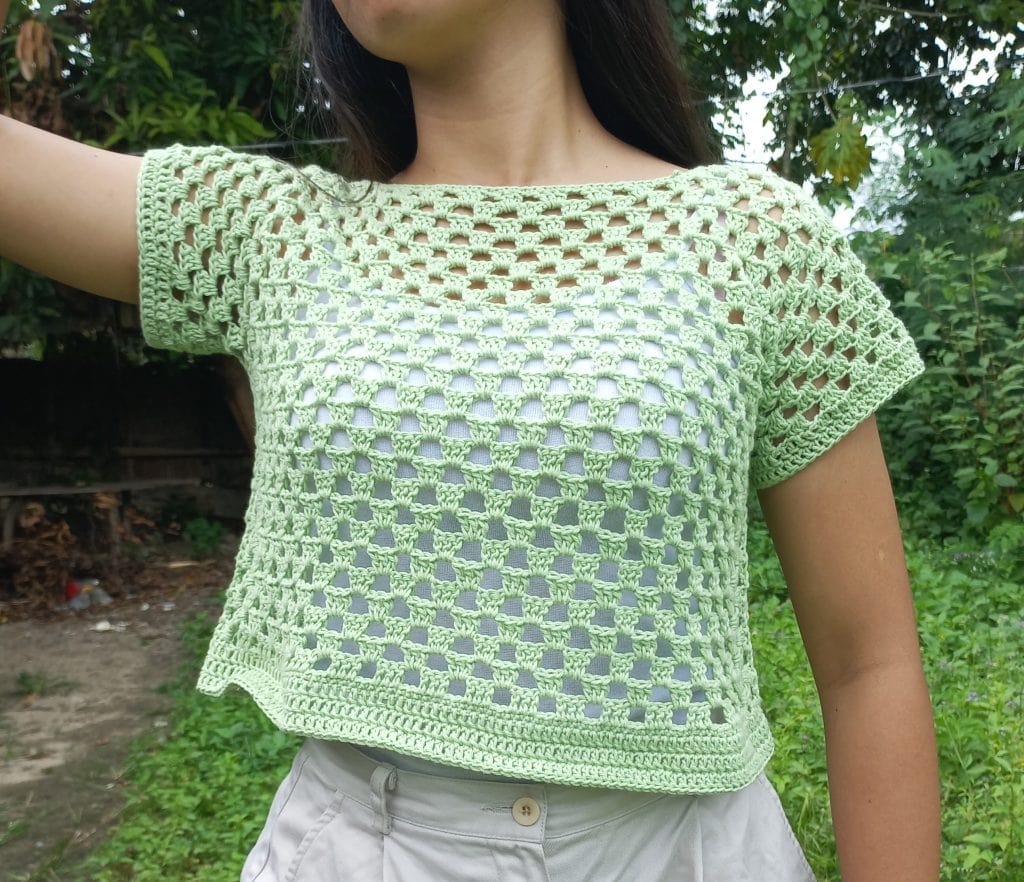
Granny Stitch Top For Women
This beautiful granny stitch top does not take long to complete, even if you’re a beginner at crocheting women’s garments!
It’s the perfect gift to make over the Christmas season, and give away as a meaningful gift to a loved one.
About Granny Stitch Sweater for Adults
As the name indicates, the Granny stitch cardigan is a crochet sweater that is worked entirely in granny stitch. The only exception is the ribbing, which adds some great shaping to the finished piece.
Other than the ribbing, the only shaping needed while making this design are a few increasing and decreasing rows in the sleeves. The rest of the sweater is worked back and forth in rows.
Since the granny stitch is a pretty obvious design, it helps keep your stitch count consistent as you work. Plus, working your stitches right into the open chain-spaces from previous rows helps this project go by fast!
Skill Level
Since the Granny Gifts Cardigan uses the same basic pattern as a granny square, it really is pretty simple to pick up. Knowing how to chain and double crochet is mostly all that you need. Overall, I would say that this sweater is suitable for anyone who would at least call themselves an adventurous beginner.
Sizing
Here is a quick breakdown of the sizing used in the Granny Stitch Cardigan:
- Size small- bust 34″
Materials Needed for Size Small
To make this project, you need the following:
- Heavy worsted/aran yarn in 1-3 colors- amounts will vary by size
- A size H/5.00mm hook, or whatever size you need to match gauge
- 5 buttons that are about 1½ in diameter (you can even make them yourself!)
- A tapestry needle (not required, but very useful for weaving in your ends
- Scissors
The amounts of total yarn you’ll need to make the Granny Stitch cardigan will vary depending on the size you choose to make.
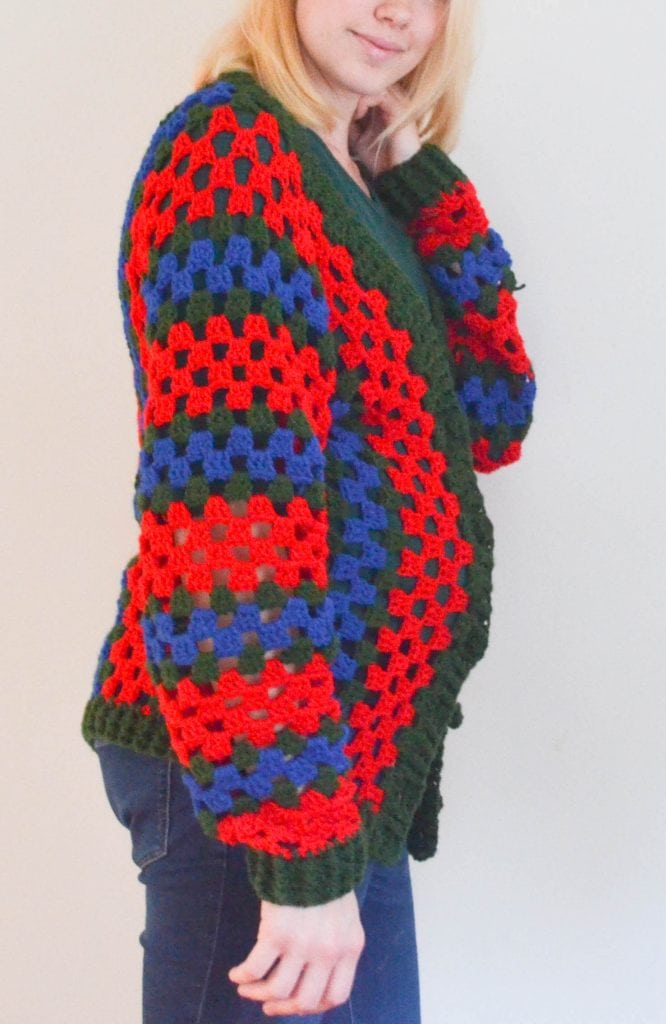
Plus, it will also depend on whether you use one color (for a completely solid version), two colors (such as a solid version with contrasting ribbing), or three colors (using the stripes pattern that you see in mine).
The stripes repeat is included in the pattern as a main option, and it turns out looking so good with all different palettes!
Check out this gorgeous version in blue from Beverly:
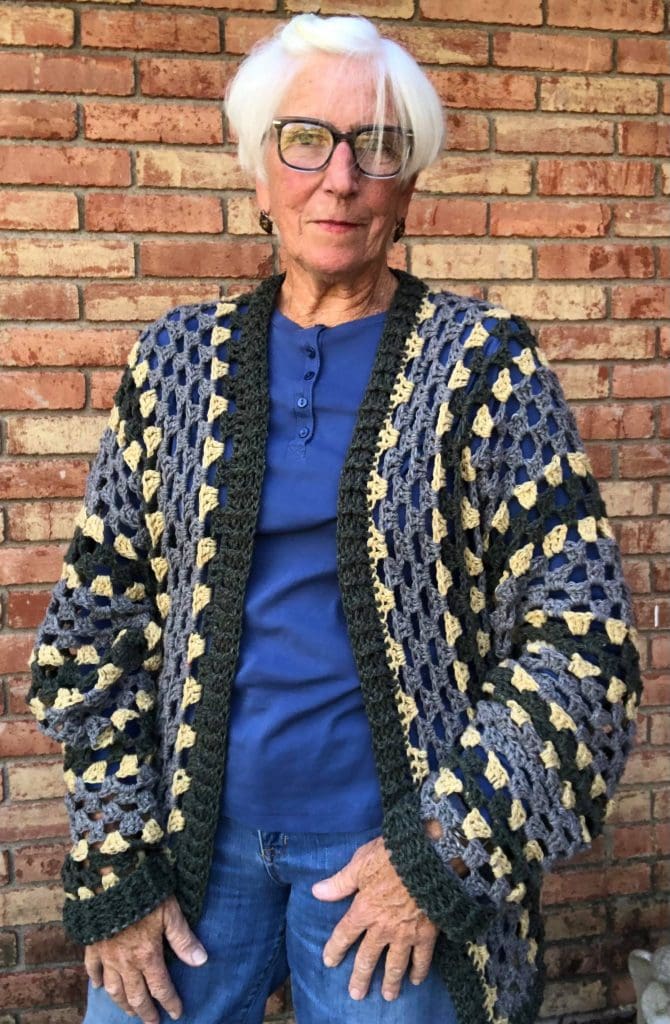
Across all of the sizes, a good approximate breakdown of your total yardage needed (which you’ll find listed) is 40% of color a (used the most in stripes), 40% of color b(used second in stripes as well as for the ribbing and cuffs, and 20% of color c (used in the most narrow stripes).
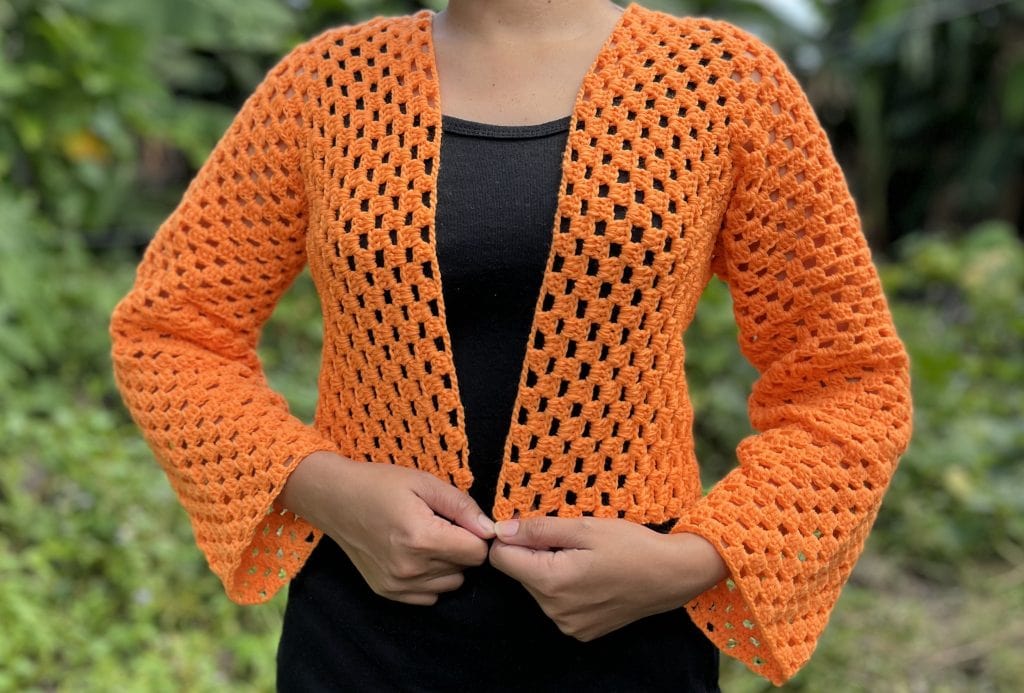
For my own Granny Gifts Cardigan, I used Paintbox Simply Aran in colors Rose Red (213), Racing Green (227), and Royal Blue (240). This line is my #1 go-to for affordable yarn in plenty of beautiful color options, and I highly recommend it.
You may also find stitch markers helpful for this project, just to mark where certain rows need to start or stop. this will show where you want your buttonholes to go, and even to “pin” the sides of your sweater together to keep it lined up well for seaming.
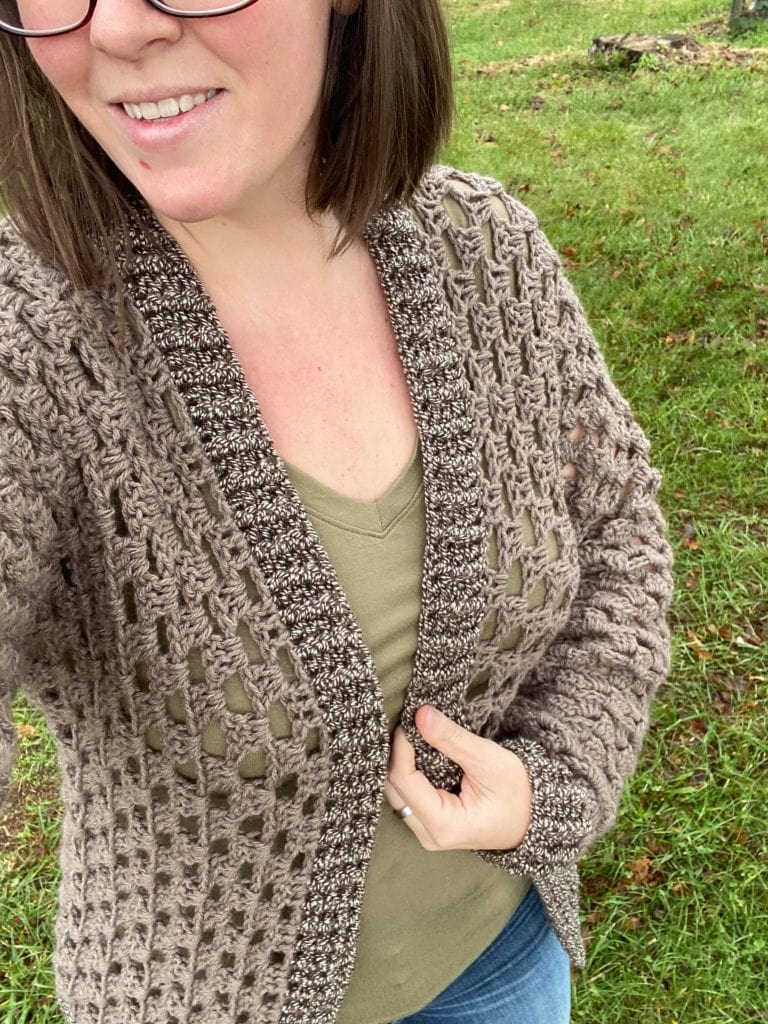
Here’s another example of how this cardigan can have so many different looks depending on the yarns and colors used!
Jennifer B. made a gorgeous neutral version:
Gauge
The gauge for this project is 13sts and 7 rows of dc per 4” square.
Abbreviations Used
- Ch: chain
- Dc: double crochet
- Ch: space – Chain space, meaning the open space created by chains in the previous row.
- Rep: repeat
- st/sts: stitch/stitches

Prefer the PDF Version?
Grab the ad-free, printable PDF pattern in sizes XS to XL.
You can view it on your computer, phone or tablet or download and print it at home.
Pattern Directions For Size Small
First Sleeve
In color A, Ch 34
Row 1: Skip 2 ch and dc2. ch2, skip 2sts, dc3 Repeat 5x (6x total).
Row 2: Ch4 and turn. Skip your first solid section and dc3 into your ch-space. ch2, skip 3sts (solid section) and dc3 into the next ch-space Rep 4x (5x total). Ch2, skip 2sts and dc into the end of the row.
Row 3: Ch2 and turn. Dc2 into your first ch-space. ch2, skip 3sts(solid section) and dc3 into the next ch-space Rep 5x (6x total)
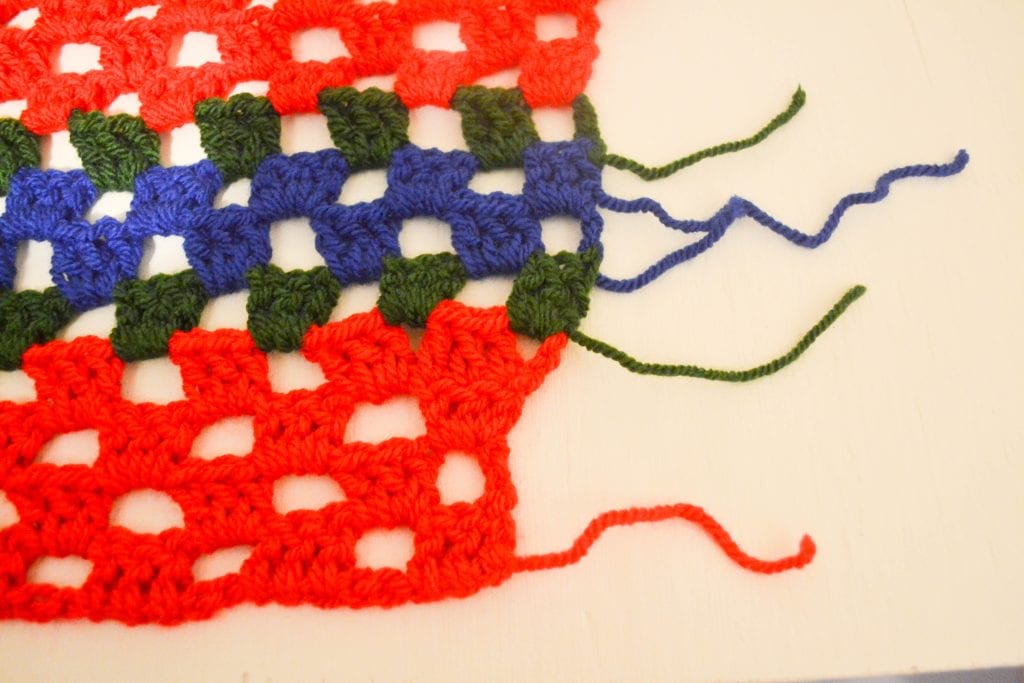
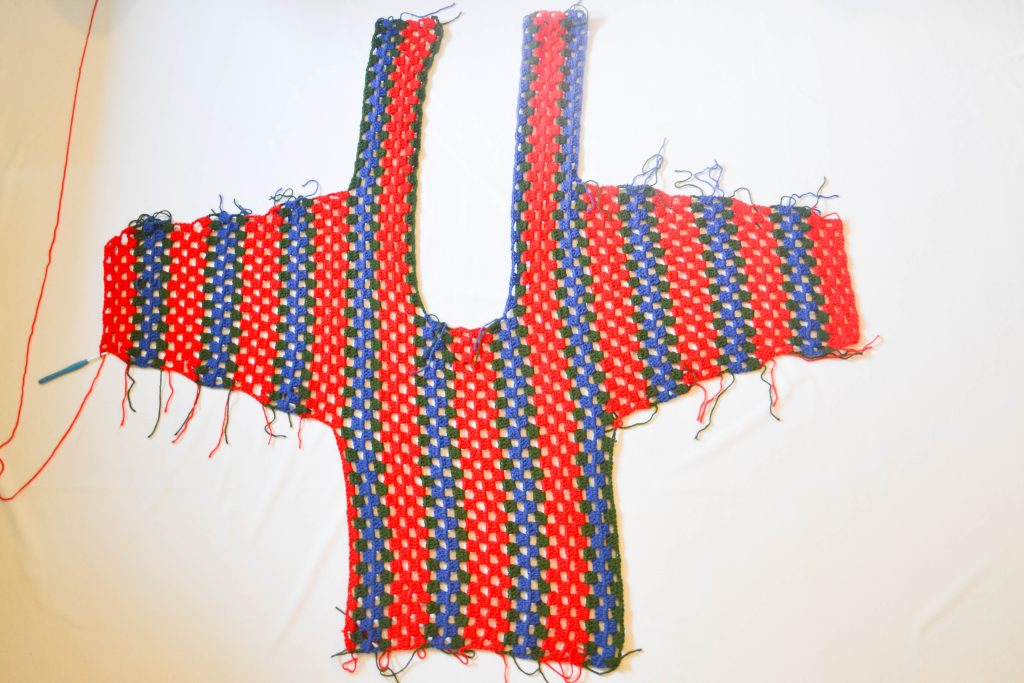
Row 4: Ch2 and turn. Dc in the next 2 dc in the solid section from your previous row. ch2, dc3 into the first ch-space (This increases the side of the sleeve by one solid section and one ch-space). ch2, skip 3sts(solid section) and dc3 into the next ch-space Rep 4x (5x total). Ch2, dc 3 into the last 3sts of the row. Ch2 and finish with one more dc in the end of the row (This
increases the other side of the sleeve).
You can see one of these increase rows in the picture below:
(Switch to color B)
Row 5: ch2 and turn. Dc2 into ch-space. ch2, skip 3sts(solid section) and dc3 into the next ch- space Rep 7x (8x total). (Switch to color C)
Row 6: ch4 and turn. Skip the first solid block of dc and dc3 in to the first ch-space. ch2, skip 3sts(solid section) and dc3 into the next ch-space Rep 7x (8x total). Ch2, skip last solid block and dc into the end of the row.
Row 7: repeat row 5 (Switch back to color B)
Row 8: Repeat row 6
Done with one color repeat!
Continue on to do two more color patterns (8 rows each), each time increasing at the beginning and end of the fourth row. All of the directions will stay the same, except that your row 1 does not begin with skipping stitches, and the number of repeats in the granny square pattern will increase.
Ch2 and turn. Dc2 into ch-space. ch2, skip 3sts, dc3 into the next ch-space Repeat across. For shorter arms and/or petite sizes, skip straight to the body section.
Keep in mind that the sleeve cuffs will be added later and will add some length to your sleeves. For longer arms, add 4 more rows of the granny square pattern, without doing another increase.
By now, the color repeat should feel pretty familiar, so just keep following it with your desired colors as you continue the cardigan.
Starting Cardigan Body – First Front + Back Section
Starting from the end of your last sleeve row:
Ch 51
Turn, skip 2ch and dc2. ch2, skip 2 sts and dc3 Rep across your chain and across the top of your sleeve. (This gets the back section started)
Ch 54
Turn, skip 6ch and dc3(this starts your new section with a ch-space.) ch2, skip 2 sts and dc3
Repeat across the entire width you have created. (This gets the front section of the sweater started).
Continue in the granny square stitch using your color pattern for 10 more rows. This will give you a front section that is 11 rows wide. When finished with this section, you should be at the bottom of the sweater back (where your work is one row wider).
Back Only Section
For the next row, work 80 stitches up the row, and then stop.
This row should begin with an open section and end with a solid section. It should leave you almost exactly in the middle of the sweater, above the middle of the sleeve.
Do 5 more rows with this width to add the middle portion of the cardigan back.
Second Front Back Section
On the next row, get to the end of the row (at the neck of the sweater) and chain 86 to create the second front section. Turn, skip 6ch and dc3 (this starts your new section with a ch-space. *ch2, skip 2 sts and dc3 * Repeat across the entire width you have created. (This gets the second front section of the sweater started).
Again, continue in the granny square stitch using your color pattern for 10 more rows.
This will give you a front section that is 11 rows wide. When finished with this section, you should be at the bottom of the sweater back (where your work is one row wider).
Second Sleeve
On the next row, stop after 115 sts.
Your row should be starting and ending with a solid section in the granny square pattern. This gives you one more row on the back of the sweater but discontinues the front section. Turn.
Now, work your next row until it is 62 sts wide. This row should start and end with an empty space.
At this point, you have stopped working rows on the back of the sweater as well, and only have the width of the sleeve left to work rows with. To be on the safe side, make sure that the second sleeve is lined up correctly with your first sleeve before you go any farther. Now you will work some more rows in this width, continuing with your granny square pattern.
If you kept your first sleeve shorter, work 3 more rows now. If you added four more rows in your first sleeve to make it longer, work 7 more rows now.
On the next row, we decrease by 2 sections (one solid section and one ch-space) at the beginning of the row as well as the end of the row.
This shapes our second sleeve down just like we increased our first sleeve by 2 sections at a time:
Decrease Row: Ch4 and turn. Skip the first 8sts(two solid sections and one ch-space) and dc3 in the next ch-space). ch2, skip 2 sts and dc3 rep 8x more (9x total). Ch2, skip the remaining 8sts and dc into the end of the row.
Work the next row at this decreased width, starting and ending with a solid section of 3dc into the ch-space you used to decrease. Then, work 6 more rows (for 7 total rows after your decrease).
Do another decrease row, followed again by 7 normal granny rows. Finally, do one more decrease row, and follow it with 2 more normal rows to finish your second sleeve.
At this point, you can bind off or you can keep your yarn attached and use it for your seam on that
side of the sweater(see next section).
Note: If you go ahead and weave in the ends that you have so far, it may make seaming up the sweater easier.
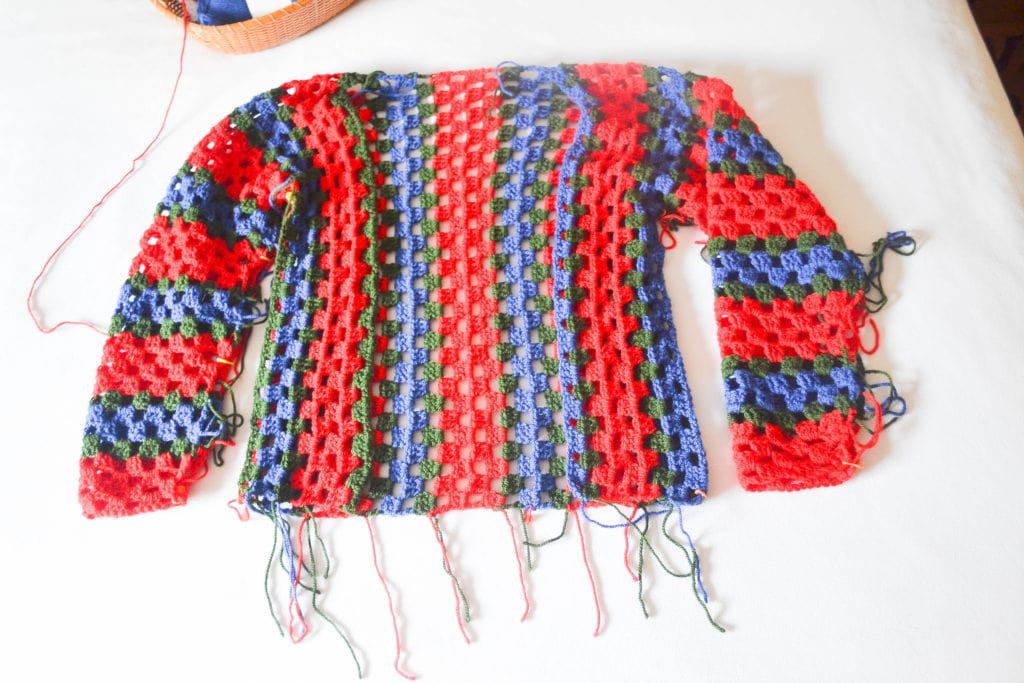
The picture below shows the completed sweater body before seaming:
Seaming Up Your Sweater
Fold your sweater in half along the middle of the sleeves. Line up the bottom edges of your sleeves, your sweater sides, and the bottoms of the front sections with the bottom of the back section.
On each side of your sweater, make one large seam from the end of your sleeve all the way to the bottom of your sweater. Go up the sleeve to the underarm, and then down the side of the sweater to the bottom, where you can bind off.
You can use either ss or sc stitches to work your seams, but sc may be easier for working around your open granny spaces. Each seam uses about 10 yards.
Body Ribbing
Starting from the bottom of one side seam, begin the ribbing by starting around the bottom of the back, and going all the way around both sides of the sweater and around the neck area until back where the border got started.
Row 1: DC a border, starting with a ch2. Some of the border is working along the side of the granny pattern, so put two dc stitches in each section(whether it is a solid square or an open square). Where your border is actually working in the same direction as the body pattern, simply put one dc in the top of every stitch (or bottom, depending on the section).
At the very corner stitch of the bottom front, add 3dc. At the two neck corners, dc3tog to gently decrease the corner inward. SS the beginning and the end of the border.
Row 2: ch2 to start the row. FPdc, BPdc repeat this all around your sweater opening whenever you are not working a corner or a buttonhole. At the bottom front corners, DC3 in the very corner stitch again. This should be the middle stitch from your dc3 in row 1.
At the neck corners, you can dc3tog again, or simply continue your ribbing pattern around if it seems like the ribbing is shaping
the neck area enough.
When working the right side of the sweater front in row 2, evenly space 5 buttonholes as follows:
After your dc3 in front right corner, FPdc, BPdc twice. (Ch2, Skip 2 sts. FPdc, BPdc 4x) rep the entire section in parentheses 3x more, and then Ch2, Skip 2 sts one last time to make your top buttonhole before continuing your FPdc, BPdc pattern/repeat.
Row 3: Repeat row two, except in your buttonholes dc2. Make sure to line up your FPdc and BPdc stitches line up to keep your 1×1 ribbing pattern going. At the end of this row, ss to close and bind off.
You may do more rows of ribbing if you want a wider border and/or a slightly larger sweater.
Sleeve Cuffs
To start off each of your cuffs, attach your yarn and ch2 from the sleeve seam.
Row 1: dc into every dc stitch of your granny pattern, and dc one into each ch-space. ss to close.
Rows 2-5: ch2. FPdc, BPdc rep around your whole cuff, and adjust your stitch count slightly if you need to make the pattern seamless. ss to close.
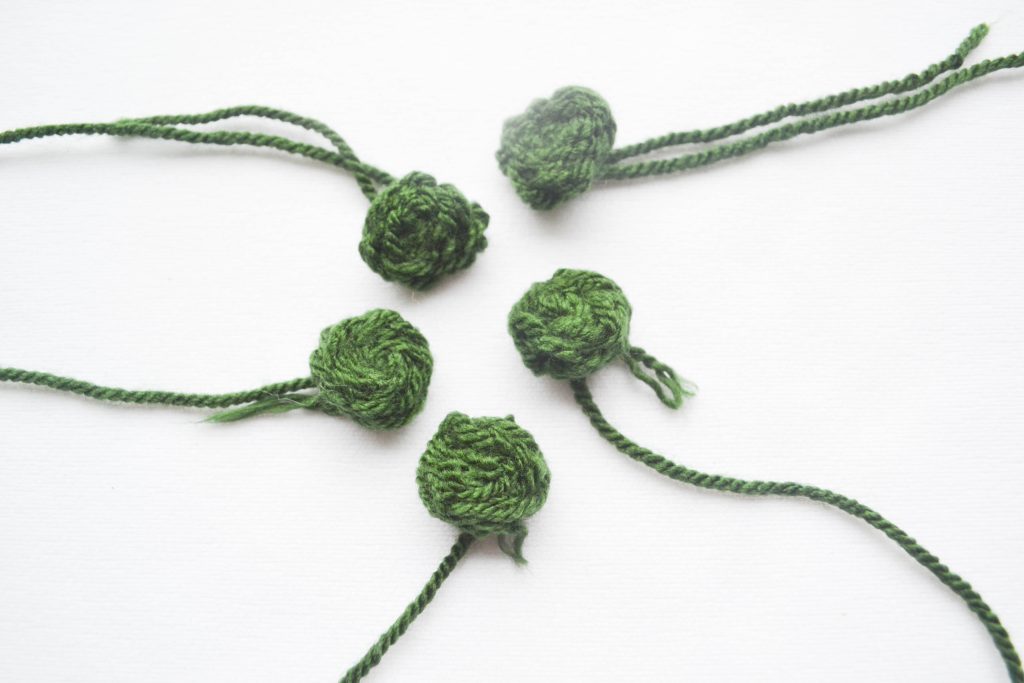
Buttons (Make 5)
If you are making your own buttons to add to your sweater, here’s how:
Leaving a tail about 6”, ch20. Ss back across your ch stitches, and bind off leaving another tail about 6”. Starting with the end with the yarn tails, roll up the button little by little.
Use a tapestry needle to securely stitch through your button as you go, using one of your yarn tails.
In the meantime, your other yarn tail hangs from the button center and can be used for attaching. Each button uses about 2 yards.
Finishing
To finish up your sweater, attach your buttons opposite of the buttonholes you created and make sure they line up.
Weave in any remaining ends, and block if desired.
Keep the Crafting Delightful!
Amelia
The Granny Gifts cardigan is a one-piece crochet sweater pattern in five sizes. It uses a granny stitch variation with minimal shaping. The result: an easygoing, cozy layer that is quick to work up and fantastic for gifting or for wearing yourself!
You might also like:


Pingback: The 2020 Crochet (Christmas) Spree ~ Amelia Makes
Pingback: 1 Hour Messy Bun Hat Crochet Pattern ~ Amelia Makes
Pingback: Star Stitch Stocking- Free Crochet Patten ~ Amelia Makes