Learning how to crochet a granny square will give you such an appreciation for the simplicity and beauty of this classic design.
The granny square may not have the most exciting name, but it’s an absolutely brilliant concept. This incredibly classic crochet idea uses chain stitches and another basic stitch (often double crochet) to create a checkerboard pattern of alternating solid and open spaces.
NOTE: I also posted a step-by-step video tutorial version on how to start a granny square, which you can find below!

The pattern is worked from the center outwards, getting larger and larger each time. And in this post, I’ll be showing you step-by-step photo tutorial of the written pattern directions for crocheting a granny square.
If you’re a beginner, this is the perfect post for you, as you’ll be able to start crocheting this pattern right away and with ease!
What’s also exciting about learning the granny square, you’ll then automatically know how to crochet the granny stitch which is basically worked in a straight line as opposed to in rounds. If you’re interested in this technique, be sure to check out our popular Granny Stitch Cardigan pattern that uses this beautiful design!
Often associated with vintage and retro afghans, granny squares of various sizes can be used to make anything from clothing, to bags, to breathable blankets for anyone.
Once you learn this beginner-friendly design, there are literally endless ideas out there for other gorgeous crochet squares that build off of these skills.
There is a lot of repetition in crocheting a granny square. So, to make things a little easier I will be using a set of asterisks (**) to show you what things are getting repeated.
This is also something that is used to show repeats in many crochet and knitting patterns, so by following along with this now you are already learning to read other patterns.
How to Crochet a Granny Square Video Tutorial
To better illustrate all of these directions, I’ve created a video for you that shows me making a two-layer square (and part of the third layer) in real time.
Key Points to Note About The Granny Square
Another thing that I want to clarify is the terminology I use to explain how the square increases in size.
Whenever crochet is done from the center outward instead of back and forth (rows), we call each the layers rounds. With each round, we go around our work once and add a layer of stitches.
This can sound a bit contradictory though, when we are talking about a square. It just seems strange to refer to making “rounds” on something with corners.
So, to break things up a little bit and hopefully cut down on the confusion, I will be using a few words interchangeably. Since round is technically the correct term, you’ll see that in here fairly often. But, I also refer to the “layers” and “rows” of crochet. Just know that in this case, they are all referring to the same thing.

Crochet Granny Square Free Patterns
Once you get familiar and confident with crocheting a Granny Square, you can start to put your talent to practice!
Below are three beautiful patterns of mine that use the Granny Square technique:
- The Granny Square summer tote bag
- Granny Square winter blanket
- Granny Stitch Cardigan – the popular crochet pattern I spoke about earlier. This is an easy project to make, great for beginners, and is done in one piece.
Skill Level
The skill level for crocheting a Granny Square is considered to be intermediate level.
While most of the square is at the beginner level, round 4 uses a stitch combination called the box bead stitch (which you can learn with this tutorial).
Materials Needed
To get started making a granny square, you will need:
- A crochet hook: Although your hook selection will depend on your yarn, or vice versa, it is best to make sure that you stay in the “medium” sizes. An extremely small or extremely large hook is rather difficult to learn with.
- Yarn: I recommend a smooth medium weight yarn. An ideal number weight of about a four would be perfect.
- Scissors: To snip your yarn with
NOTE: Generally speaking, I think that if your choice of yarn pairs well with something between a G hook (4.5mm) and a K hook (6.5 mm), then you should be fine.
Important Notes on Your Yarn
When it comes to learning a new crochet technique or stitch, I think yarn choice is important. The right yarn can make learning crochet easier, while a less ideal choice will easily make the whole process harder than it has to be (and less enjoyable).
I highly recommend that beginners choose smooth yarns that are a medium weight. By smooth yarns, I mean yarns without a lot of fuzziness, or a strong “halo” as it’s sometimes called. Other textures like sashay yarn or yarn with bobbles and beads are also better left until later.
By medium weight yarn, I simply mean something that’s not thread-thin or super chunky. Generally, yarn that is considered “worsted” or “aran” and has a number weight of about a 4 (usually found on the labels of commercially produced yarn) is going to be a great choice for beginners.
You can browse different yarns in this thickness here.
Once you get confident with a few stitches and techniques or get the hang of a new concept, yarn with more of those extra interesting elements can easily be introduced.
Stitches You Need to Know
As I mentioned above, granny squares are often made using double crochet stitches. This is also what I’m using in this tutorial.
Altogether, to make this granny square you will need to know or learn the slip knot and chain stitch, the double crochet stitch, and the slip stitch.
Abbreviation Used
- ch: chain (yarn over, pull loop through)
- dc: double crochet
- esc: extended single crochet(insert hook, yarn over, draw up a loop, yarn over, and draw through the first loop. Yarn over and draw through two loops).
- mc: magic circle or magic ring
- SS: slip stitch(insert hook, yarn over, draw up a loop through the work and through the loop on your hook)
- Slcl: slanting cluster stitch(yo, bring hook around and under the dc, working between the dc and the previous stitch, yo again and bring the hook back to the front of the work. Repeat 2x.) yo again and draw that loop through 6 loops on your hook. yo once more and draw the yarn through the last remaining 2 loops to complete the slanting cluster)
- ST/STS: stitch/stitches
How to Crochet a Granny Square: Photo Step-by-Step Guide
Getting Started (Two ways)
There are two ways that I know of to start a granny square. Both are equally good, but they do look different.
Feel free to try both at different times and see what you like best. Sometimes, they are just preferred for different types of project.
Option One: Start With a Chain
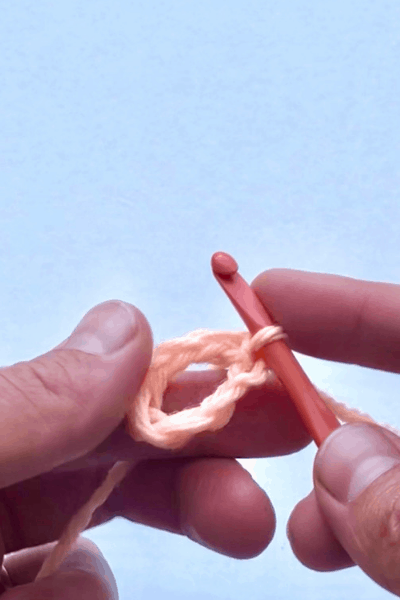
The first way to start a granny square is with a ring of chain stitches. This involves chaining between 4-10 stitches (I recommend you start with trying 8) and slip stitching the two ends together to make a circle, or some may call it a ring.
In the completed granny square, this ring of chain stitches becomes the circular hole in the very center.
The exact number of stitches you chain varies from pattern to pattern, and different people have different preferences. Since you will actually be working stitches into the center of this circle in row one, anything less than four stitches is going to be nearly impossible to work with.
Likewise, more than ten stitches would probably make a center that is too large for the first row of stitches to go around it as I show you how to crochet it in just a little bit. Obviously, the more stitches you chain here, the larger your center will be.
If you are starting out as an absolute beginner and don’t yet know how to crochet a chain stitch, you can learn those by following my chain stitch tutorial.
Option Two: Use a Magic Circle
The second option for starting a granny square is to use the magic circle/ring technique. Although slightly more challenging, the magic circle will result in a tight and solid center for your granny square.
Just know, if you choose to use this method, you will actually do the stitches of row/round one into your magic circle before it is done. Since those things sort of overlap, I would recommend you use first use my link above to practice the magic circle on it’s own. Then, once you are comfortable with that you can return and use the magic circle in conjunction with learning how to crochet a granny square.
In either case, once you have your beginning of choice in place, you can start with row one of the granny square.
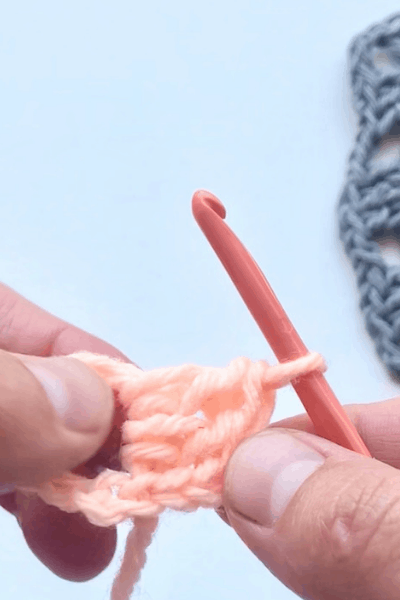
First Row of the Granny Square Pattern
As I said before, granny squares alternate between open spaces of three chain stitches and “solid” sections of three stitches. Although technically you could start with either one, I have always started by making a solid section, so that is how I’ll show you:
- start by chaining two (out of either your ring of chains or your mc)
- Now work two dc sts into your center circle. This finishes your first solid section (since the starting chain of two counts as a ST)
- *Now chain three sts (this is going to become your first corner)
- Work three more dc sts into your center* (another side done)
- Repeat those last two steps (everything inside that set of asterisks) two more times. When you are finished, you should have four solid sides done and three corners.
- At last, chain three more sts to create your last corner. SS into the top of your first two stitches in this row to complete the row.
Congratulations! You have successfully made a small, one-layer granny square. Even though the corners are still rather rounded, it should still look basically like a square.
I have always thought this point was cool because just a moment ago we only had a circle.
You can see the whole first row illustrated with a few pictures below:

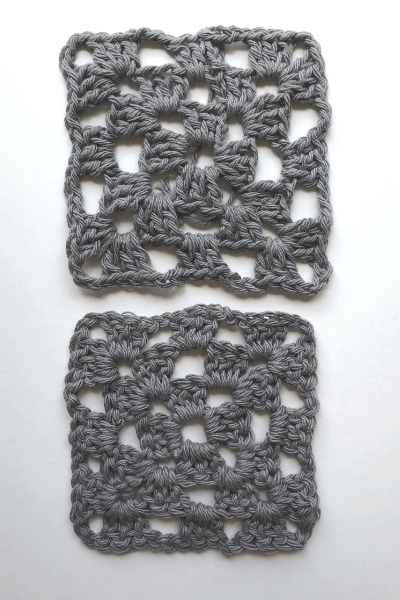
Now, if you watch my video, you’ll see that I demonstrate a granny square with one change. This is because I typically only chain two stitches in-between my solid sections, instead of the three stitches that is a little more standard.
Here you can see examples of both ways. The top square is a little tighter because it is done with chains of two stitches. The bottom square is done with chains of three, the way I’ve written the directions here.
To understand the pattern of how a granny square works and how it continues, it is best to do a few more rows. In these subsequent rows, the corners will become a little more defined and everything will become more clear.
Second Row of the Granny Square Pattern
Since we started the first layer of our granny square with a solid section, our second layer will start with an open one.
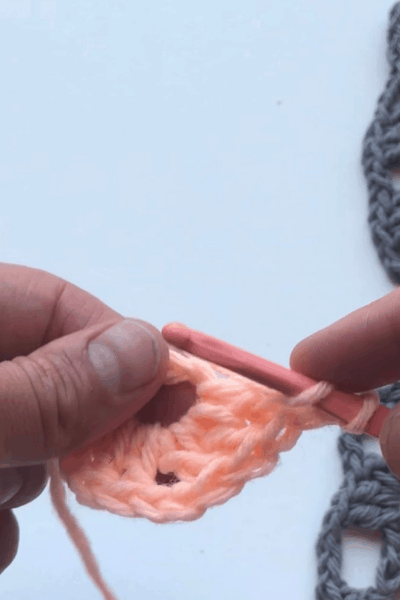
- To start this, chain 6 sts. These stitches will become the first open space as well as the very last stitch in your last solid section.
- Now put 3dc into the first open space/corner of your first row.
- Now chain 3 sts and put three more double crochet stitches into the same corner/open space. Yes, this is where things are a little different. You are putting two sets of dc stitches into the corner because that is how the square grows with each layer. The new chain of three sts in-between them becomes your new corner.
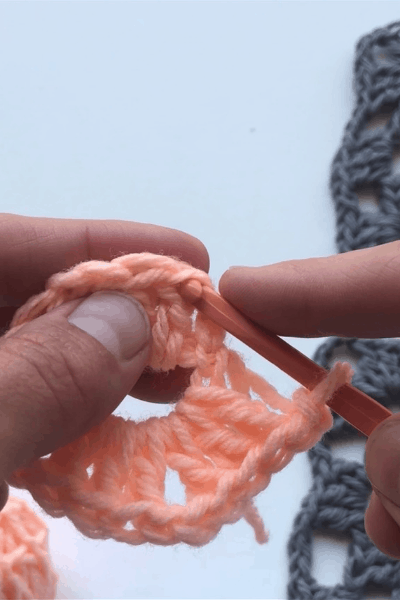
- *Okay, so now that you have that done, chain three for that side of your square and do that corner sequence again (3dc, 3ch, 3dc) into the second corner space. *
- Repeat that last step twice more to complete all four of your sides and all four of your corners. As I said before, your very last set of dc only needs two, because the first part of your starting chain for this round acts as the third dc sts.
- To finish this second layer, SS into the third chain after doing the other 2dc sts.
Third Row of the Granny Square Pattern
If you have kept going this far, you are probably starting to get the hang of this whole granny square pattern.
It repeats in threes and grows at the corners in every round.
For the third row and beyond, you will have places again where you only put in 3dc sts. Whenever you are on a side of the square and not yet at a corner, you will simply dc 3 sts and continue on your way.
Likewise, every space above a solid section in the previous row gets a simple chain of three stitches. Each layer larger will give you more and more of each to do.
But obviously, each layer is going to have the same amount of corners, so you will do that special sequence to increase at the corners four times, in every layer after that first one.
Final Encouragement
So now that you’ve tried making a granny square, what do you think? I hope you’ll continue and make some kind of project with this humble but beautiful technique.
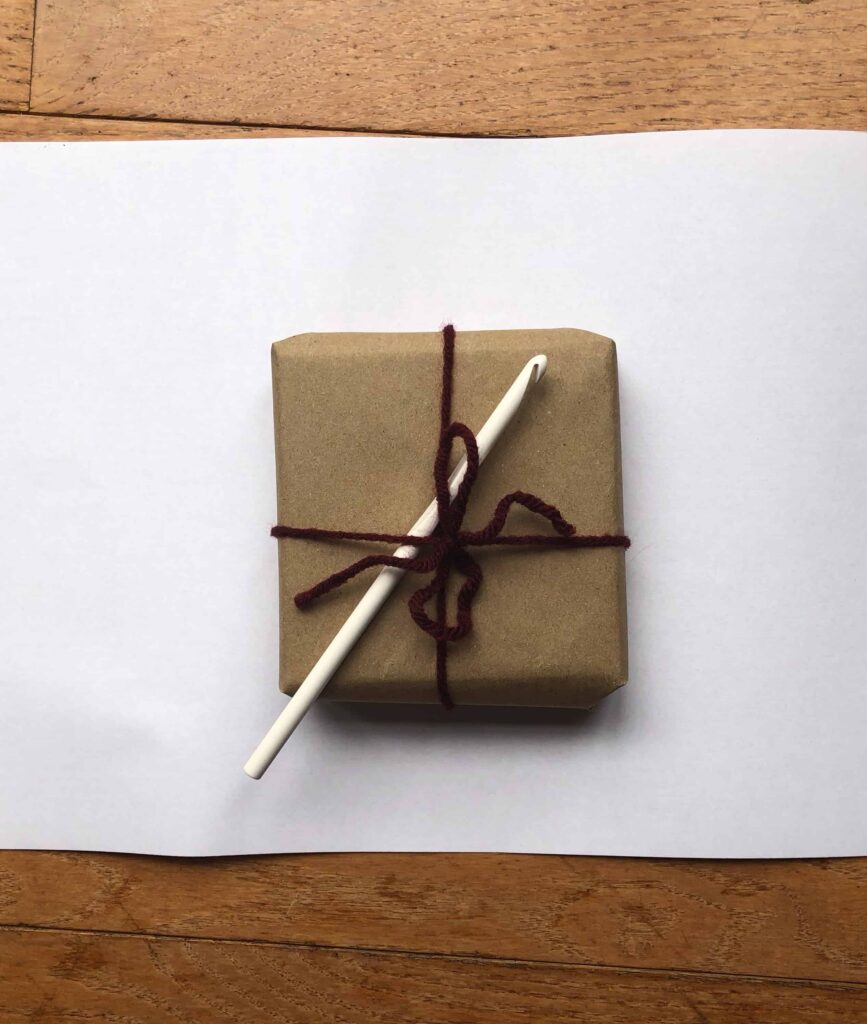
As a gift, here are three FREE patterns from me:
Keep the crafting delightful!
Amelia
What’s Next?
- Share on Facebook or Instagram: I always love seeing fellow crocheters make my patterns! Tag me when you’ve completed it @ameliamakesblog
- Pin the post: Save this post on your Pinterest board, and get back to it later.
Join my Facebook Group
Share your ideas and pictures on my Facebook Group! This is a small private group of crochet enthusiasts that would love to hear from you!
After learning how to crochet a granny square, you’ll be able to use them in all sorts of projects with literally endless potential!