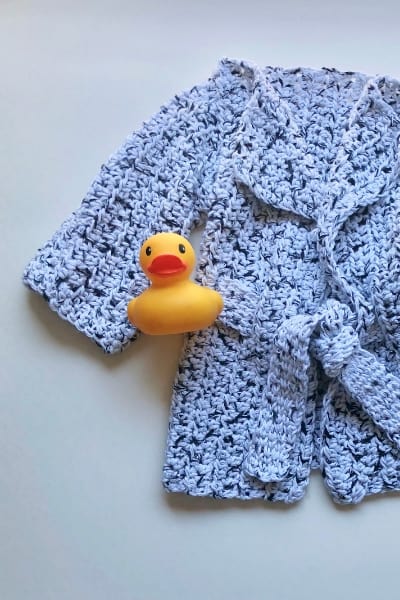
The Julia Crochet Baby Booties have a solid, warm construction with a cozy knit look and are perfect for crochet beginners!
Do you like the way that traditional baby knitwear looks, but prefer to stick with crocheting? Even if you know how to knit, sometimes it is more convenient to only crochet certain things.

The Julia crochet booties came out of my desire to make a very solid, warm pair of baby booties that would simply not have any holes for chilly air to pass through.
In this post, I’ll be showing you the pattern directions for a new born baby size – 0 to 6 months old. I’ve also included a video tutorial on how to crochet these baby booties!
If you want the pattern directions for all sizes, you can purchase the PDF pattern below!
Note: If you’re a beginner, you can start off by reading my ultimate guide to crochet hooks and an overview of the basic crochet stitches.
Note: This post contains affiliate links, meaning that if you make a purchase it may benefit me with a small commission at no extra cost to you. You can read all of my affiliate disclosures and other disclaimers on the disclaimers page.
They are an easy pattern and the construction of each shoe is done in one piece. You don’t need to worry about sewing together a top and bottom, or even working any seams at all. You can simply crochet each round until it looks just right.
Pro tip: IF you have the space and mental energy for this, it can be a great idea to crochet both baby booties at the same time.
No, I don’t mean some kind of crazy magic trick or crazy conjoined baby shoes. Instead, I mean you crochet one step of the first baby shoe until you’re satisfied with it, and then do the same for the other one.

Prefer the PDF Version for ALL sizes?
Grab the ad-free, printable PDF pattern.
You can view it on your computer, phone or tablet or download and print it at home.
Join My Crochet Maker’s Vault
If you’re interested to join my Crochet Maker’s Vault membership, you will get immediate access to ALL of Amelia Makes patterns and get exclusive access to video tutorials for a number of patterns, including the Julia Crochet Booties one!
About The Julia Crochet Booties
With its classic look, The Julia Booties are perfect for any occasion, from a baby shower gift to a newborn’s first pair of shoes. These booties are easy to make and can be customized to fit any baby up to approximately one year in age.
The best part? You can create an entire collection of booties in different colors and styles, knowing that each pair will be both adorable and practical.

Skill Level
This is considered to be an intermediate pattern.
Sometimes, it takes a bit of practice simply to create two baby booties that are the same size and look like a finished pair. In this pattern, the waistcoat stitch is also used, and this stitch may take a bit of practice if you’ve never done it before.
Gauge
The gauge for crocheting these baby booties is 8sts and 10 rows of ssBLO per 2” square. ssBLO simply stand for slip stitching in just the back loops of previous stitches.
Slip stitching is a technique that goes slower than other stitches, however the benefit of using this for your gauge testing is that you can actually just create the sole of this pattern (which comes first in the pattern directions) and make sure that it turns out the right length.
Only the largest size of the pattern may actually be wide enough to “officially” do a 2×2” swatch, but if your length turns out correct then you should be good to go!
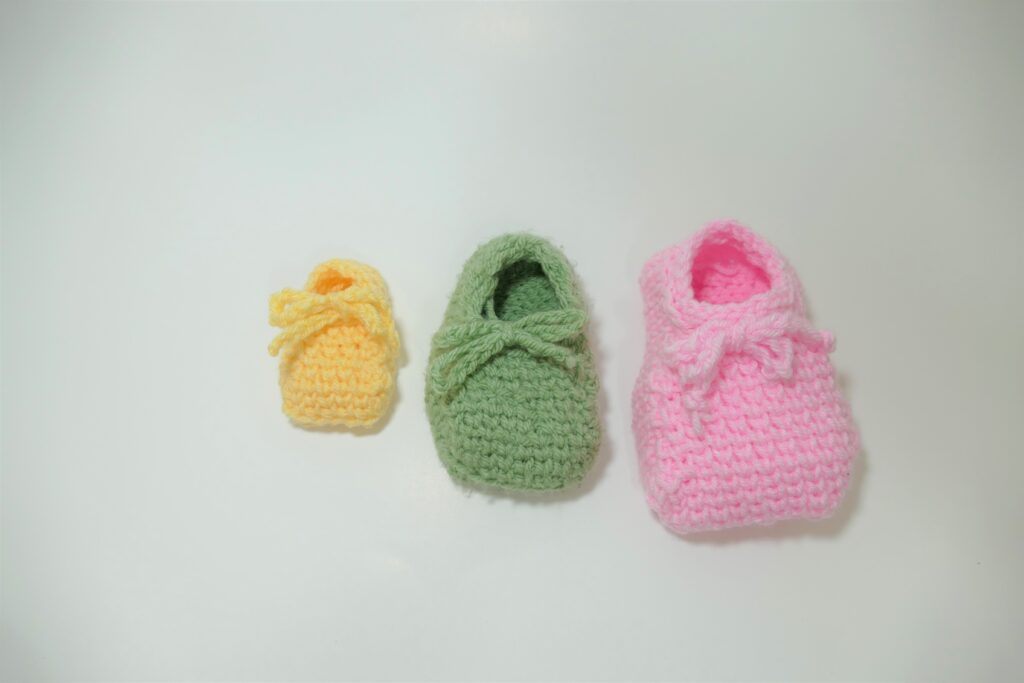
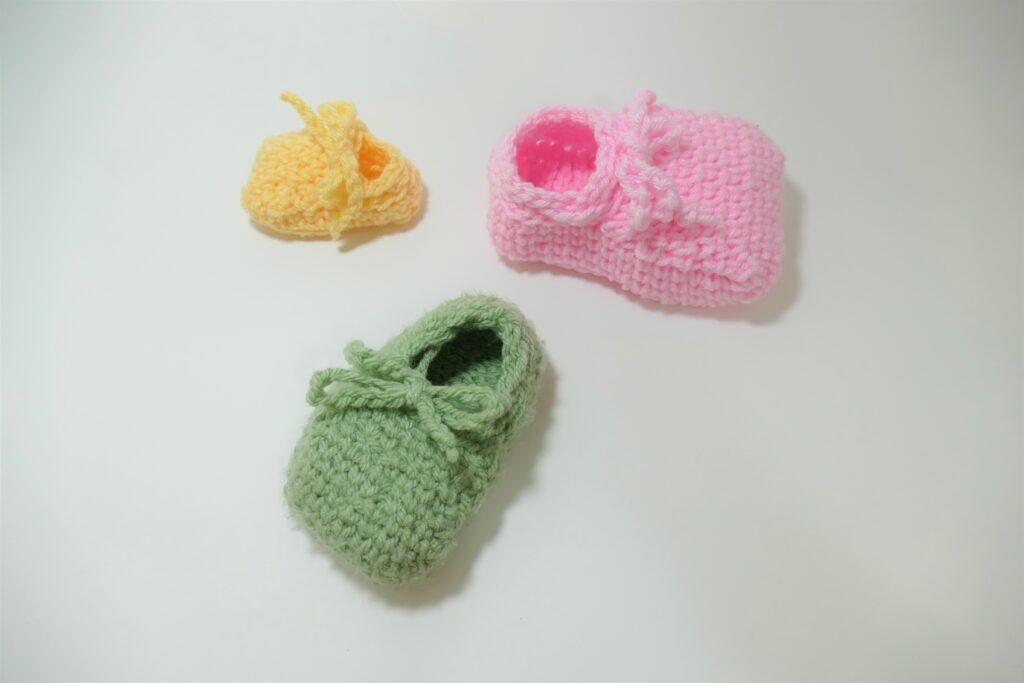
Sizing
The Julia Bootie pattern is written for three sizes. The smallest size is for the teensiest little baby feet. The sole measures 3” long, making it good for newborns or young babies that still have smaller feet.
The medium size has a 4” sole, and will fit most babies 6-12 months.
And finally, the largest of these booties are very roomy with a 5” sole and should give an older baby plenty of room to grow and could last into the walking ages.
Speaking of babies walking, please note that like other knit and crochet baby shoes, the Julia booties are NOT grippy on their own. These baby booties are ideal to crochet a gift for a little one who isn’t walking yet, but who needs some cute footwear for cozy toes.
Use your discretion about watching for signs that the little one in your life is getting more active and may need something more than these kinds of booties.
Materials Needed
One skein of yarn can make several pairs!
To make the Julia booties for yourself, you will need:
- Up to 38 yards of heavy worsted or aran weight yarn
- A H/5.00mm hook
- Scissors
- A tapestry needle (optional, for weaving in ends.)
For the baby booties pictured, I used the Simply Aran yarn from Paintbox, and the Brava yarn from WeCrochet.
Abbreviations Used
Here are all the abbreviations used in the Julia Baby Booties Pattern.
Everything is done in US terms.
- ch: chain stitch (yarn over, draw a loop through)
- sc: single crochet (insert hook and draw up a loop, yarn over, draw the yarn through both loops)
- ss: slip stitch(insert hook and draw a loop through work and the loop on the hook)
- ssBLO: slip stitch in the back loop only (insert hook in the back loop and draw a loop through work and the loop on the hook)
- ss2BLO: slip stitch twice in the back loop only in the same stitch (increase)
- ss2togBlO: slip stitch two togethe (start a ss, then ss in the next stitch and finish both ss together (decrease)
- st/sts: Stitch/stitches
Variation Ideas
While the Julia Booties end at the ankle, it would be extremely easy to add a cuff on them. Cuffs would simply be a matter of adding more rounds-perhaps in single crochet or more waistcoat stitch.
These would also be very cute with poms or tassels added at the ends of the tie! There are truly SO many ways to customize every pattern, and this one is no exception.
How to Crochet Baby Booties Video Tutorial
Directions for the Julia Crochet Baby Booties
Crocheting the sole of the Baby Bootie
Ch5
Row 1: skip a ch and ss 4. Ch1 and turn. You should have 4 sts
For the next 2 rows: ssBLO in all stitches. Ch1 and turn. You should have 4 sts
First increasing row: ssBLO, ss2BLO in the same st x2, ssBLO. Ch1 and turn. You should have 6 sts
For the next 3 rows: ssBLO in all stitches. Ch1 and turn. You should have 6 sts
Second increasing row: ssBLO, ss2BLO in the same st, ss2BLO, ss2BLO in the same st, ssBLO. Ch1 and turn. You should have 8 sts
For the next 7 rows: ssBLO in all stitches. Ch1 and turn. You should have 8 sts
Decreasing row: ssBLO, ss2togBlO, ss2BLO, ss2togBlO, ssBLO. Ch1 and turn.You should have 6 sts
For the last 2 rows: ssBLO in all stitches. Ch1 and turn.
Altogether, you should have worked 18 rows of ss to create your sole.
Ch1 and begin to sc around the edge of your sole. 24 sts total need to go into the border around what you’ve made so far. Start down the long edge and sc into each “ditch”. Put two sc into each corner.
At the short/heel end, place 4 sc in-between the corner. When you get all the way to the toe end, work the first corner, place 5 sc in-between the corners, and then finish with a sc in the corner and ss with your first sc.
Turn the work over so that the part that was just facing you becomes the bottom of the sole. You should work the next section(the sides) from the outside of the bootie.
Crocheting the Baby Bootie sides
Round 1: scBLO in every st and ss to close. You should have 24 (38,46) sts total.
Round 2: without turning, waistcoat st in every st and ss to close. You may count the ss as a stitch if that works out better. You should end up just a bit back from a front corner.
Crocheting the Baby Bootie Top
Row 1: skip up to 2sts (to center the next sts at the front of the bootie) and waistcoat stitch 5(8,10) working from the inside of the bootie).
Ss into the next st of the sides, and then ss again in the st beyond that. Turn your work.
Row 2: skip the 2ss and waistcoat stitch 5(8,10)(working from the outside of the bootie). Ss into the next st of the sides, and then ss again in the st beyond that. Turn your work.
For the next 4 rows: repeat rows 1-2, always skipping the last 2 sts/ss from the previous row.
Cuff
Round 1: from the outside of the bootie, ssBLO in every st around the bootie opening.
Round 2: *ssBLO, ch1 and skip a st* repeat around the opening so that you have several discrete holes for the tie.
Ss to close, and bind off. (NOTE: for the largest size you may want to repeat round 1 a few times before binding off)
Making the Tie
Chain the length that you would like for your tie, and bind off. Finish the bootie by trimming and weaving in all of your ends.
Finally, weave your tie through the cuff holes and tie a bow at the front.
Final Thoughts
With its easy-to-follow instructions and stunning results, the Julia Booties are sure to become one of your go-to projects when looking for something quick yet beautiful to give as a gift! Not only do these booties look like something made with knitting needles – they’re also incredibly comfortable for baby’s feet thanks to their cozy construction. Whether you’re looking for something special for a little one who isn’t walking yet or just wanting an impressive but fast project – give these beautiful Julia Booties a try!
Now if you like access to free patterns, hearing about new design, and other crochet-related things, be sure to sign up below. As a bonus for getting on the list, I’ll send you 3 of my most popular patterns FREE.
keep the crochet delightful!
Amelia
You might also like:
What’s Next?
- Share on Facebook or Instagram: I always love seeing fellow crocheters make my patterns! Tag me when you’ve completed it @ameliamakesblog
- Pin the post: Save this post on your Pinterest board, and get back to it later.
Join my Facebook Group
Share your ideas and pictures on my Facebook Group! This is a small private group of crochet enthusiasts that would love to hear from you!
Don’t forget to pin this for later!