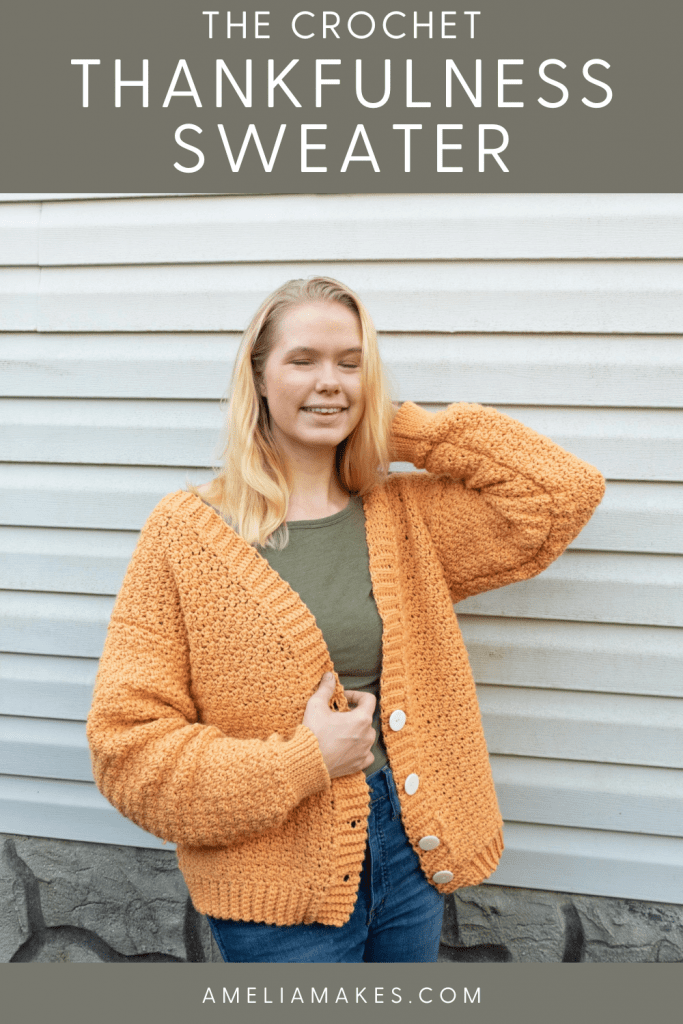
The Thankfulness Cardigan is a crochet sweater that is elegant, rich in texture and perfect for the winter season!
Ready for your new favorite cardigan?
This oversized shape cardigan is becoming the new crochet trend for the younger generation!
It’s looser look to it give it that cool vibe that the younger ones love, but doesn’t take away from the classy and elegant touch to it. It’s the perfect combination!
If you keep scrolling down, you’ll find the full video tutorial of how I made it.

The result is a beautiful thick textured, classic v-neck sweater that you can layer and cozy up in for years to come. In order to make this cardigan thick and textured, I used the griddle stitch which you can learn the step-by-step tutorial here.
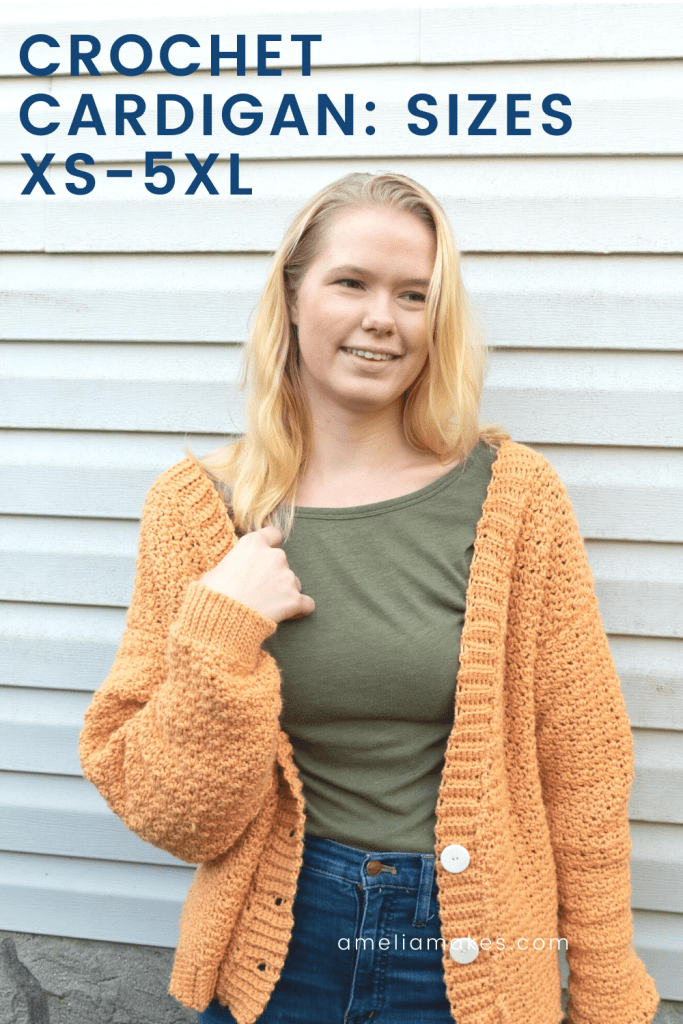
This crochet sweater is a size-inclusive pattern (XS to 5XL). You can find more specific details about it below.
Prefer the PDF Version for All Sizes?
Grab the ad-free, printable PDF pattern for sizes XS to 5XL.
Or become a member and get access to ALL my PDF crochet patterns!
About This Project
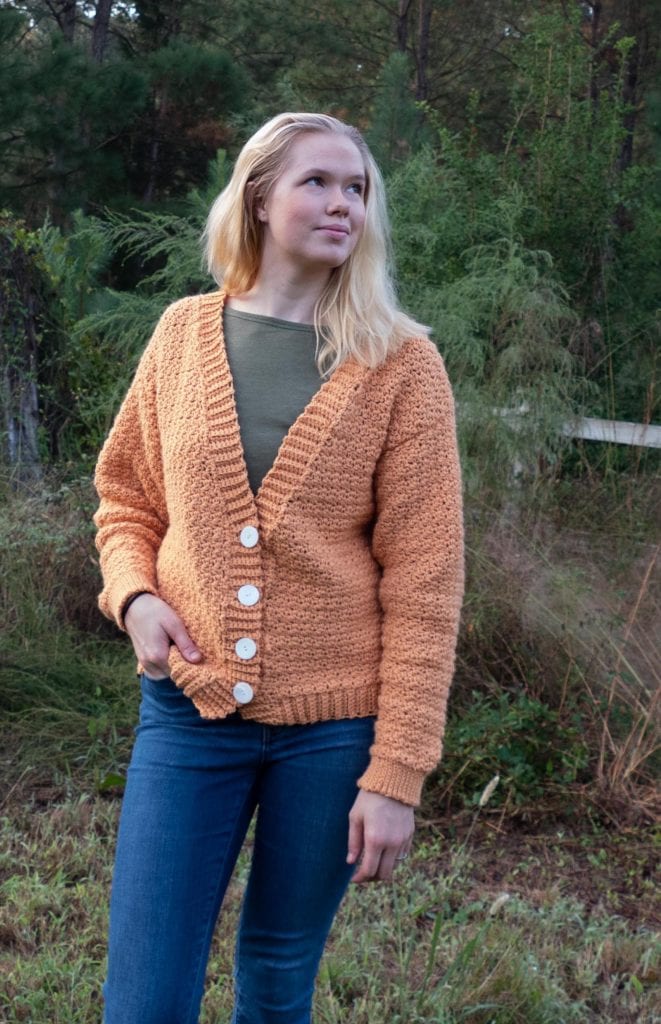
The Thankfulness sweater is meant to be useful for just about anyone who enjoys a good “old man” sweater. The oversized shape and deeper “V” neckline give off the sort of feeling that smells like newspapers and peppermints.
But, the shape itself is really quite versatile and can work with a lot of different styles. Sizes are included to fit the vast majority of adults.
NOTE: In this post, I will be adding the extra small size free pattern for the Thankfulness Sweater. If you’d like to have the pattern for all sizes, be sure to purchase the PDF pattern above!
Gauge
The gauge for this project is 12 stitches and 11 rows of Griddle Stitch for a 4×4” swatch. Now, if that last sentence sounds intimidating because you haven’t quite mastered gauge or aren’t sure how it works, starting with this post should help.
Basically, the idea of making a gauge swatch is to create a “test piece” for your project before you dive in to start the whole thing. If you can get your test piece to turn out the correct size, then it follows that your whole project should be spot-on in how it is sized as well.
Sizing
Speaking of sizing, I’m happy to let you know that the Thankfulness Sweater is very size inclusive. The pattern download involves instructions for women’s adult sizes XS-5XL. Shoulder measurements are provided to help you choose your size.
In addition, since this could be considered a unisex sweater, having the shoulder measurements can help you choose a size if crocheting it for a man.
Something to note is that this sweater has LOTS of positive ease. As an oversized cardigan, crocheting this design as written for your sizing and measurements will most likely leave you with plenty of room.
If you would perhaps like a less roomy finished sweater, especially for a woman, consider sizing down.
Materials Needed
To create the Thankfulness Sweater, you’ll need the following:
- 1,400-2,128 yards of worsted weight yarn (The PDF includes a size-by-size breakdown of estimated yardage)
- H/5mm hook
- Larger hook size such as a k/6mm
- 3-8 buttons 1″ in diameter
- Sewing needle and thread
- Scissors
- Tapestry needle (for weaving in ends)
Skill Level
As this is a crochet cardigan, this project is definitely for intermediate-level crocheters.
There is shaping used in all of the main pieces. The Griddle Stitch is used throughout the pattern, which uses double crochet and single crochet stitches. There are also
Variation Ideas
If you’d like to put your own “spin” on this sweater, there are definitely plenty of ways to do that. In fact, choosing the number of buttons for your sweater yourself is written right there in to the pattern. The original sweater that you see pictured was made with four buttons (although I originally planned for three).
You can really use whatever number you wish and space them accordingly. You can even place the top button a bit higher if you wish.
This sweater is made in one solid color, but it would be easy enough to create it in stripes if you wanted to. Finally, one other easy way to change up this sweater design would be to crochet a cropped or extra-long version of it.
The Thankfulness Sweater is designed to hit right at the hip, but since all the pieces are created from the top down, you could easily change the length based on where you’d like the finished sweater to hang.
Just keep in mind that (1) the body ribbing will add a few more inches of length to whatever you crochet on the panels, and (2) that changing the length on your crochet cardigan will affect the total amount of yarn needed.
Abbreviation Used
- ch: chain stitch(yarn over, draw a loop through)
- sc: single crochet(insert hook, draw up a loop, yarn over, draw through 2 loops.)
- dc: double crochet (yarn over, insert hook, yarn over and draw through the stitch, yarn over, draw a loop through 2 loops, yarn over, draw a loop through 2 remaining loops)
- dc2tog: double crochet two together(a decreasing stitch)(yarn over, Insert hook, yarn over hook and draw through stitch, yarn over and draw the yarn through two loops, yarn over, insert hook into next stitch, yarn over hook and draw through stitch, yarn over hook and draw through 2 loops, yarn over, draw through remaining 3 loops.)
- ss-slip stitch(insert hook and draw a loop through work and the loop on the hook)
- ssBLO-slip stitch back loop only(insert hoop in the back loop of a stitch, draw a loop through work and the loop on the hook)
- st/sts: Stitch/stitches
How to Crochet a Cardigan Video Tutorial
Pattern Direction for Size Extra Small
Front Panels – Make 2
Ch17
Row 1: skip 2 chains and dc in the third ch from the hook. sc,dc repeat for the rest of the row. You should have 15 sts. Ch2 and turn.
Row 2: sc,dc repeat until the last two sts in this row (finishing the repeat on a sc).
Dc and then sc into the same stitch(increasing), and then dc into the very last stitch. You should have 16 Ch2 and turn.
Row 3: sc,dc repeat across the row, keeping the same stitch count. Ch2 and turn.
Row 4: sc,dc repeat until the last two sts in this row (finishing the repeat on a
dc). Sc and then dcinto the same stitch(increasing), and then sc into the very last stitch. You should have 17 Ch2 and turn.
Row 5: dc, sc repeat across the row(finishing on a sc and keeping the same stitch count)Ch2 and turn.
For the next 16 rows: repeat rows 2-5. You should end up with 25 sts
Front Panel – Continued
Last increasing row: sc,dc repeat across the row to the last st. Sc in the last st, and then add one more dc, working it into the top of the turning ch. You should end up with 26 sts
Ch2 and turn
For the next 22 rows: sc,dc repeat across the row. Ch2 and turn at the end of every row (except for the last row). Bind off when finished.
All in all, you should have a total of 44 total rows.
Back Panel
Shoulder pieces (make 2) *important: don’t bind off after finishing your second piece!
Ch17
Row 1: skip 2 chains and dc in the third ch from the hook. *sc,dc* repeat for the rest of the row. You should have 15 sts. Ch2 and turn.
Row 2: sc,dc repeat until the last two sts in this row (finishing the repeat on a sc). Dc and then sc into the same stitch(increasing), and then dc into the very last stitch. You should have 16 sts. Ch2 and turn.
Row 3: sc,dc repeat across the row, keeping the same stitch count. Ch2 and turn.
Row 4: sc,dc repeat until the last three sts in this row (finishing the repeat on a sc). Dc and then sc into the same stitch. Repeat once, and then dc into the very last stitch. You should have 18 sts .Ch2 and turn.
Row 5: sc Dc and then sc into the same stitch. Repeat once. dc,sc repeat across the row to the last st. You should have 20 sts Dc.
ch2 and turn
Rows 6-7: repeat rows 4-5. You should finish with 24 sts
Sleeves
Ch52
Row 1: skip 2 chains and dc in the third ch from the hook. sc,dc repeat until the last stitch, sc. Ch2 and turn. You should be left with 50 sts
For the next 10 sts: dc, sc repeat across the row. Ch2 and turn. You should still have [50 sts]
Note: the rest of these directions cover 6 rows, which get worked six times altogether(5 repeats)
First Decrease Row: dc,sc. dc2tog(decrease),dc,sc repeat across until the last 4sts. dc2tog, dc,sc. You should have [48 sts] Next two rows: sc, dc repeat across the row. Ch2 and turn. Second decrease row: sc,dc. dc2tog(decrease),sc,dc repeat across until the last 4sts. dc2tog, sc,dc. ch2 and turn. You should have [46 sts] Next two rows: dc, sc repeat across the row. Ch2 and turn.
Repeat from the first decrease row to the end of the sleeve directions 5x, for a total of [47 sts]rows in your sleeve. When finished, you should have [26 sts], as each repeat decreases your stitch count by 4 stitches.
Back Panel – Continued
Connecting the shoulder pieces:
Starting from the end of row 7 in your second shoulder piece, begin row 8
Row 8: sc,dc repeat across the row. Ch13, and, placing the first shoulder piece so that the two are symmetrical (the increasing sides face towards each other) work into the stitches of row 7. dc, sc and repeat across the row. You should now have a total of 61 sts. Ch2and turn.
Row 9: dc, sc repeat across the row to the last st. Sc. Ch1 and turn.
Row 10: sc,dc repeat across the row to the last st. Dc. Ch1 and turn.
For the remaining 34 rows: repeat rows 9-10.
All in all, you should have a total of 44 total rows.
Seaming
This sweater design gets seamed using slip stitches. To prevent these from getting too tight, I recommend switching to a larger hook (such as a K/6mm) for seaming.
*note: the right side and wrong side of your work is up to your discretion. If you’ve been keeping all your yarn ends on one side or have a preference, go with that. Start by seaming the shoulders. Lay the back panel flat, right side up. Lay the front panels on top with the right sides down. The shaping of the front pieces should be facing inward to create the v-neckline. Align the tops of both pieces where you did the starting rows, and ss across the shoulders on both sides.
Next, seam the top of each sleeve to the front and back piece we just created. Open the front and back of the sweater that you just seamed, and lay it flat, with the wrong side facing up. Find the middle of the top of one sleeve, and line it up with one of a shoulder seams. Ss the sleeve top in place(this will span part of the front and part of the back). Repeat on the other side.
At this point, fold the sweater back so that it looks like a sweater: the front panels on top of the back panel, and the sleeves folded in half.
The last thing to do is seam the bottoms of the sleeves and the sweater sides. This is done in one step on each side. Starting from the end of the sleeve, seam up the bottom to the underarm. Take care to seam the underarm portion well, and continue down the side of the sweater to the bottom. Bind off and repeat on the other side.
Cuffs
To crochet the cuffs, ss are worked in the back loop only. Work from the wrong side of the sweater. To start, join the yarn to the sleeve end close to the seam and ch11
Row 1: skip a ch and ss10. Ss into the next stitch up on the sweater end. Turn.
Row 2: skip the last ss you did and ssBLO in the remaining 10sts. Ch1 and turn.
Row 3: ssBLO in the 10 cuff sts. ss into the next stitch up on the sweater end. Turn.
Repeat rows 2-3 until you get all the way around the cuff. The exact number is stitches may vary. Ideally, finish on a row 2 so that the seam can go from the end of the cuff inward.
To seam the cuff, ssBLO of your last row and BLO of the first row together. Ss to the sweater end so there’s no hole, and bind off. Repeat on the other side.
Ribbing
The main ribbing that goes around the main sweater body is done in two main phases (going around the bottom and then around the front/neck area), without binding off.
Bottom Ribbing
With your sweater inside out and with the front facing you, Attach the yarn at the bottom corner of the right front panel and ch8
Row 1: skip a ch and sc7. Ss into the next stitch up on the sweater end, and then again in the next stitch after that. Turn.
Row 2: skip the last 2ss you did and scBLO in the remaining 7sts. Ch1 and turn.
Row 3: scBLO in the 7 ribbing sts. ss into the next stitch up on the sweater end, and then again in the next stitch after that. Turn.
Repeat rows 2-3 until you get all the way around the bottom of the sweater. The exact number is stitches may vary. Finish on a row 2,without doing the ch1, to set up for the next section of ribbing.
Front/Neckline Ribbing
Note: along this edge, the ribbing gets worked into the sides of your dc and sc stitches.
As you ss up the edge in between rows, simply try to place them about one chain stitch length apart.
Without binding off from your bottom ribbing, ch8
Repeat rows 1-3 of the bottom ribbing directions.
Repeat rows 2-3 ALL the way up the left sweater panel, around the neck area, and
down the shaping portion of the right front sweater panel. Stop when you reach the
end of the shaping.
Buttonholes
For this last stretch of ribbing, the goal is to evenly space buttonholes for the amount
of buttons you want to do.
First, count the rows of ribbing that you did along the straight edge of the other front
panel. Use this as a starting point for how to evenly space your buttonholes.
Remember to leave a bit of space at the top and bottom (especially the bottom)
To work a buttonhole row, start at the end of a row 2, and replace a row 3 with this:
Buttonhole row: sc2BLO, ch2 and skip 2sts. Sc3BLO. ss into the next stitch up on the
sweater end, and then again in the next stitch after that. Turn.
Buttons and Finishing
Turn your sweater right side out and sew on your buttons on the right side of the ribbing so that they align with the buttonholes you created on the left side. Weave in or tie off your ends, and block if desired.
Join My Crochet Maker’s Vault to Access the Exclusive Video Tutorial
In addition to the PDF download for this pattern that is available inside of the Crochet Maker’s Vault, there is also a full series of video tutorials available to help you make this sweater! With eight videos total, I show you all the steps to crochet the Thankfulness Cardigan.
All of these videos are available for Community members as well, inside of the pattern library. Members also have access to ALL my patterns and a separate library just for tutorials, and a forum to connect with other members.


Final Thoughts
If you’d like to see more crochet pieces like this, be sure to sign up for emails. Each week I send out new projects, crochet tips and tutorials, behind-the-scenes info, and other resources for my readers.
Plus, as a bonus for signing up you’ll immediately get the current free pattern bundle with downloadable pdfs.
This is where members can download unlimited PDFs, browse organized tutorials for certain projects, and reach out to me for any priority support you need.
Keep the Crafting Delightful!
Amelia
If you want a comfortable, easygoing crochet cardigan that includes simple shaping and full video tutorials, you can learn quite a bit by following along with this design
You might also like:
Don’t forget to pin for later!