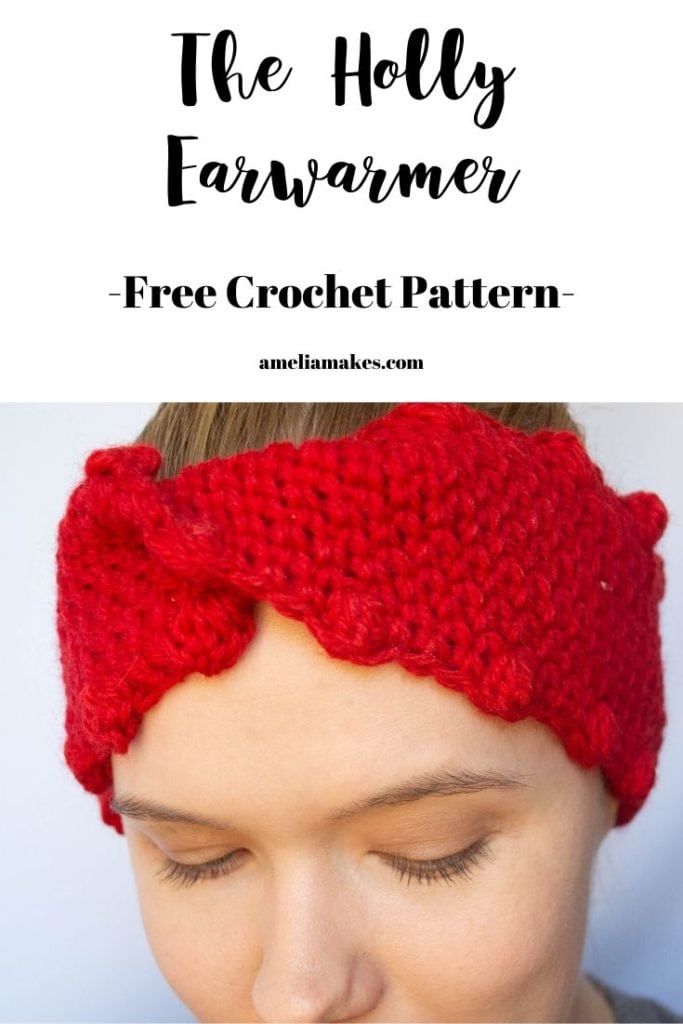
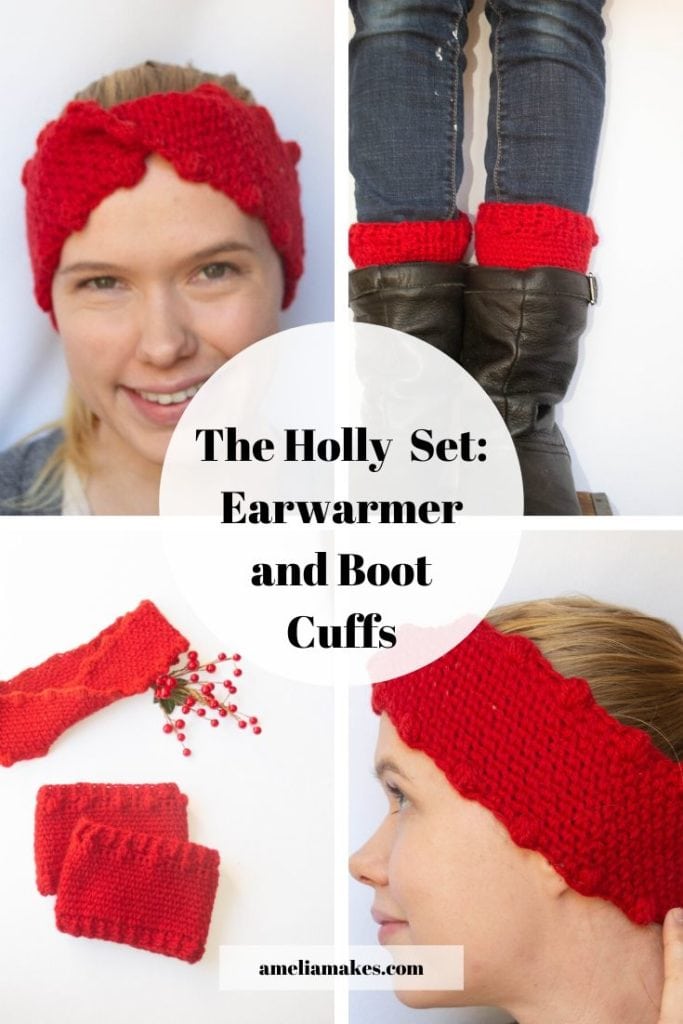
The Holly Crochet Headband is a truly warm festive ear warmer pattern that is perfect for wearing around the holidays or giving as a gift
There’s a lot of simple satisfaction to be had from finding something that gives you great results, without being too challenging. This certainly rings true in our crochet projects, and today I’m excited to share a beautiful crochet ear warmer pattern that I think you’ll enjoy!
It delivers interesting texture and style while still being easy to make. Plus, it’s very functional and warm to wear.
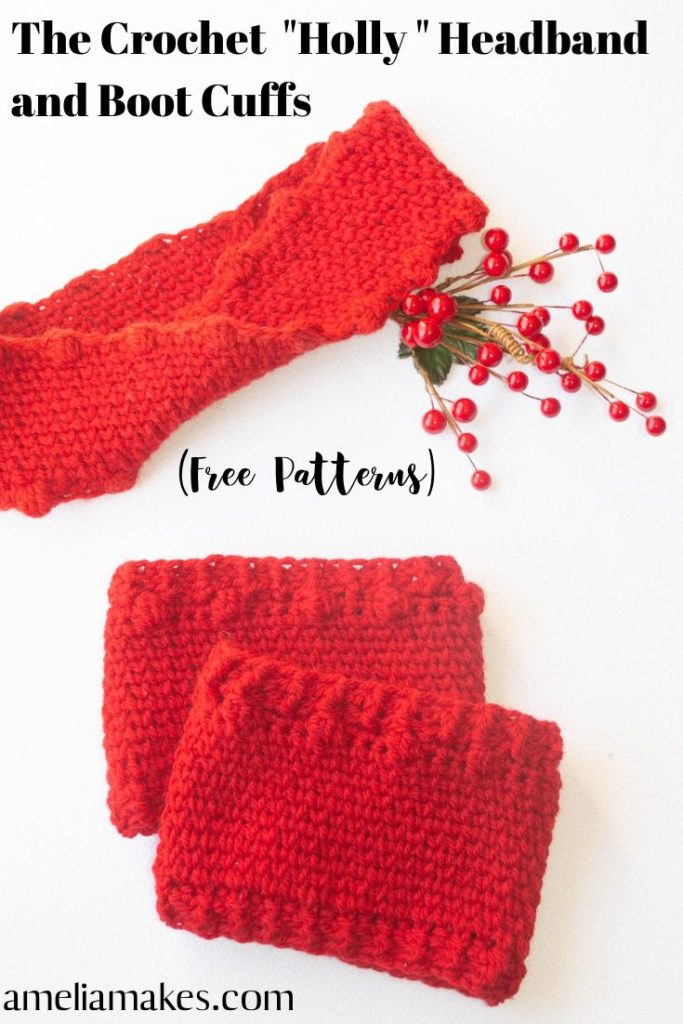
This pattern is pretty trendy as well. Headbands and hats with twists, curved lines, and even a turban or cloche shape seem to be a lasting style right now, and also tend to be very flattering. It also comes with matching boot cuffs that are so adorable together!
And while I actually took my time to try out this trend for myself, it’s certainly grown on me. This version-the Holly Headband or Holly Ear warmer is a nice festive design with some extra pops of texture in the form of bobbles.
(If you’d like to see another example of this style, check out this pattern. It’s not my design but I’ve been meaning to try it)
(Note: This post contains affiliate links, meaning that if you make a purchase it may benefit me at no extra cost to you. You can read all of my affiliate disclosures and other disclaimers on the disclaimers page. )
Prefer the PDF Pattern for the Ear Warmer and Boot Cuffs?
Grab the ad-free, printable PDF pattern for babies and adult sizes.
You can view it on your computer, phone or tablet or download and print it at home.
About the Crochet Holly Ear Warmer
The Holly Headband is a thick(ish) and cozy ear warmer made with an edging of not-too-out-there bobbles to add some festive detail and texture. As a ladies headband, the pattern you’ll find here is going to fit most people with some flexibility for those of you out there with different head shapes and hair that is so much thicker than mine.
The stitch that makes up most of this project doesn’t stretch quite as much as many crochet stitches, and I’ve taken that into account. However, if you want to try making this headband without the twist in it, you will probably need to make your rows a bit shorter since the twist takes up some of the length.
If you’re interested in making headbands with a twist, check out my luxurious twist headband design made with the spider stitch that you’ll absolutely love.
Skill Level
Although this ear warmer pattern uses stitches that are beyond the most basic ones, I would still consider it to be an advanced beginner to intermediate pattern.
The waistcoat stitch is really very simple to do once you realize that it’s basically single crochet with a small variation. The bobbles in the pattern are simply several half double crochet (hdc) stitches done together.
Now, one thing that is worth noting about the bobbles: To make the pattern easy with the twist (getting the bobbles to show up on the right side of the ear warmer without working them on both sides and placing the twist just right), the pattern will actually have you push/”pop” some of the bobbles inside out, so that they show up on the back side of your work.
This bobble technique is remarkably easy to do, and if you make the pattern yourself I think you might just find this trick as neat as I did.
But, if the idea of turning the bobbles inside out has you a bit skeptical, go ahead and try making a swatch (in any basic stitch) and adding a few bobbles to try the idea out for yourself.
That way you can get comfortable with the idea in just a few minutes before committing to the 1-2 hours or so that the ear warmer will probably take.
Basically, the techniques used in this crochet ear warmer are all one step away from very basic stitches. Or, to put it another way, basic stitches with a twist…
Considering the fact that this project is done in rows and joined with one small seam, I think it’s well within your reach to try it even as a beginner. I wouldn’t make it your first project ever, but as a small and relatively quick accessory it’s a good choice for trying these techniques if they’re new to you.
Yarn Choice
To keep the ears extra warm in these chillier days, I opted to use 100% wool in the Holly Headband. Paton’s Classic Wool yarn is one of the only 100% wools that I actually see consistently in “mainstream” arts and craft stores that carry yarn, and this bright red color is about as festive as you can get!
Of course, if you don’t like the idea of using wool for whatever reason, any other type of yarn can be used instead. Just make sure that you choose something very close in weight(thickness) to the Paton’s classic wool.
So with all that said, below you’ll find the full pattern for this lovely little headband. If you’d like to download the pattern for yourself, you can find access to that(for free) by signing up at the bottom of this post
The Holly Headband: Crochet Ear warmer Pattern
Materials Needed
- G hook
- <70 yards of heavy worsted/Aran weight yarn like Patons Classic Wool
- Scissors and tapestry needle for finishing. The tapestry needle is optional, but for weaving in ends this is my preference).
Abbreviations
- ch-chain
- sc-single crochet
- hdc4tog-half double crochet 4 stitches together
- ss-slip stitch

Directions
Start by chaining (Ch) 61 stitches
Row 1: sc into second chain from hook and across the row(60 sts). Chain 1 and turn
Rows 2- 12 : waistcoat stitch across(60 sts). Chain 1 and turn.
For Bobble Edging:
Row 13: *waistcoat stitch 3 stitches, hdc4tog to make your bobble* (I inserted my hook for the bobbles in the same manner as the waistcoat stitch, because it helped me keep my stitch count correct.
Repeat 14 times down the row(15 times total). if you want, you can leave off the very last bobble and just finish with waistcoat stitch instead.
To do the other side:
Your bobbles on the two sides will probably be slightly offset, which ends up looking very pretty. At this point, we are ready to finish assembling the ear warmer:
Turn one end of the ear warmer just once so that it has a twist in it. Keeping the one twist, fold your ear warmer in half and seam up the two short ends with slip stitches(ss). When finished, cut your yarn and weave in your end(s).
At this point, about half of the bobbles are on the wrong side! Don’t worry though, these bobbles will easily “pop” inside out of you simply press them that way with a fingertip. Simply turn your
seam to the inside of the ear warmer, get the twist where you want it, and then get all of the bobbles facing outward.
Optional: you can certainly put a stitch or two through your twist or even wrap the center of the twist with yarn to cinch it(as I’ve seen in some other designs). However, I like the freedom of adjusting the twist depending on the day and my hair.
Final Thoughts
If you like the look of this pattern and want it for yourself, or if you’re just interested in staying connected for future projects, you can sign up below for access to current and future free patterns! As a thank you for signing up, I will give you FREE popular PDF patterns of mine.
Thanks for hanging out with me and checking out this project!
Keep crochet delightful,
Amelia
What’s Next?
- Share on Facebook or Instagram: I always love seeing fellow crocheters make my patterns! Tag me when you’ve completed it @ameliamakesblog
- Pin the post: Save this post on your Pinterest board, and get back to it later.
Join my Facebook Group
Share your ideas and pictures on my Facebook Group! This is a small private group of crochet enthusiasts that would love to hear from you!
The Holly crochet headband is the perfect ear warmer for the trendy twisted shape created with warm and solid stitches