If you’ve been following along with my recent tutorials, you might remember the star stitch—lovely, but admittedly a bit fiddly. Well, today I’m sharing its friendlier cousin: the trinity stitch. It creates a similar starburst-like texture, but with a simpler, one-row repeat that’s perfect for almost any project.
Jump to:
What Makes the Trinity Stitch Special
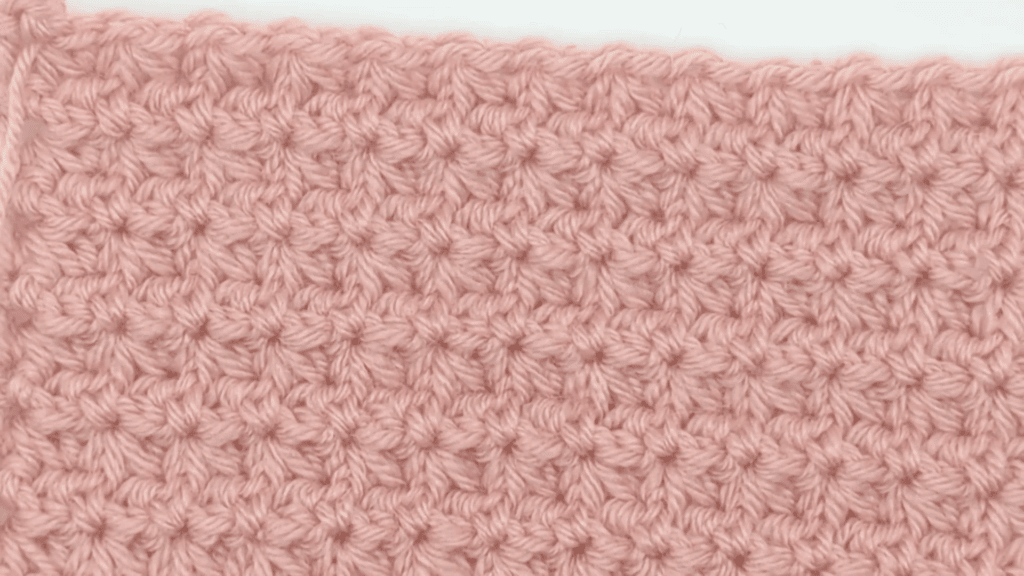
The trinity stitch is wonderfully approachable. It’s a one-row repeat (yes, just one!), which means it gives you flexibility to use it in all sorts of projects.
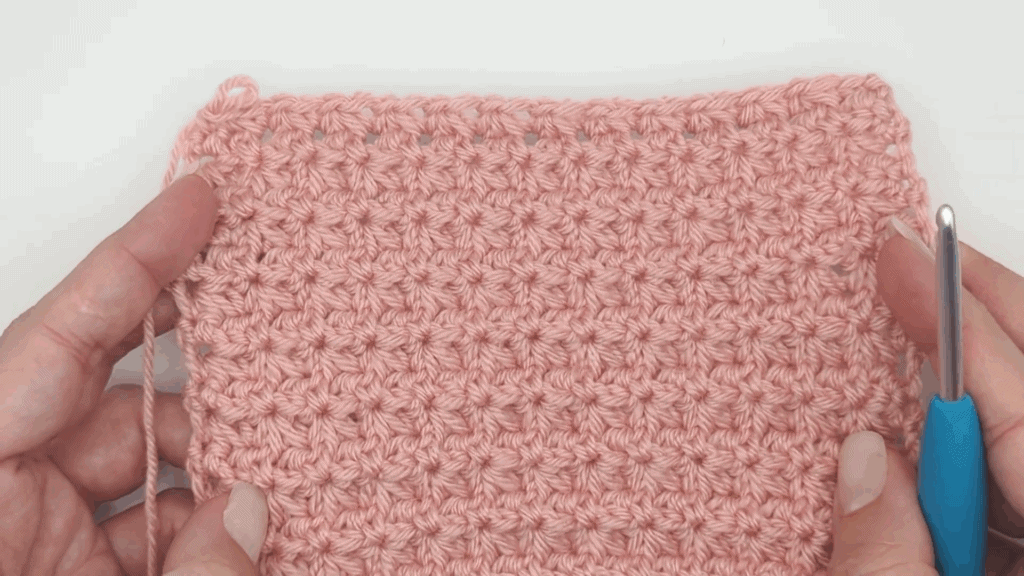
The stitch creates a gorgeous texture that adds visual interest without being overly complicated. It’s dense enough for garments and practical projects but still has a lovely drape, making it versatile for blankets, accessories or clothing.
video tutorial
Working the Trinity Stitch: Step by Step
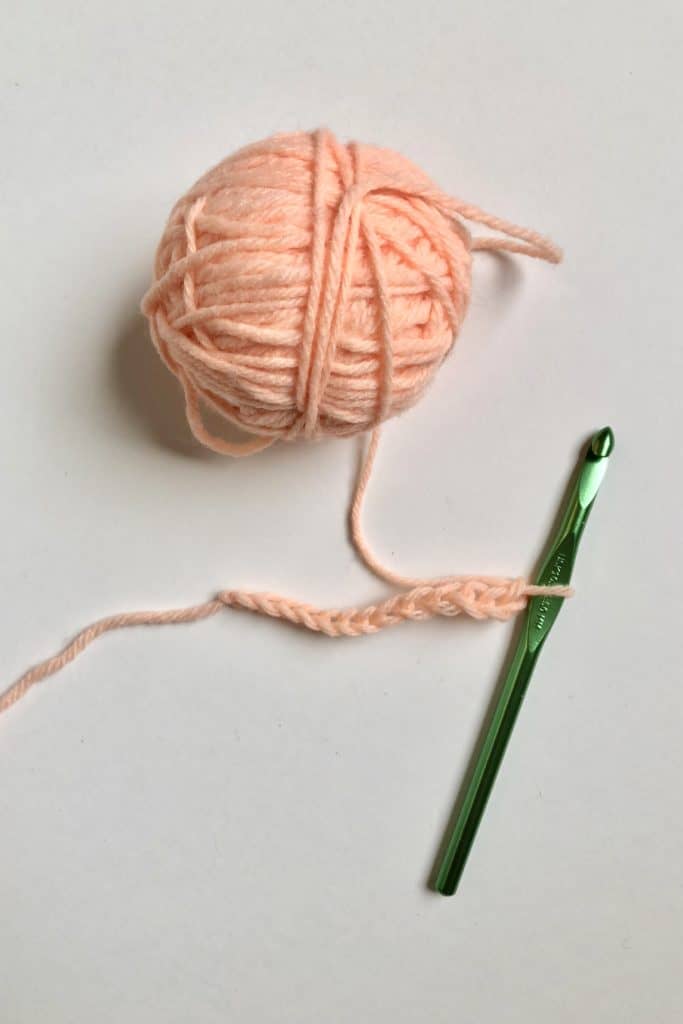
Starting Chain
Create an even number of chains.
Row 1 (Setup Row)
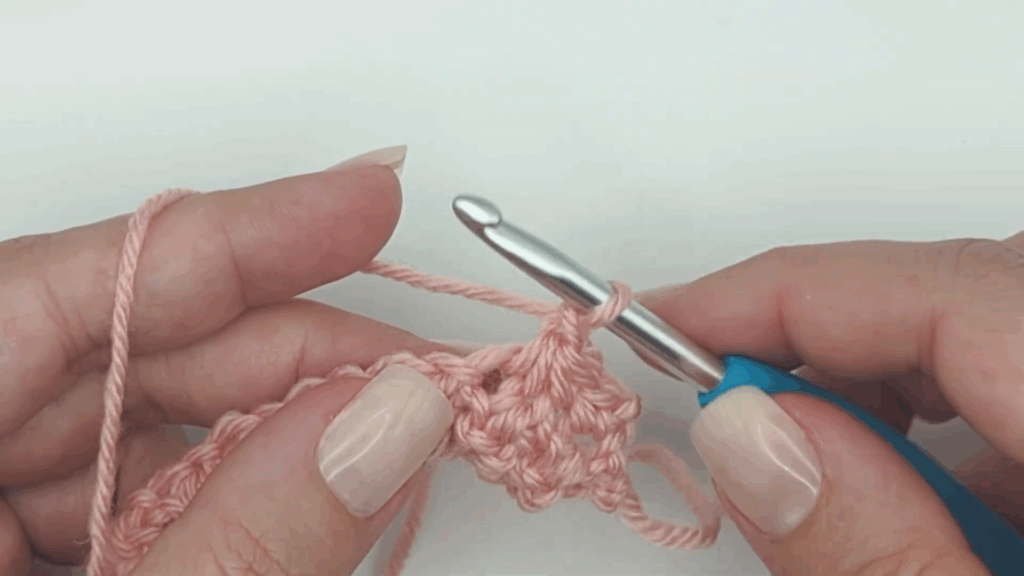
Skip the first ch. In the 2nd ch, work 1 Sc.
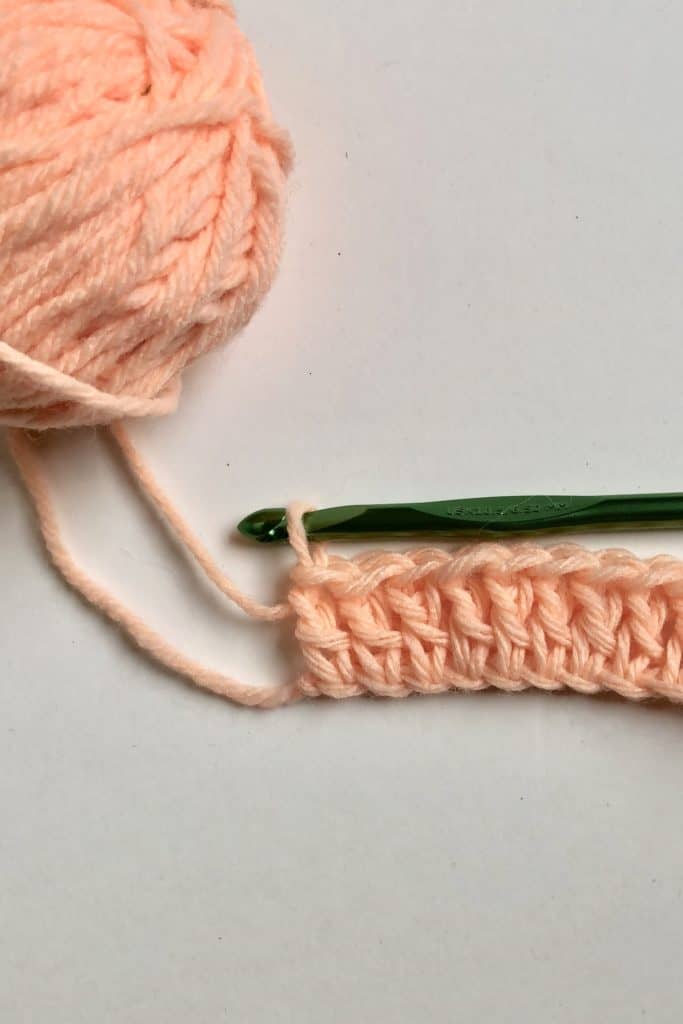
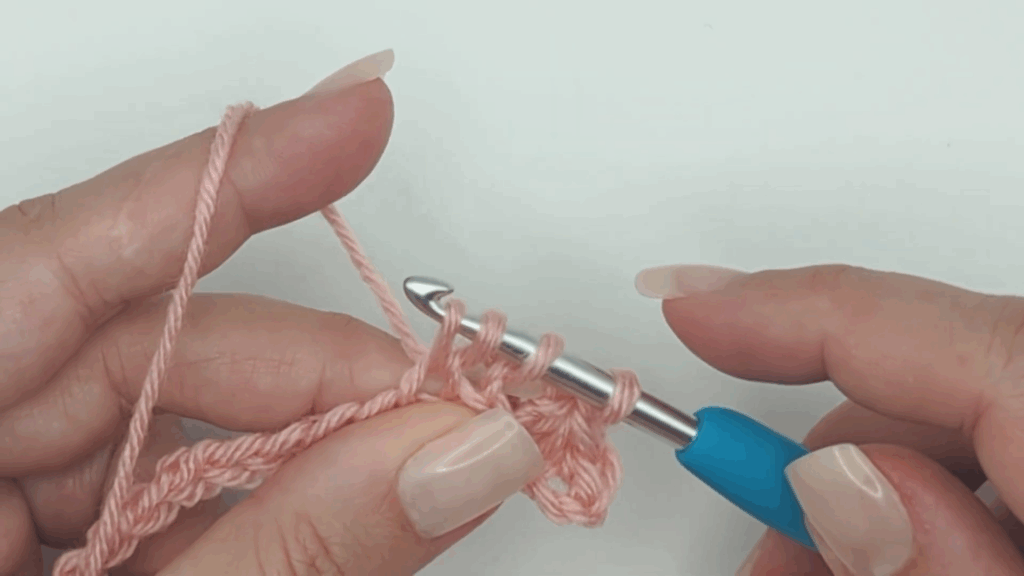
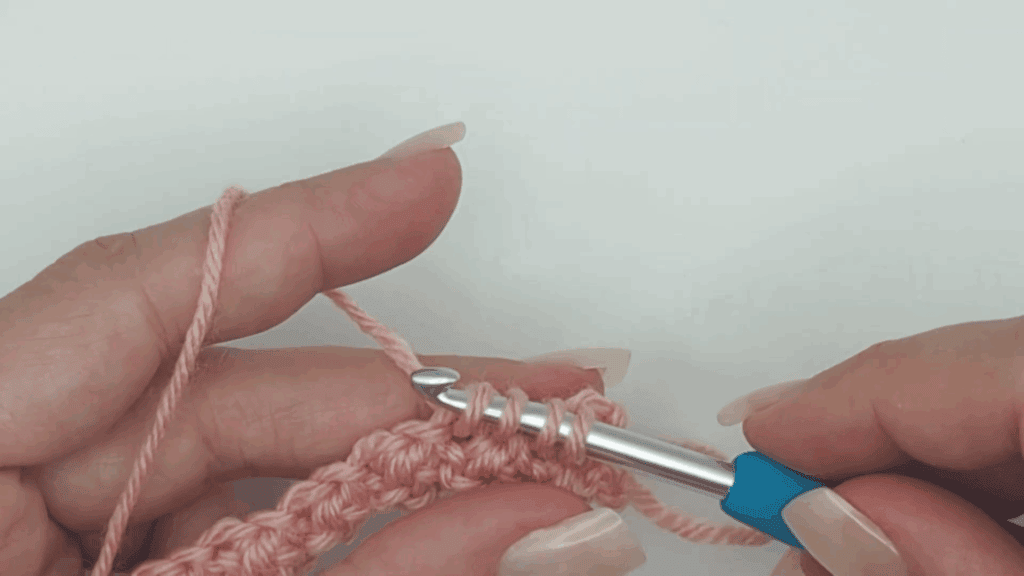
Now for the trinity stitch itself: Insert your hook and pull up a loop in each of the next 3 chains (4 loops on hook). YO and pull through all 4 loops. Ch 1 to close your trinity stitch.

Here’s the key: Insert your hook into the same chain where you pulled up the 4th loop of your previous trinity stitch and pull up a loop. Then pull up a loop in each of the next 2 chains (4 loops on hook again). YO, pull through all 4 loops, Ch 1.
Continue this pattern to the end of your row. You should have 1 ch remaining. Don’t Ch 1 to close that last trinity stitch—just work 1 Sc in the final chain.
Row 2 and Beyond (The One-Row Repeat!)
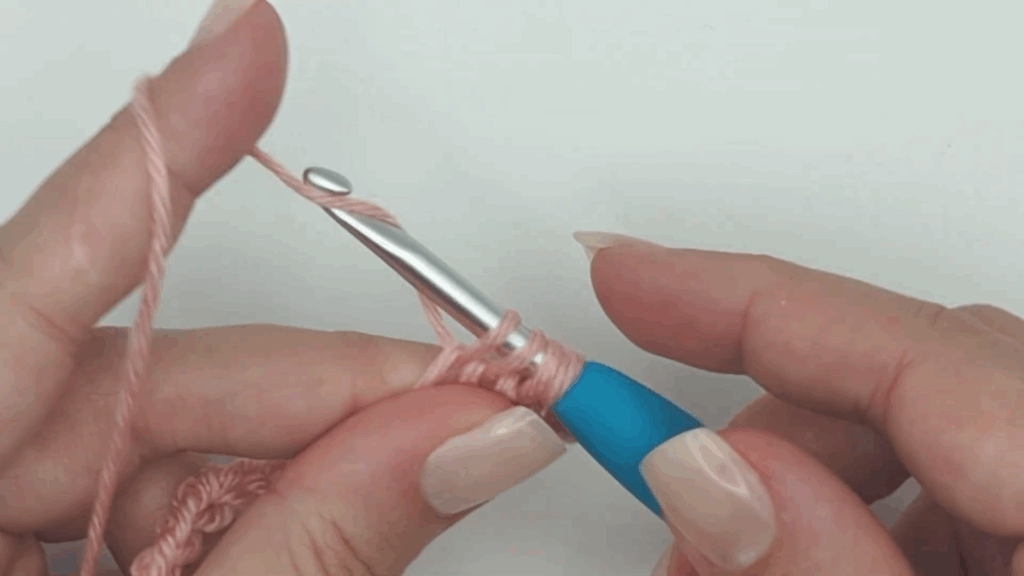
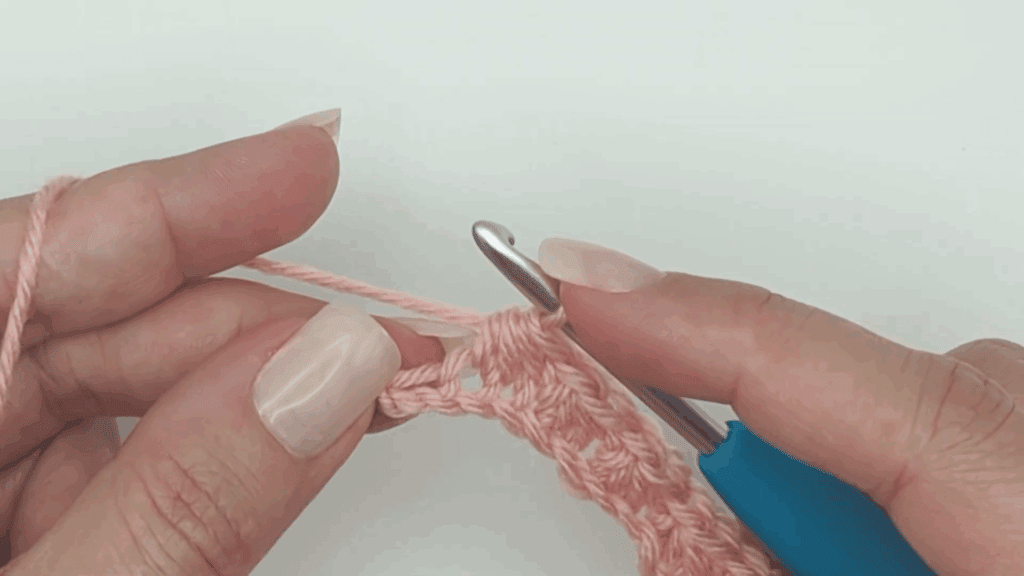
Ch 1, turn. Work 1 Sc in the first stitch.
Insert and pull up a loop in each of the next 3 stitches (4 loops on hook). YO, pull through all 4 loops, Ch 1.
Remember: Always start by working into the same stitch where your previous trinity stitch ended. This keeps your stitch count consistent and creates that beautiful clustered texture.
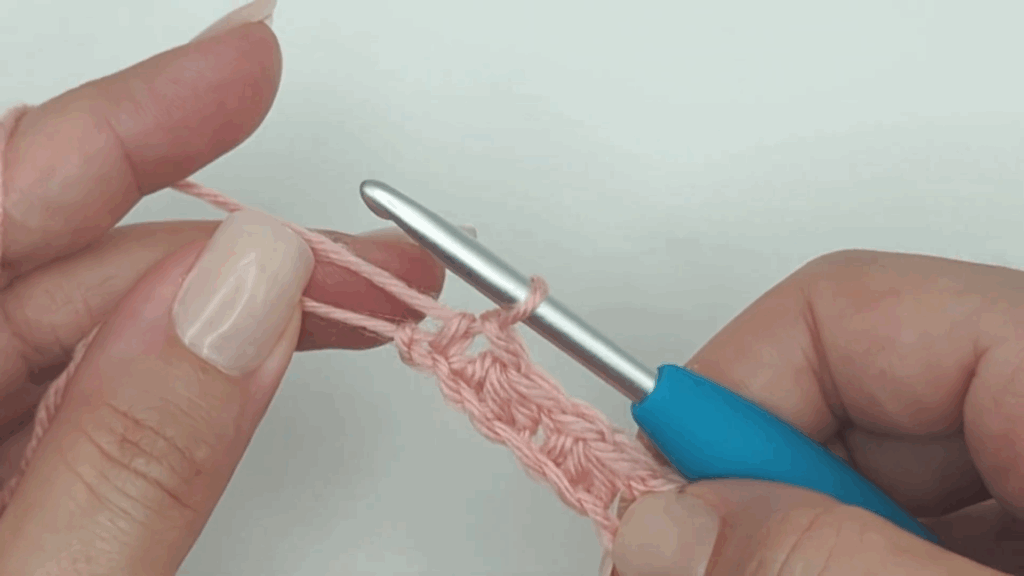
Continue across, ending with 1 Sc in the last stitch (no closing chain).
Repeat Row 2 for pattern.
Perfect Projects for Trinity Stitch
The trinity stitch works beautifully for:
- Cozy blankets and throws
- Textured scarves and infinity scarves
- Slouchy winter hats
- Pillow covers
Tips for Success
Keep your tension consistent, especially when pulling up those loops. If you pull too tightly, especially on that chain stitch, the next row can be harder to work into.
Don’t worry if your first row looks a bit uneven—it often takes a few rows for the pattern to really establish itself and show off that gorgeous texture.
And here’s something lovely: because it’s just a one-row repeat, you can stop at any point and have a finished piece. No need to calculate any rows or borders before fastening off at the perfect length.
The Beauty of Simplicity
The trinity stitch is proof that you don’t need complicated techniques to create something stunning. With just one repeating row, you can build textured pieces of any length—baby blankets, king-size afghans, or anything in between.
There’s something deeply satisfying about working a stitch that’s this approachable yet produces such beautiful results. Your hands learn the motion, your mind relaxes, and row by row, you create something wonderful.
So grab your hook and give the trinity stitch a try. I think you’ll love how quickly it works up and how lovely it looks! And don’t forget to check out the video tutorial!
Keep crochet delightful,
Amelia