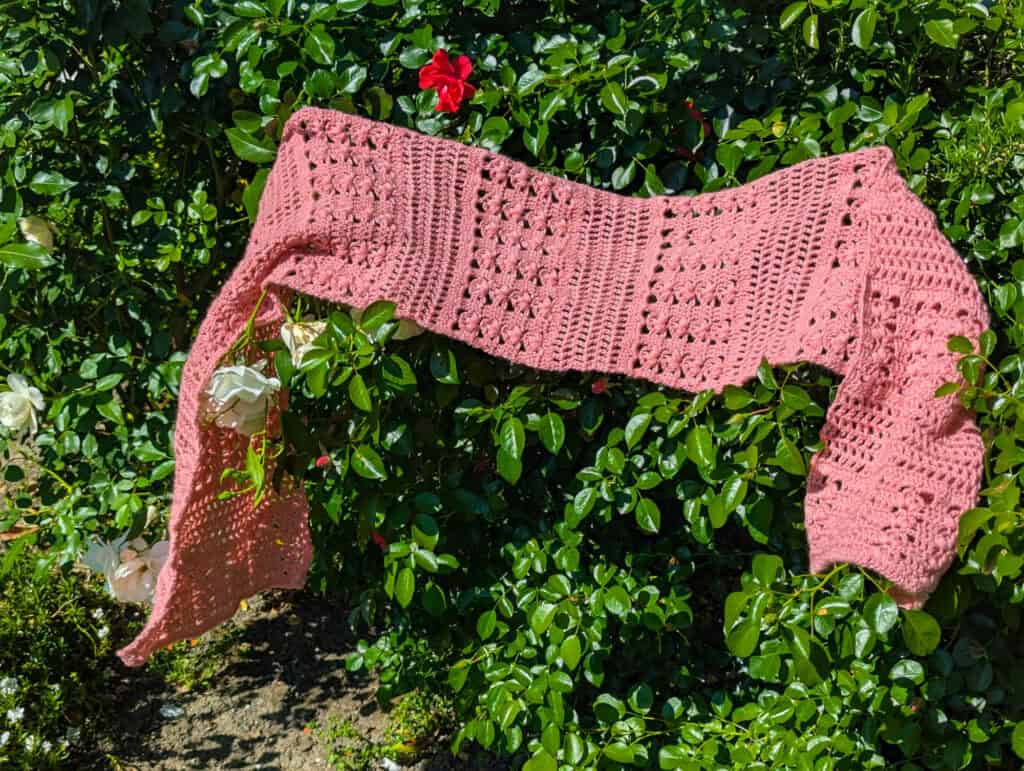
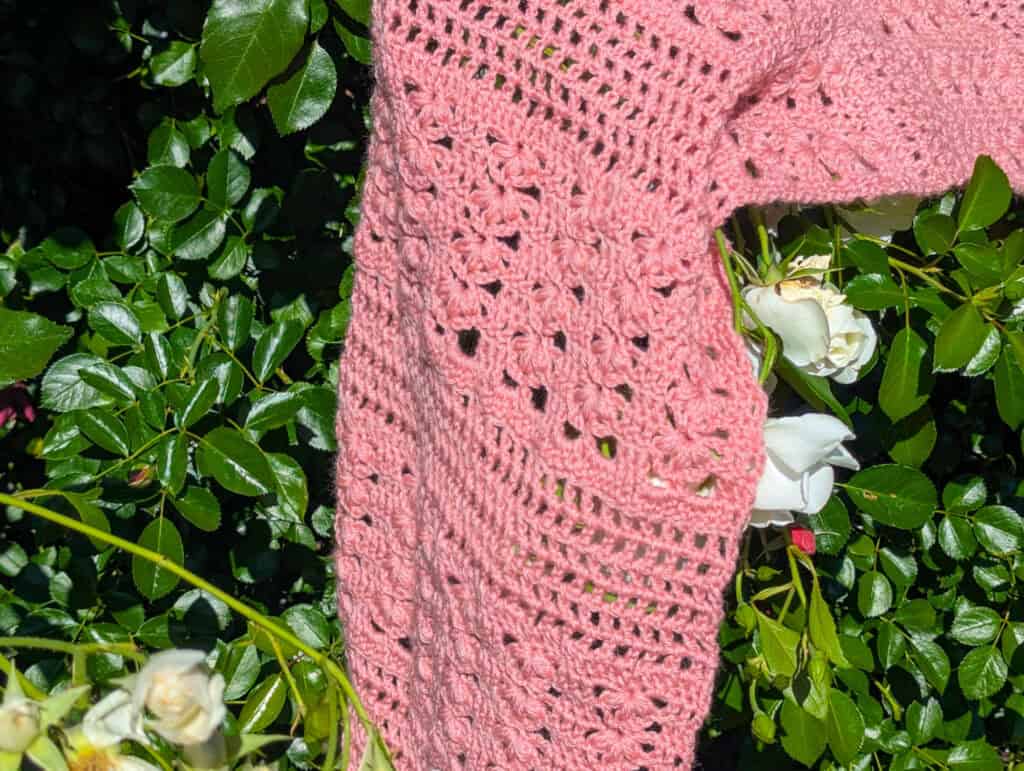
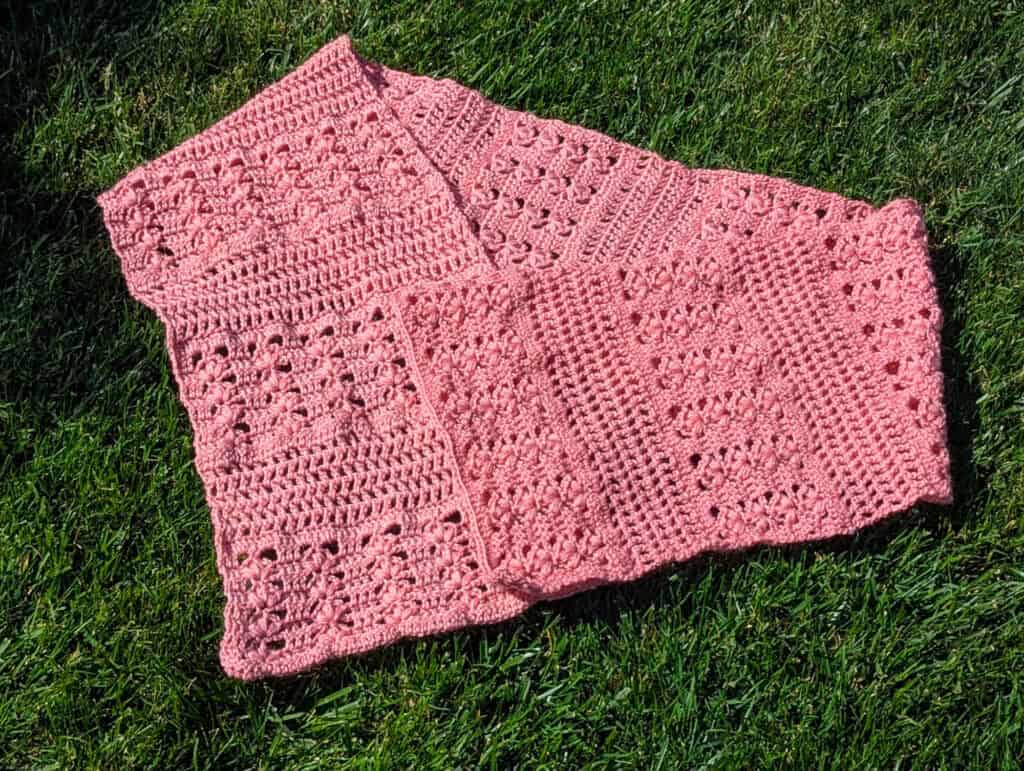
Feeling a little ambitious and want an achievable lace project? The Lotus Lace Wrap is the perfect pattern for that. By alternating mindless mesh lace sections with the more intricate aligned lotus stitch, you get that perfect combo of challenge and relaxation.
I made sure to make this wrap a sizeable 12 inches wide so you could really get draped in all of the beautiful lace you create. Best of all, it can be crocheted to any length so feel free to repeat lace patterns until this lovely shawl drapes down to the floor!
Gauge
This pattern uses 3 weight DK yarn and a 4mm hook. The gauge does not have to be precise, since it is not a fitted piece, but my gauge was about 2 lotus pattern repeats in 4″. I’ll include instructions for altering the starting width of the wrap if you decide to use different yarn weights and hook sizes. You can, of course, repeat the pattern until the wrap is as long as you’d like!
Sizing
As written, the wrap is 12″ (30cm) wide and I crocheted mine until it was 60″ (150cm) long.
Skill Level
This pattern is written for confident beginners and up. Some prior crochet experience is helpful, particularly familiarity with tension control, since the puff stitch involves a few extra yarn loops that need to stay even. That said, the puff stitches involved in the lotus stitch are very learnable, and the repetitive nature of the pattern makes it easier as you go.
Materials
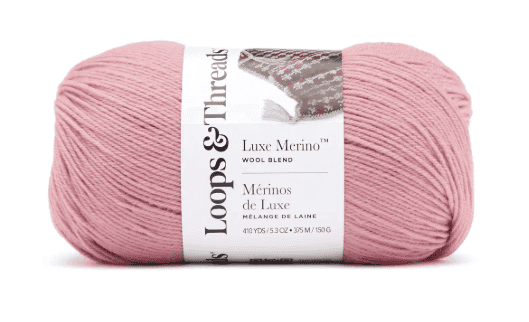
- Approximately 800 yards of DK weight yarn like Loops & Threads Luxe Merino
- 4mm crochet hook
- Optional tapestry needle if that’s how you prefer to weave in your ends
A Few Notes Before You Begin
This wrap is structured to keep you genuinely engaged from start to finish. The aligned lotus stitch sections give you something beautiful and satisfying to focus on, and the double crochet mesh sections in between give you a natural chance to breathe, let your hands relax, and just enjoy watching the fabric grow. It’s one of those projects that finds a lovely balance without you having to think about it.
Because the wrap is worked in a single color, this is a wonderful opportunity to finally use that special yarn you’ve been holding onto. You know the one. The skein that was a little too nice to use on just anything. A solid colorway is perfect here because it really lets the lotus stitch texture shine, and it deserves to.
As written, the pattern makes a generous 60″ (150cm) wrap, which is a really satisfying, substantial length. That said, feel free to keep going if you’d like something even more drapey and cozy. More length means more wrapping options so there’s really no wrong answer!
Abbreviations
- Ch: chain stitch
- Sp: space
- Sc: single crochet
- Dc: double crochet
- Yo: yarn over hook
- Ps: puff stitch ((yarn over, insert)x3, 7 loops on hook, yo, pull through 7)
- Prev: previous
- Sl st: slip stitch
- St: stitch
Downloadable PDF
Want your own, ad free copy of this pattern that’s easy to read, print and take on-the-go? It’s available as a downloadable PDF for purchase Here!
Pattern Directions
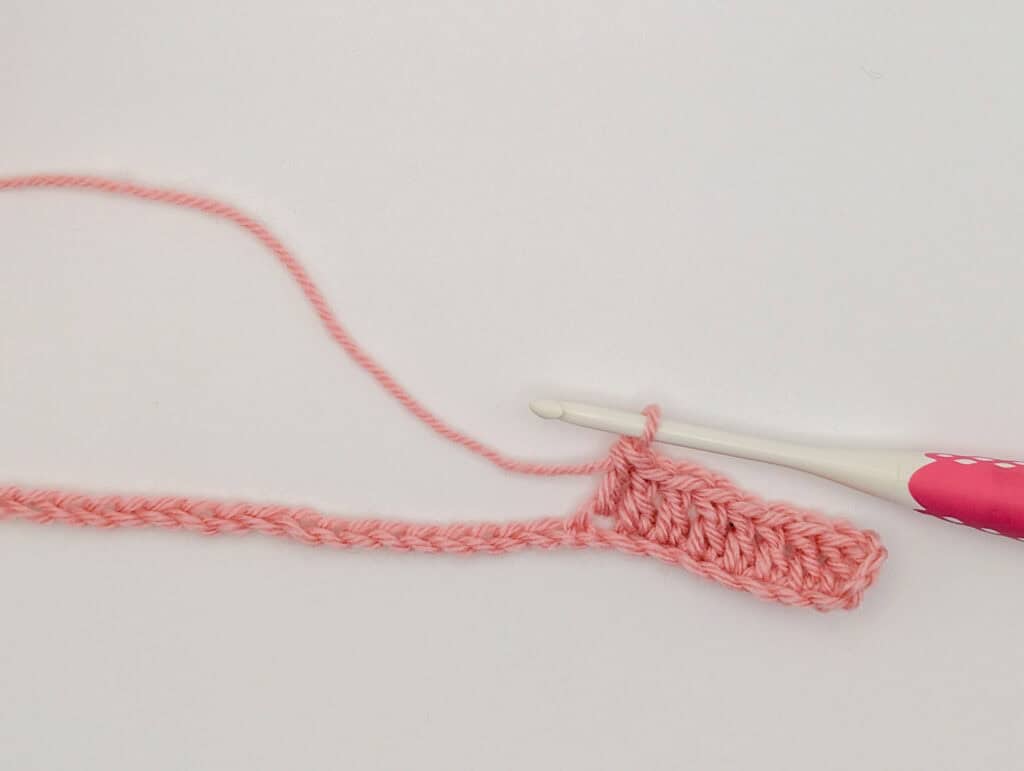
Set Up Row: Ch 65. Skip the first 3 chains (counts as 1dc) and work 1dc into each remaining chain. (63dcs)
Aligned Lotus Stitch Section
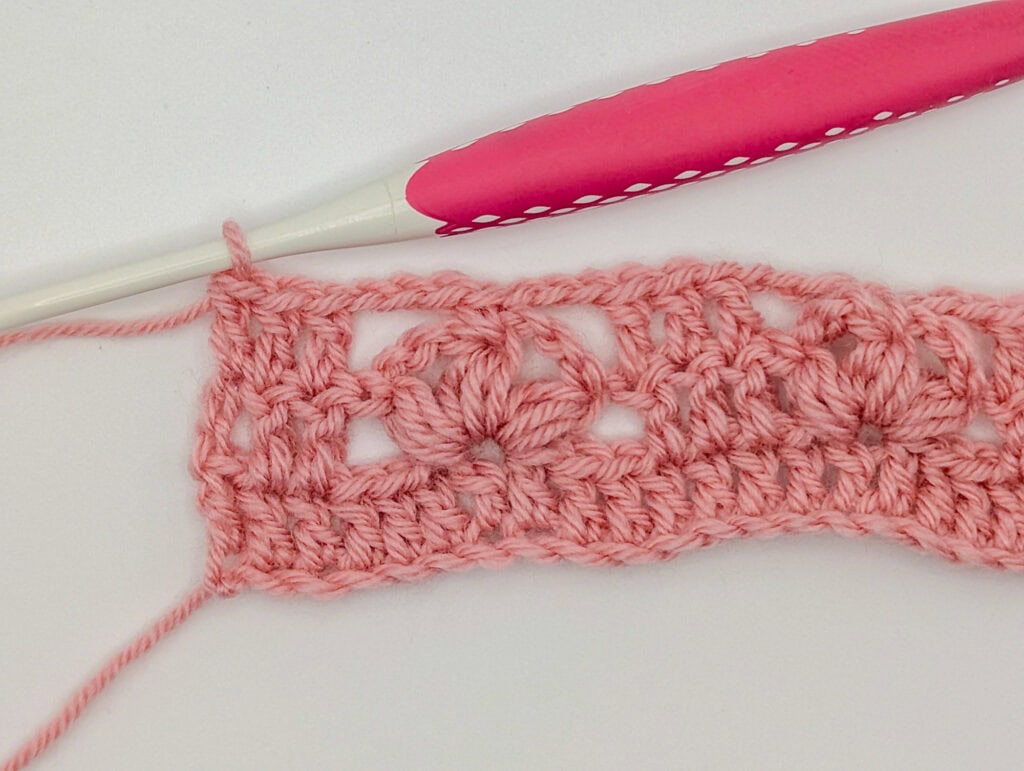
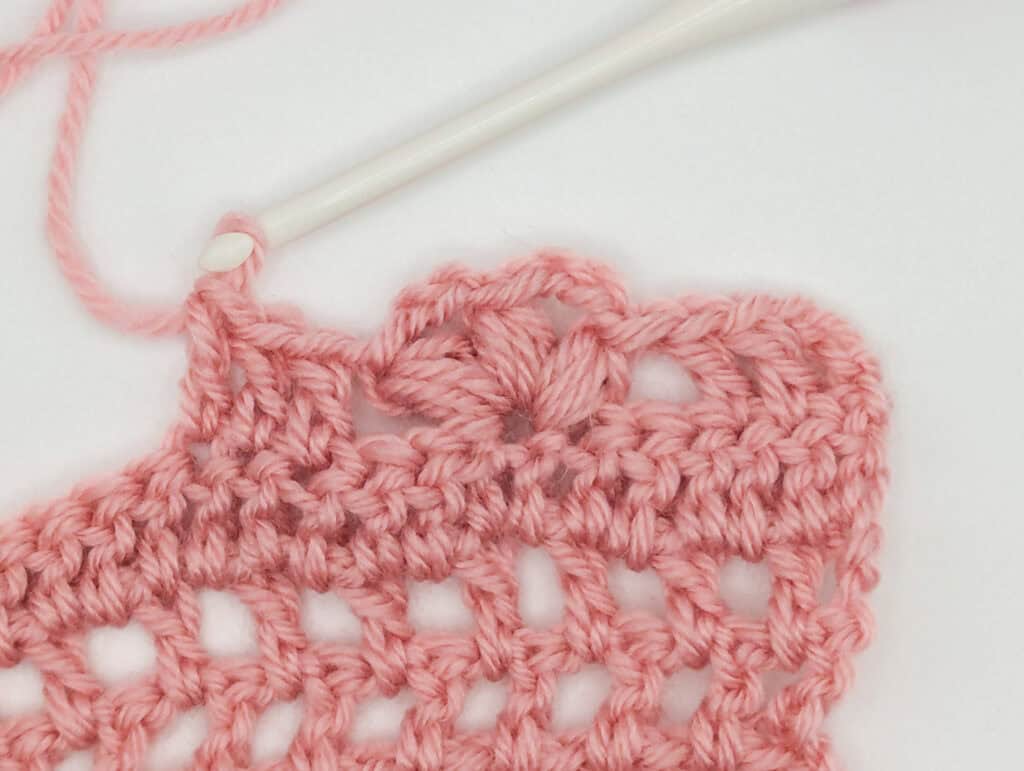
Row 2: Ch3 (counts as 1dc), turn, and make 1 dc in each of the next 2 sts. Skip 3 sts and begin a “lotus stitch” by working 1 puff stitch.
To complete a puff stitch, yarn over and insert your hook x3, with 7 loops on hook, yo, pull through 7.
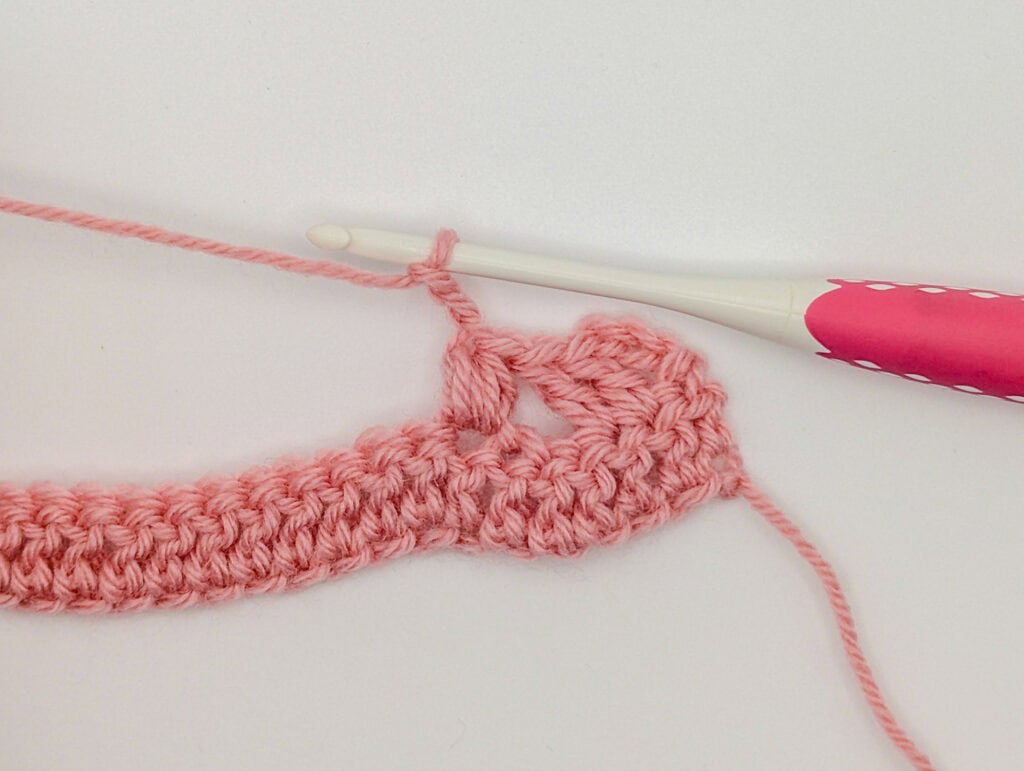
Ch3 and create another ps (puff stitch) into the same stitch. Again ch3 and complete a third ps. Ch1.
Skip 3sts and dc 3.
Repeat: Skip 3 sts, Lotus stitch, skip 3, dc 3 to the end of the row.
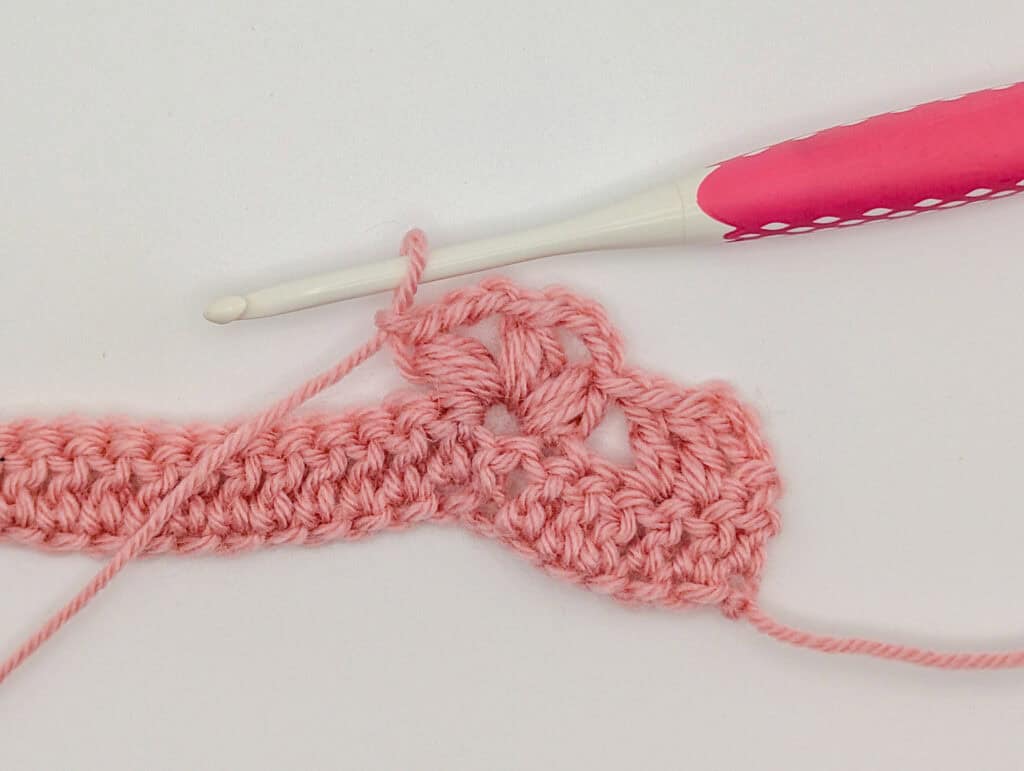
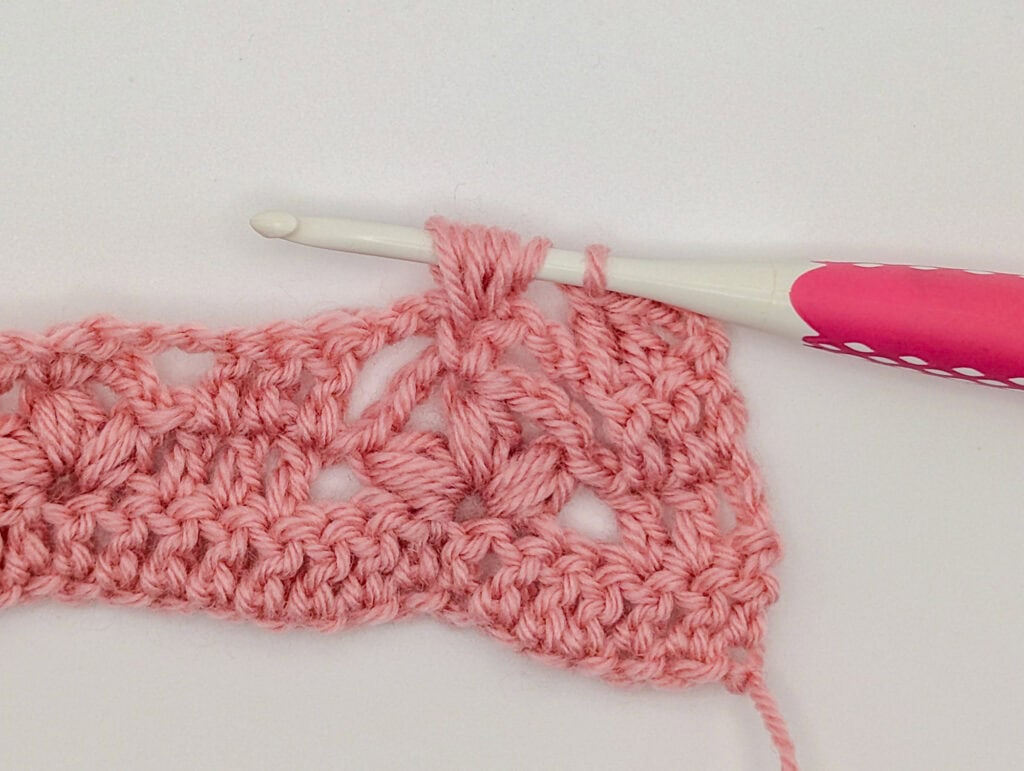
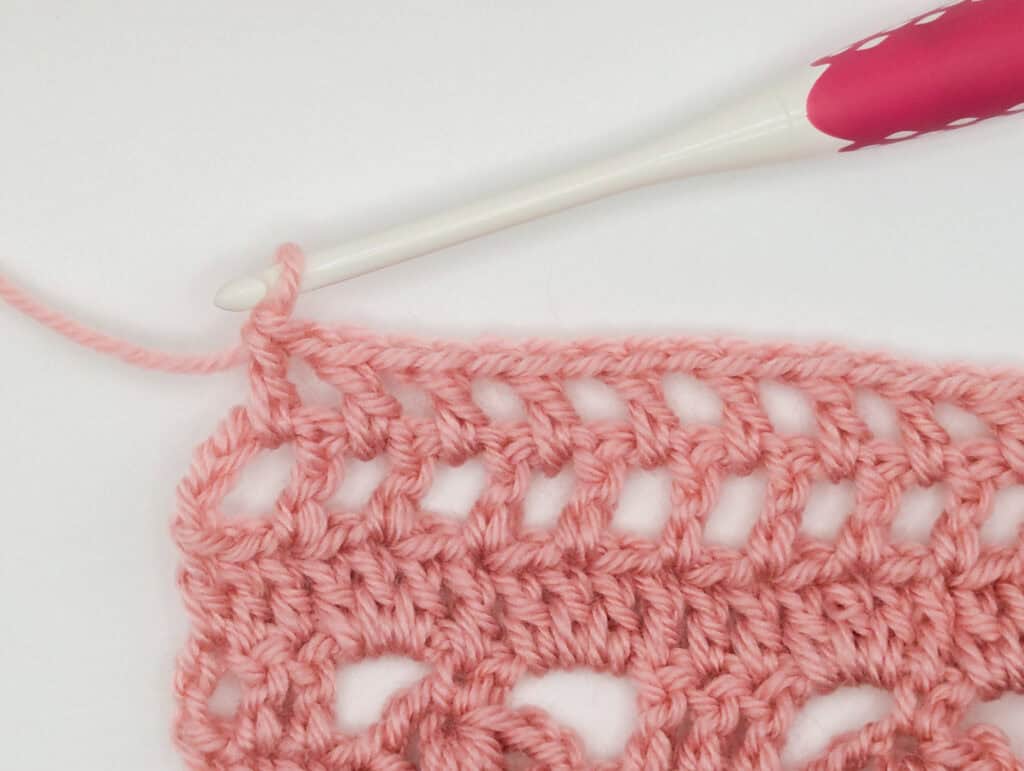
Row 3
Ch3 (counts as 1dc), turn, and work dc 2 across the next two sts. Ch 3 and work 1sc in the center ps of the lotus stitch below.
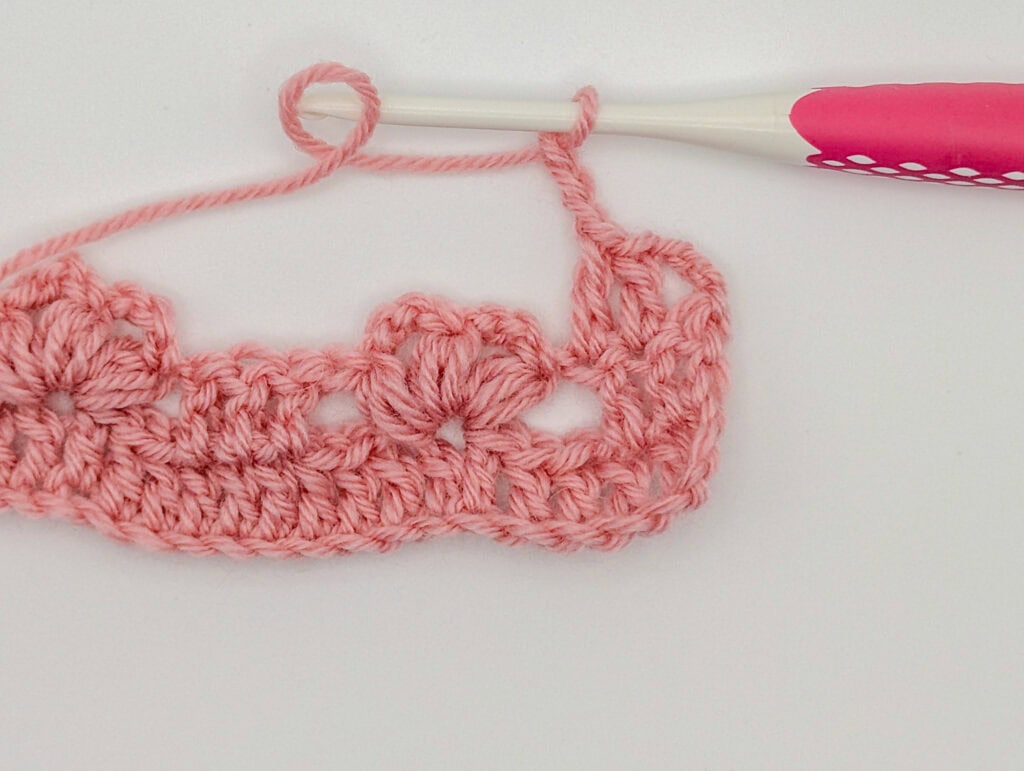
Ch3 and work 1dc in each dc from prev row.
Repeat: ch3, 1sc in center ps, ch3, dc 3 to the end of the row
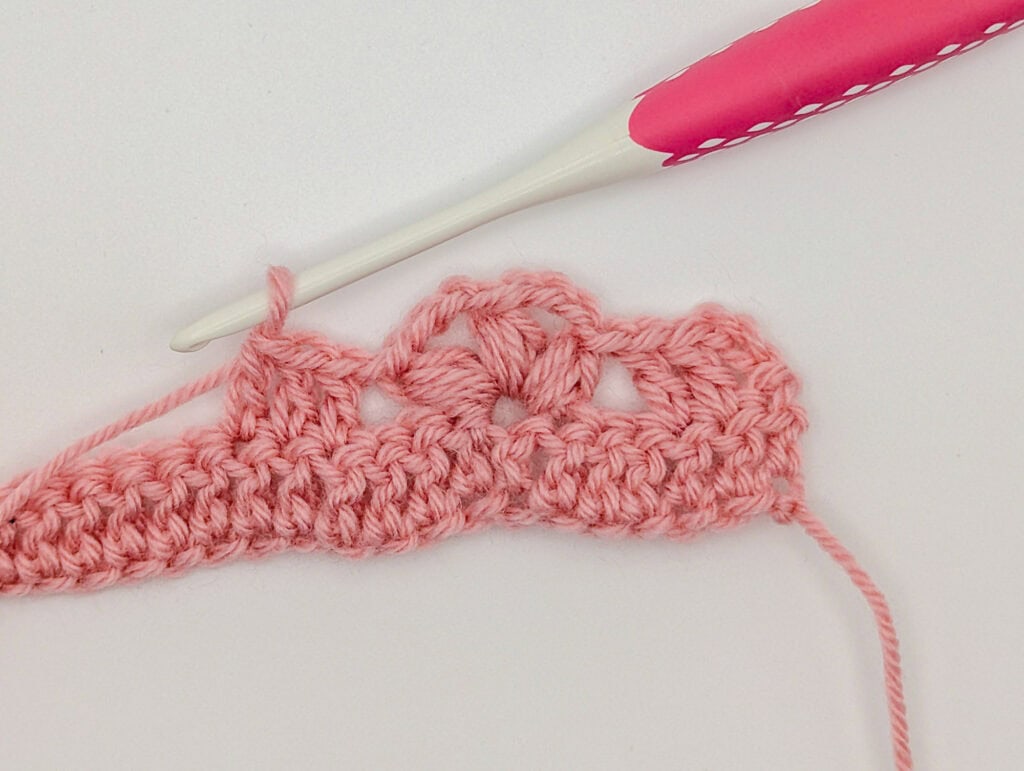
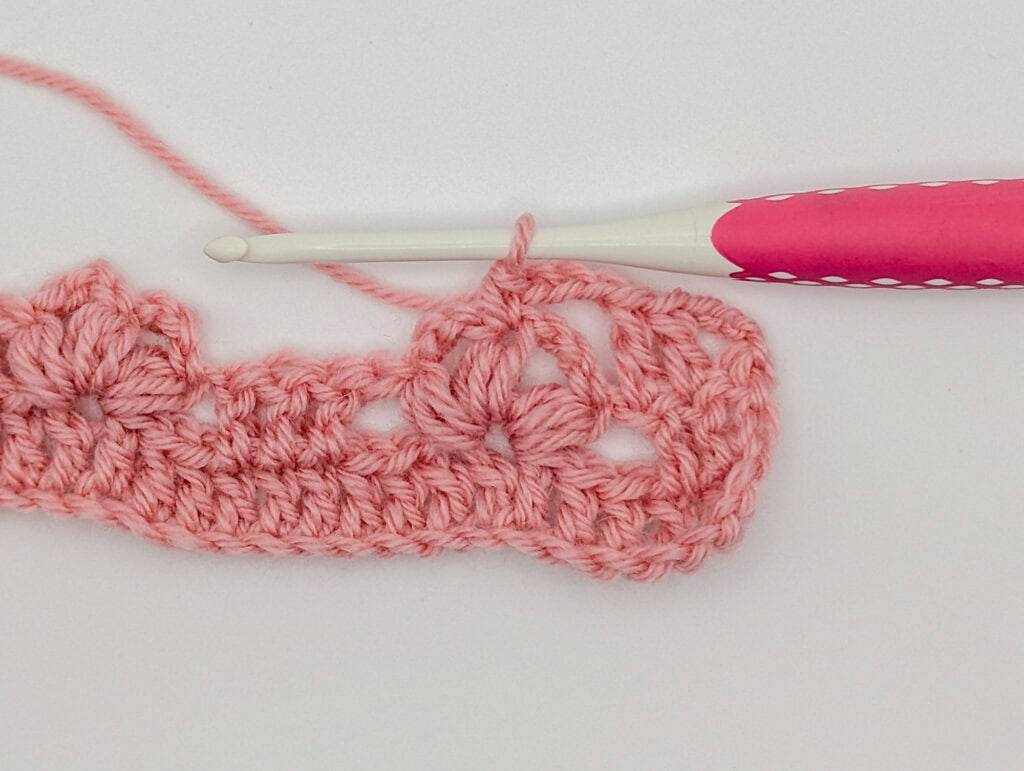
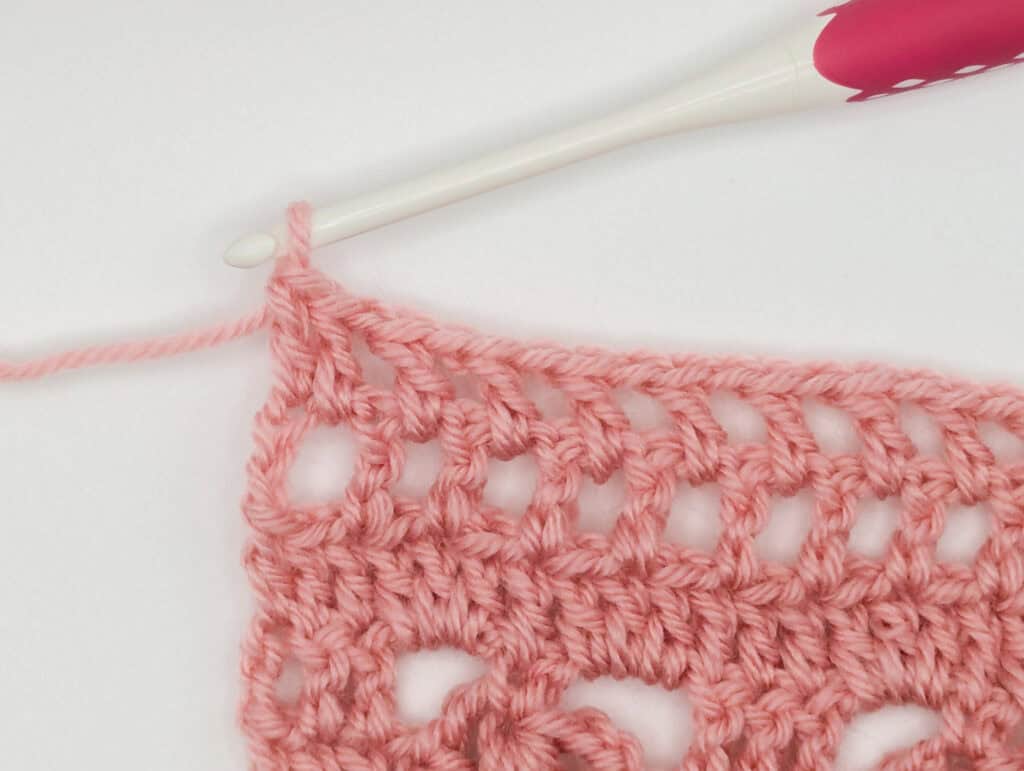
Row 4
Ch3 (counts as 1dc), turn, and make 1dc in each dc from prev row. Complete 1 lotus stitch in the sc from prev row.
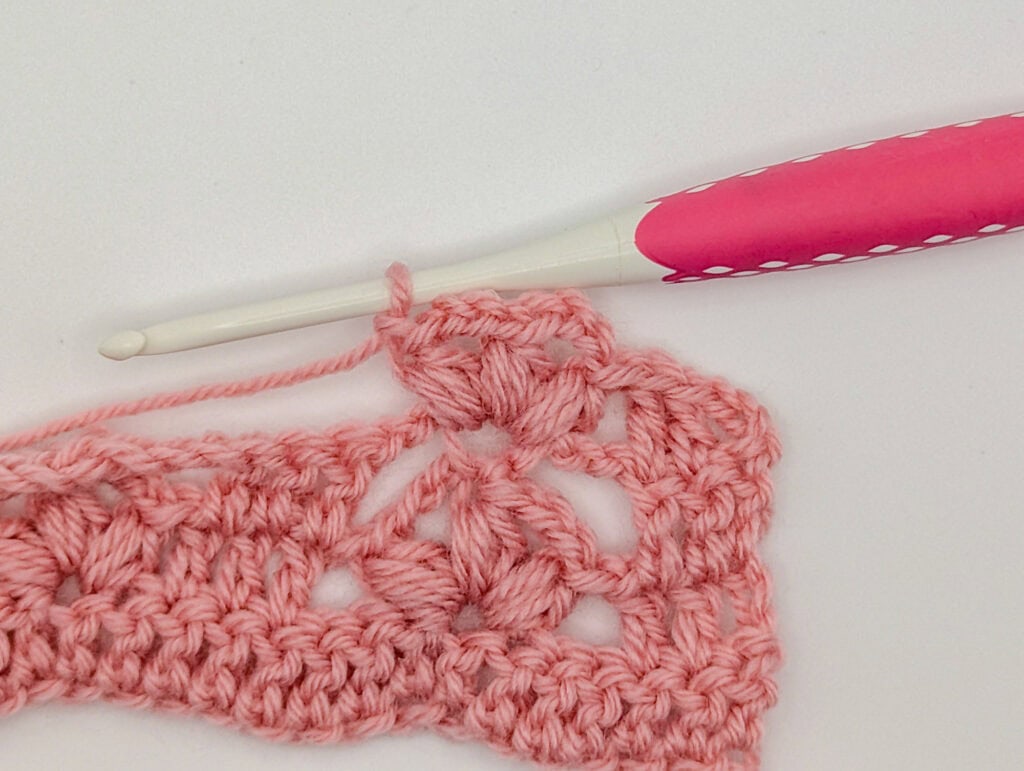
Repeat: make 1dc in each dc from prev row. Complete 1 lotus stitch in the sc from prev row to the end of your row, finishing with dc 3.
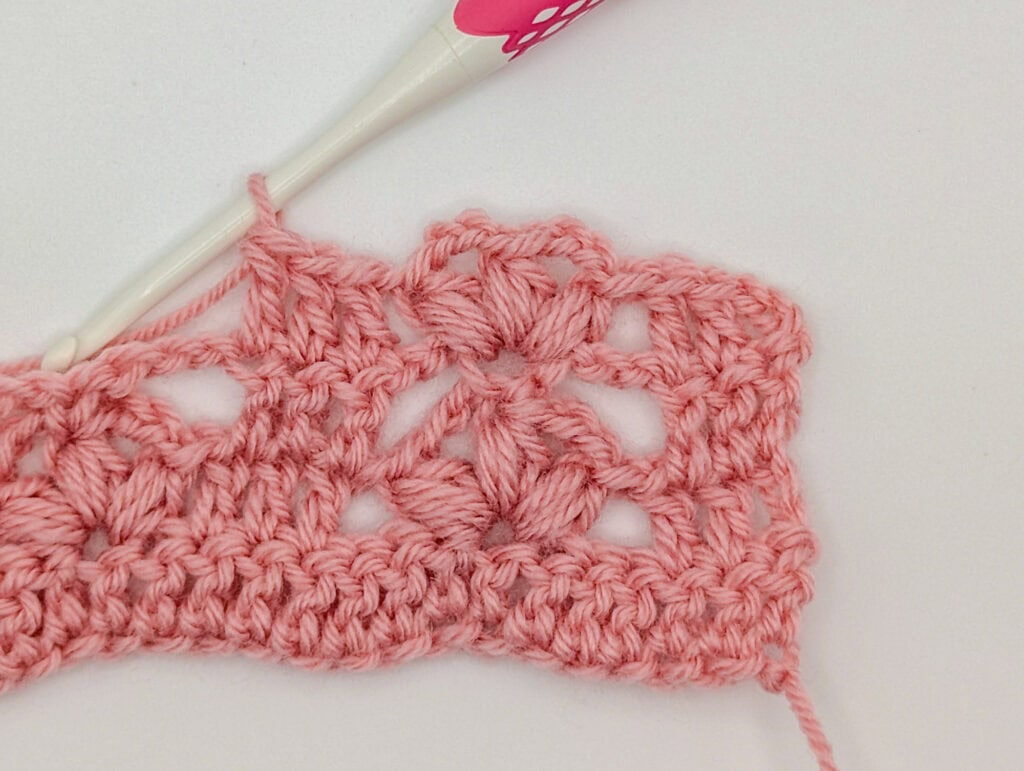
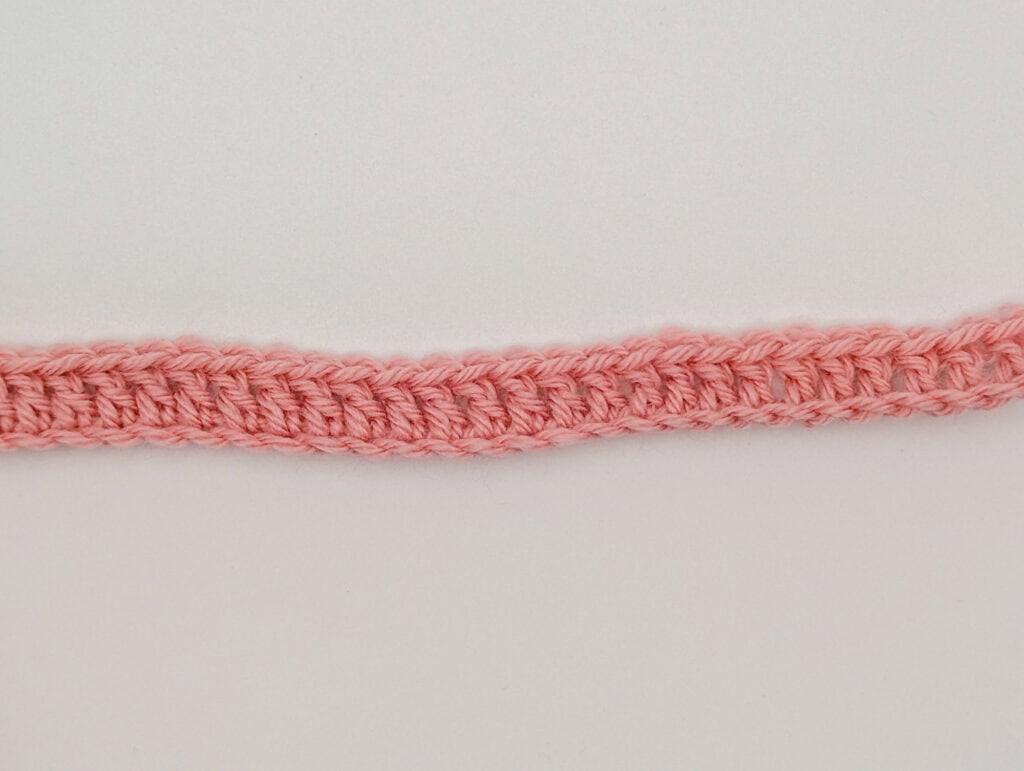
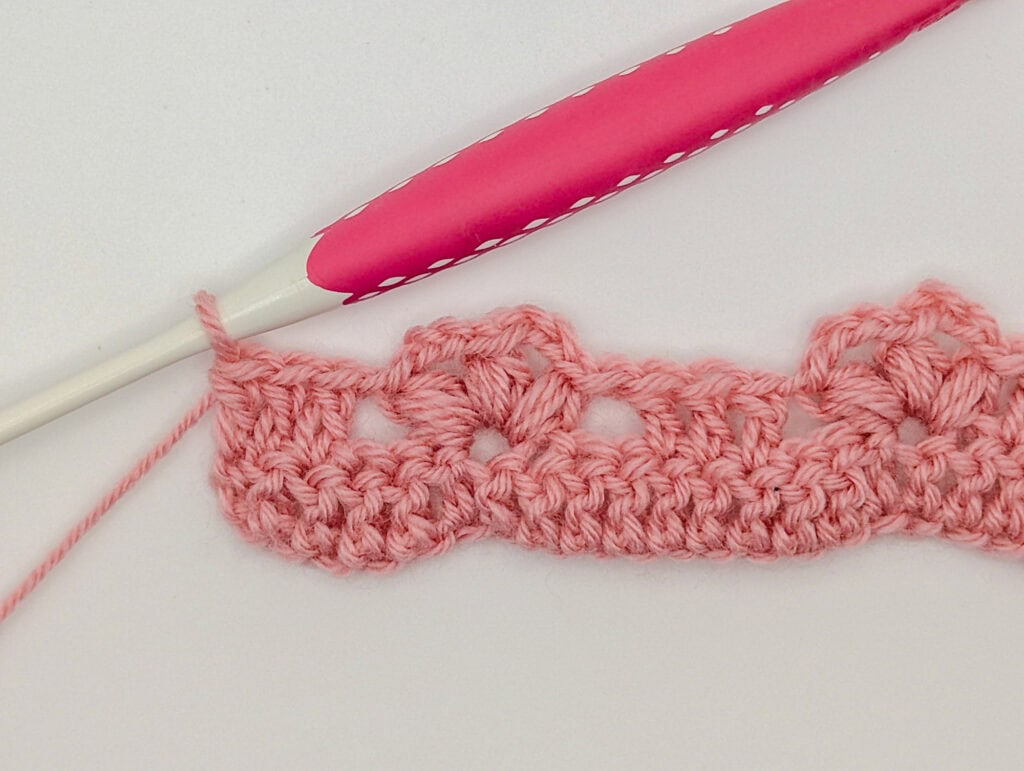
Repeat lotus rows 3 and 4 two more times, then complete one more “row 3” row. You will have 4 complete lotus stitches in your section.
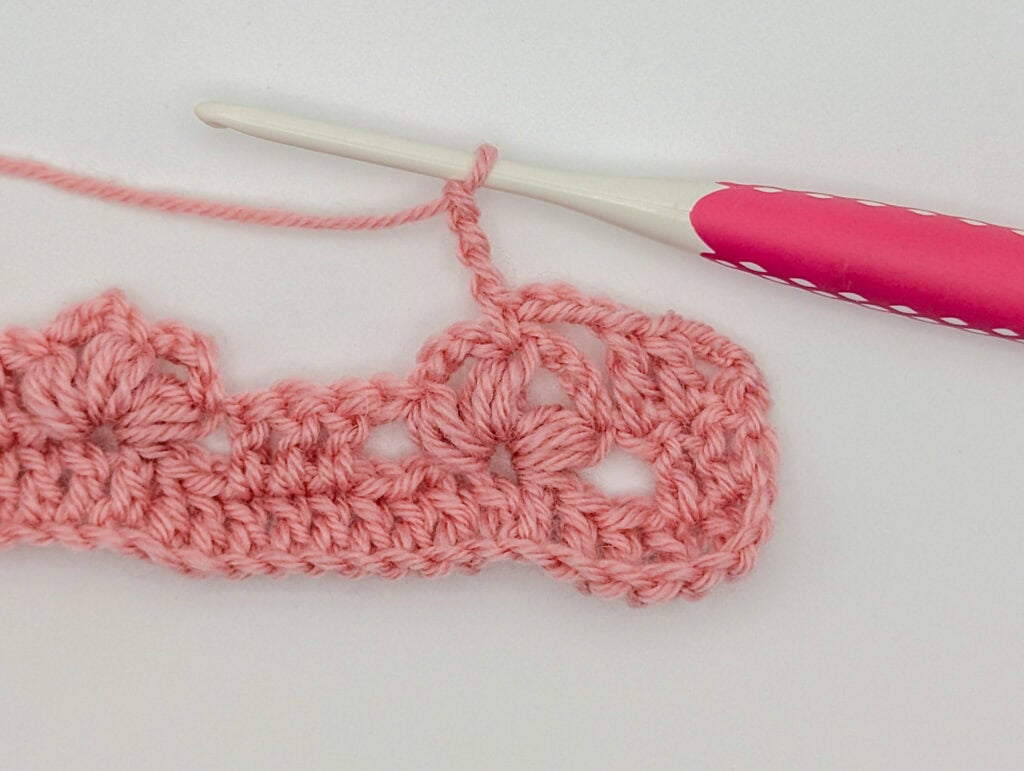
transition between stitch patterns
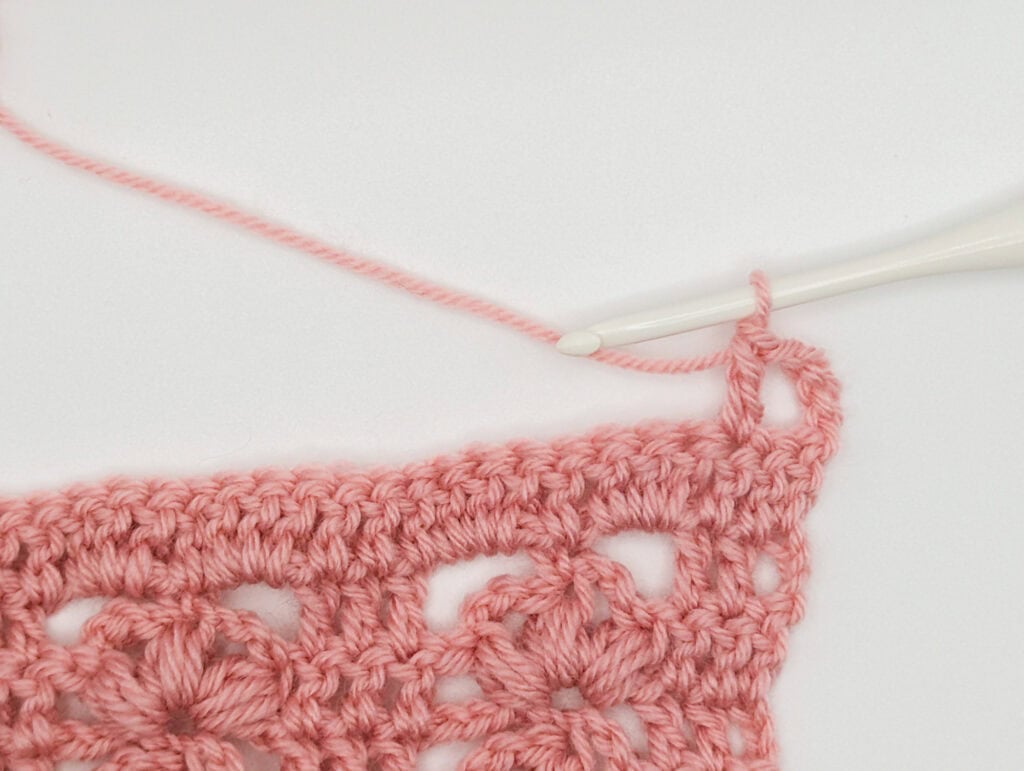
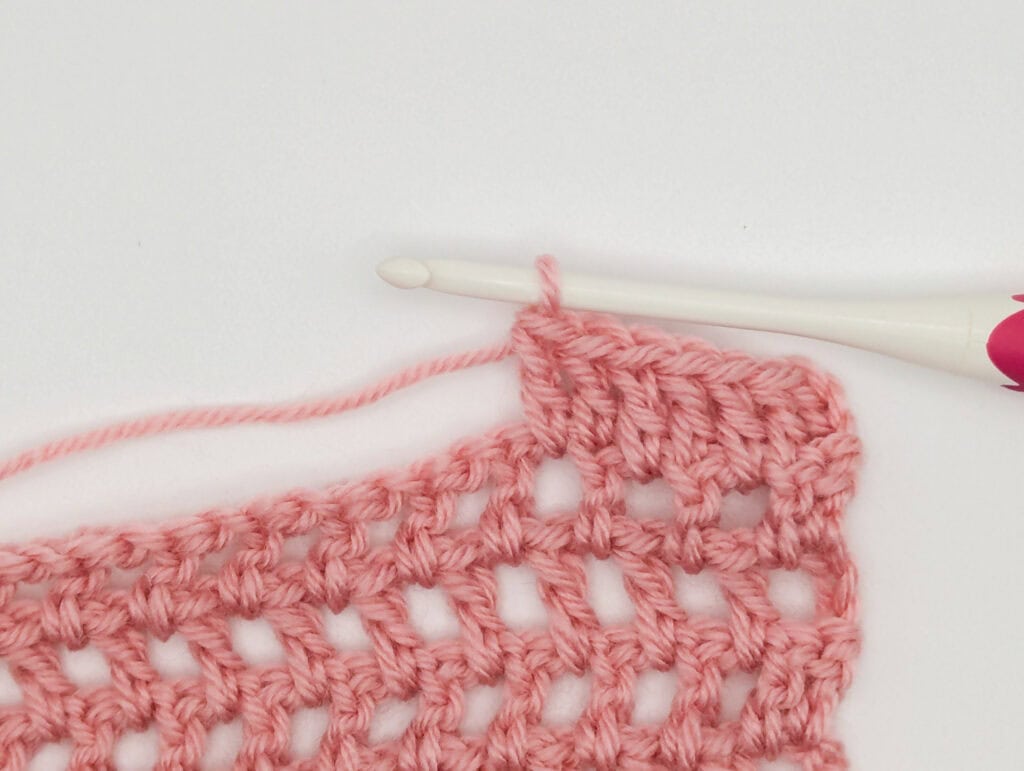
Before beginning the mesh row, we will create a separator row of straight double crochet.
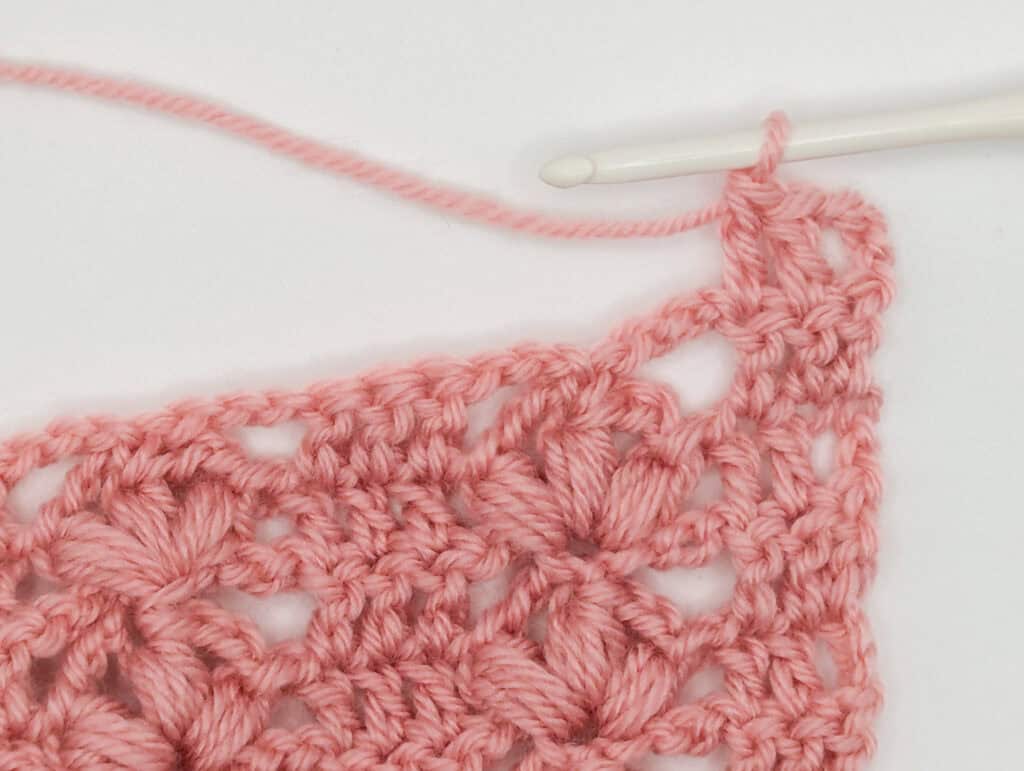
Work 1dc in each dc from prev row, 3dc in each ch3 sp, and 1dc in each sc. (63dc)
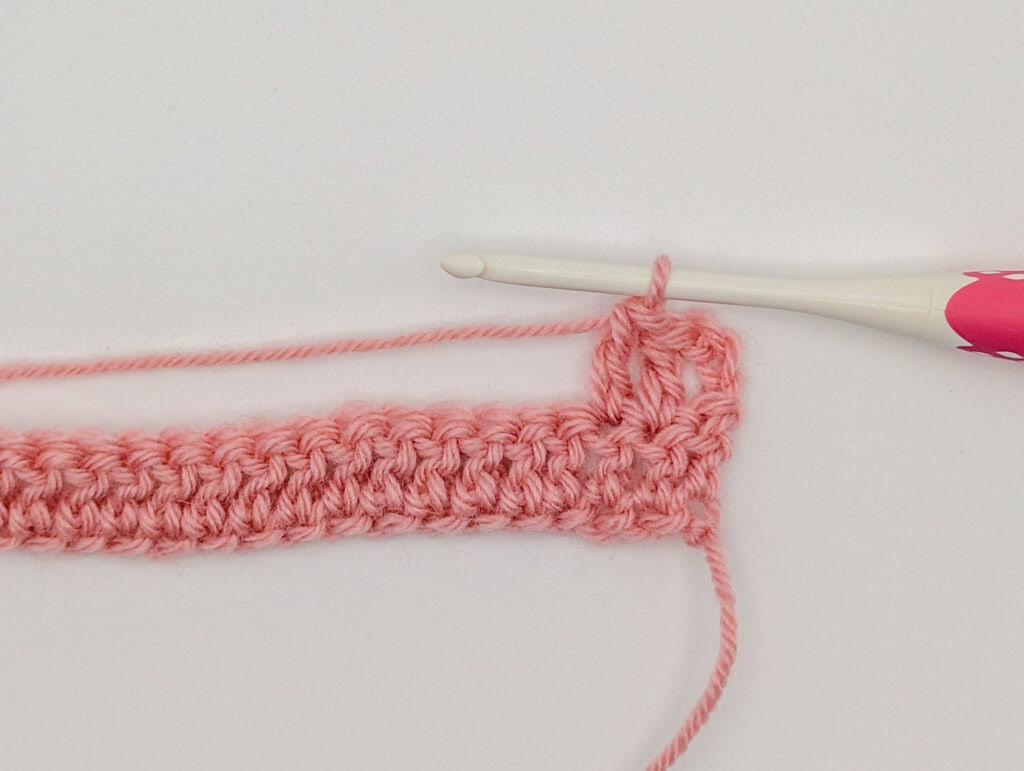
Simple Mesh Stitch Section
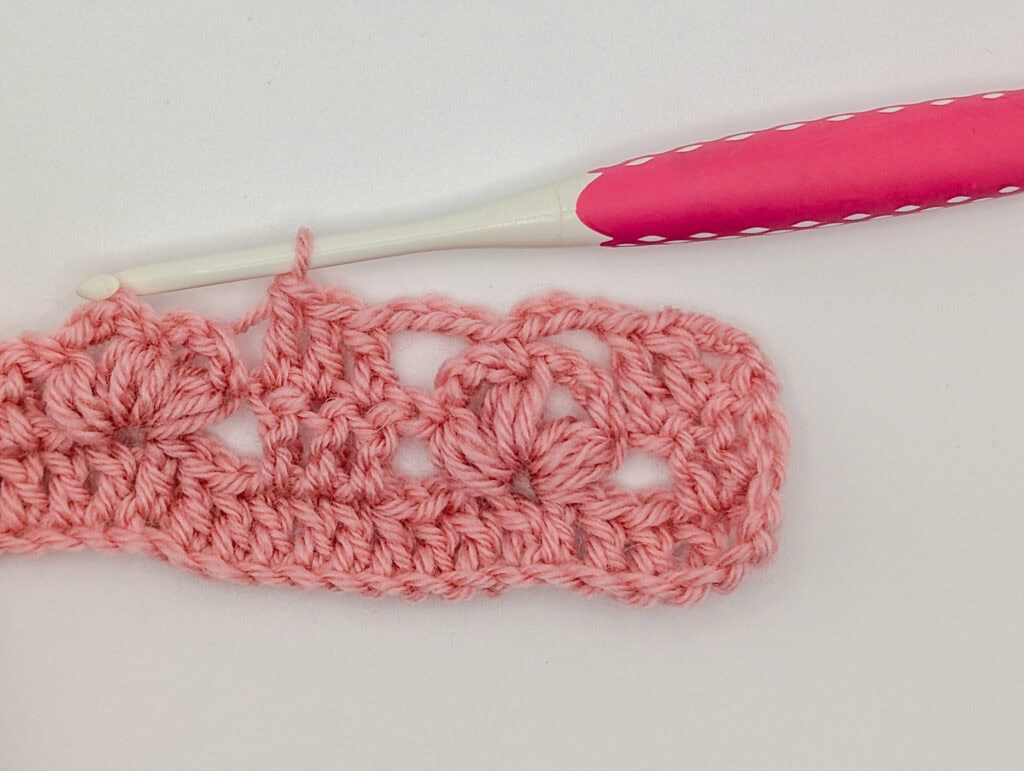
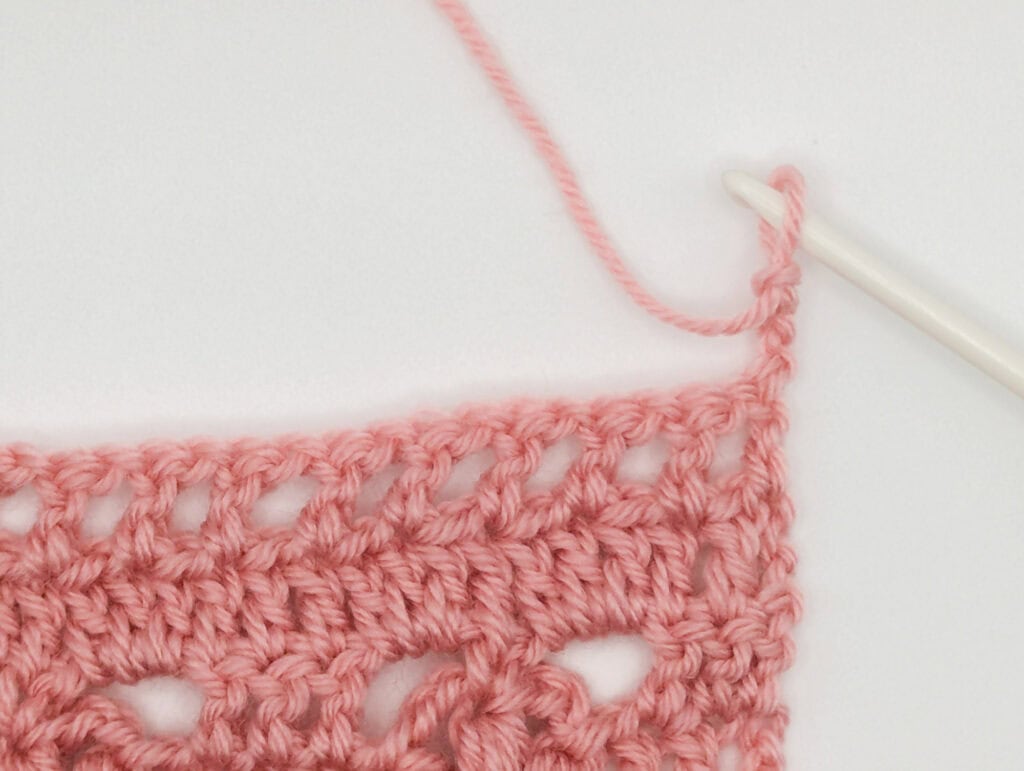
Mesh Row 1
Ch4 (counts as 1dc and ch1), turn, skip the next st, work 1dc in the next st. Ch1, skip 1 st, 1dc in next st.
Repeat: Ch1, skip 1 st from prev row, 1dc in next st to the end of the row.

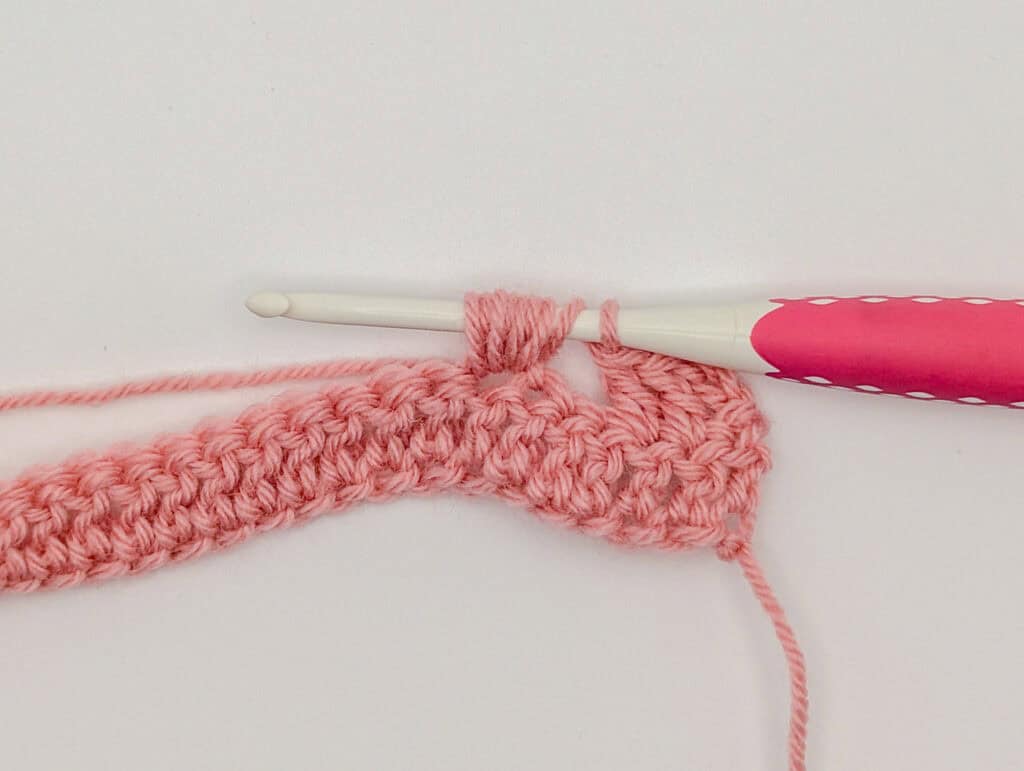
Mesh Row 2
Ch3 (counts as 1dc), turn and work 1dc in the first ch1 sp from prev row. Ch1, skip 1dc, work 1dc into the next ch sp
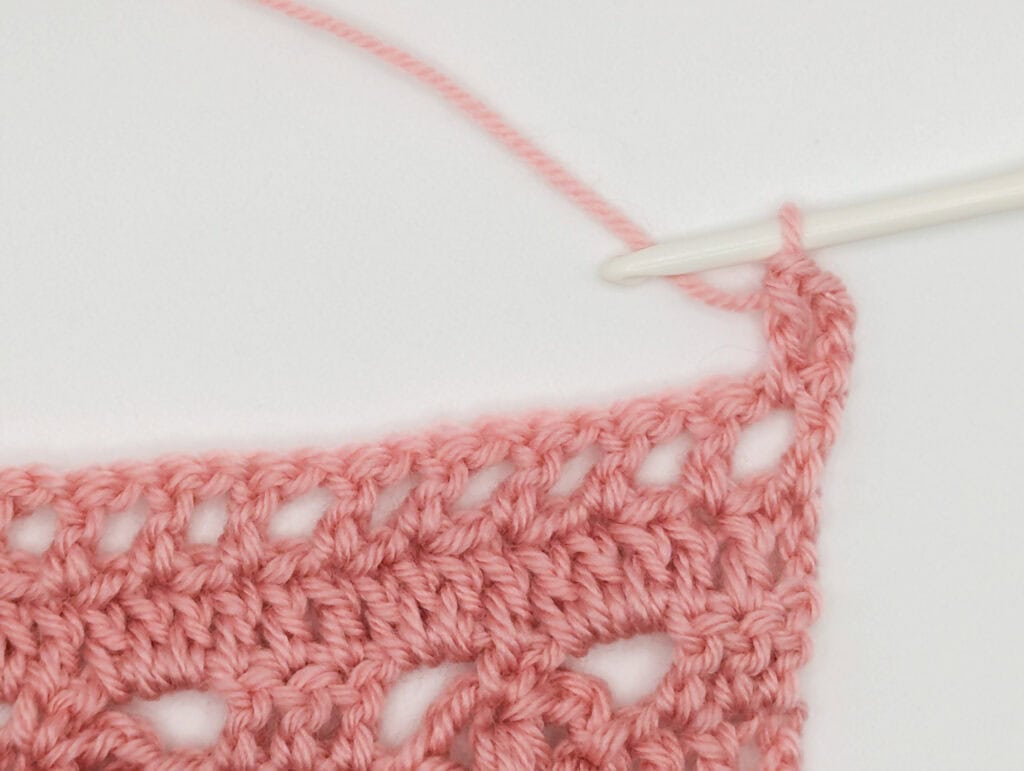
Repeat: Ch1, skip 1dc, work 1dc into the next ch sp to the last ch sp of the row. 1dc in the last dc.
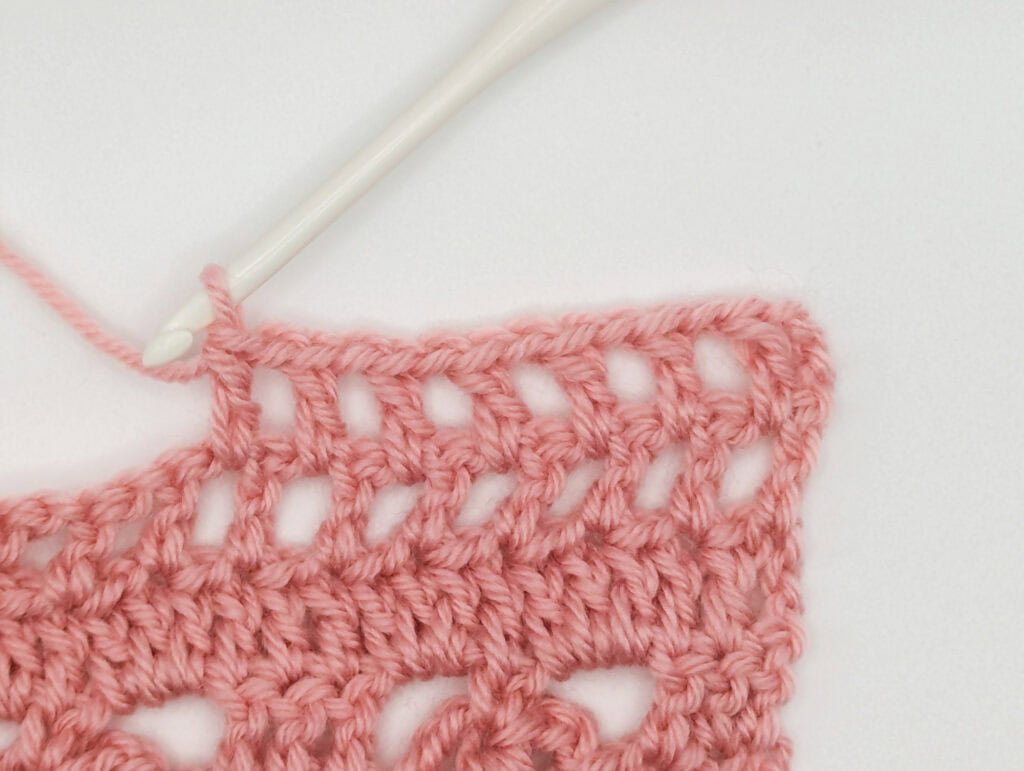
Mesh Row 3
Ch4(counts as 1dc and ch1), turn, skip the first dc and work 1dc in the next ch sp. Repeat ch1, skip 1, 1dc in next ch sp to the end of the row. Ch 1, skip 1 and work final dc in the top of the starting ch3 from prev row.
Repeat mesh rows 2 and 3 once more, then complete a final “row 2” row. You will have 6 total rows of the simple mesh.
Second transition between stitch patterns
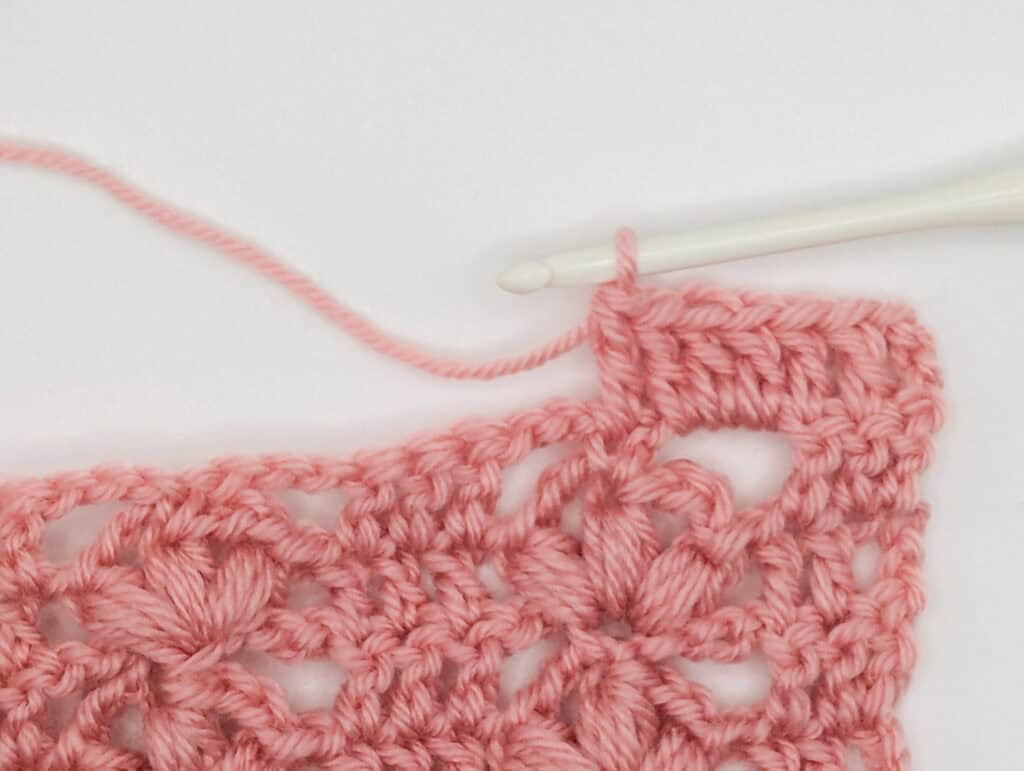
Ch3 (counts as 1dc), turn and make 1dc in each dc and each ch sp from prev row (63dc).
After the row of solid double crochet, you’re ready to begin a new lotus stitch section. Repeat “Aligned lotus stitch” instructions starting on “row 2.”
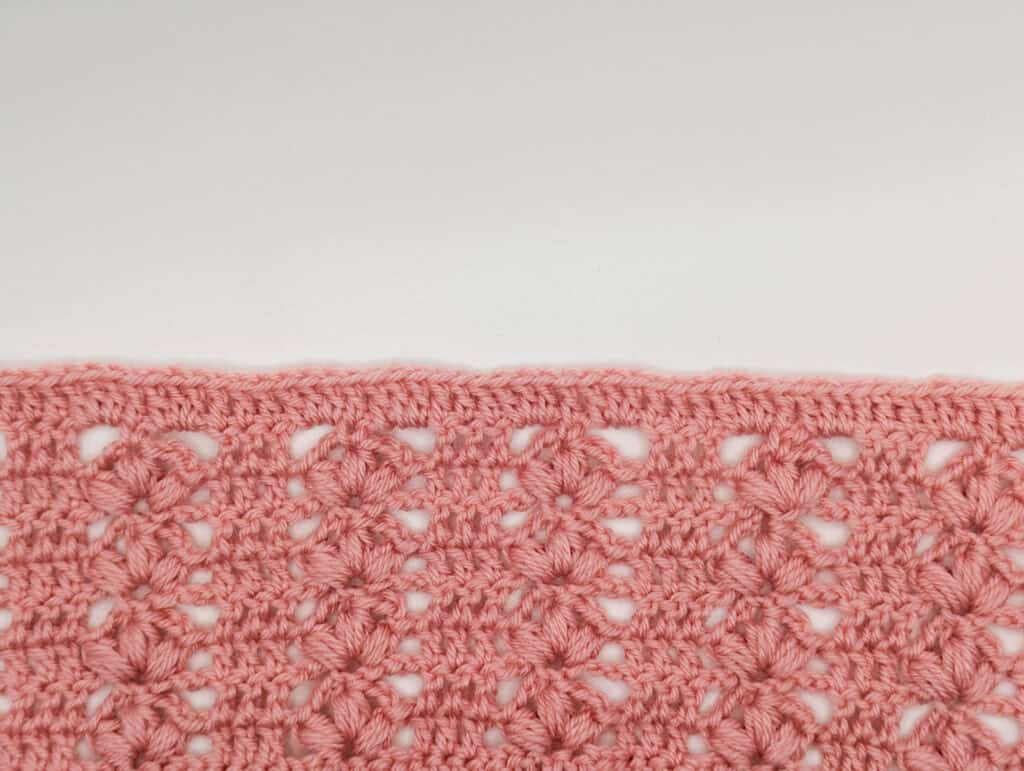
Repeat lotus stitch and mesh stitch sections with double crochet transition rows between them. You may make as many repeats as you’d like! I prefer to end on a lotus stitch section as well so either end of the wrap will match.
My 60″ wrap had 9 lotus stitch sections and 8 mesh stitch sections.
Additional Ideas
I really hope you enjoy making this wrap as much as I enjoyed designing it. There is something so satisfying about a project that looks intricate but is actually very achievable, and I think the lotus lace wrap hits that sweet spot beautifully.
If you’d like to experiment a little, here are a few ideas to make the pattern your own:
Play with length. The 60″ length is generous and lovely, but this wrap only gets better the longer it is. If you have the yarn, keep going! An 80″ wrap gives you so much more to work with when it comes to draping and wrapping styles.
Try a different yarn weight. The pattern is written for DK, but a fingering weight yarn in a silky or linen blend would give you something incredibly delicate and drapey for warmer months. A light worsted would give you something chunkier and cozier for fall. Just remember to adjust your hook size accordingly and check your stitch count after the setup row.
Gift it. A wrap like this is one of those handmade gifts that feels special to receive. Made in someone’s favorite color, it’s personal and beautiful and useful. It’s the kind of thing people actually wear.
If you make this pattern, I would love to see it! Feel free to share your finished wrap and tag me, it genuinely makes my day to see what you all create.
Keep the Crafting Delightful!