
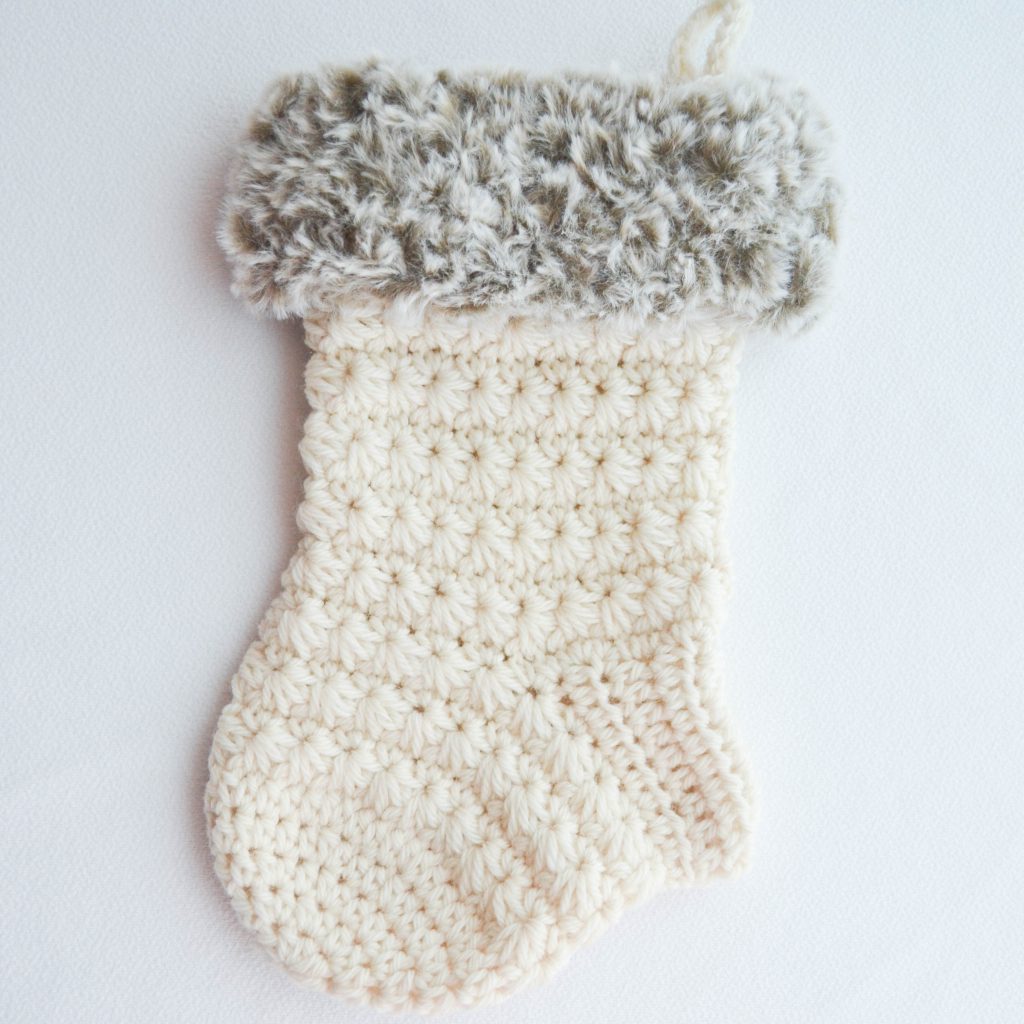
Faux fur yarn can be used to create a fur topper for any sized Christmas stocking, with just a few quick steps.
Just a few days ago, the first original Christmas stocking design was released here on Amelia Makes. In the same download, there are directions for adding an optional fur topper.
However, it is really easy to crochet one of these for any size Christmas Stocking! I’m going to walk you through a few simple steps for how you can accomplish this.
About This Project
Whether you are using store bought Christmas stockings, previously handmade ones, or making something new, adding fur toppers is an easy addition. Crocheting them is one easy option that can be customized with very little effort, and only a few supplies.

Prefer the PDF Version?
Grab the ad-free, printable PDF pattern.
You can view it on your computer, phone or tablet or download and print it at home.
Materials Needed
For crocheting your own fur stocking topper, you’ll need:
- Several yards of fur yarn (I really enjoy, and prefer to use, the go for faux yarn from Lion Brand).
- A fairly large hook, such as a k/9.00mm
- Stitch markers-these may not be strictly necessary, but can be especially helpful when working with fur yarn.
- A needle and smaller yarn/thread for attaching your fur topper to your stocking.
Skill Level
Crocheting a fur topper is extremely simple. All it involves is a foundation chain and crocheting a tube with single crochet and slip stitches– easily a beginner level project.
However, working with fur yarn makes things a little more interesting.
Part of what makes fur yarn so wonderful-its fluffiness and thick size- can also create challenges. Individual stitches are very difficult to see with this yarn. When counting stitches, it is necessary to feel for the stitches that you need to work into.
Personally, I have found that working with yarn such as Go For Faux has a lot to do with your personal comfort level, not necessarily with skill. Since crocheters and knitters alike have mostly been “trained” to tell stitches apart by looking at them, not being able to see simply puts us out of our element.
However, if you have enough experience to recognize the parts of a stitch, and are willing to get familiar with feeling for them, then I think this yarn is more than worth the effort.
Even though it works best to feel for stitches with fur yarn, you don’t necessarily need to do it for every stitch.
How to Add a Fur Topper to any Stocking
Measuring and sizing
To get started, you can either measure around the opening of your stocking, or go right into chaining the number of stitches that you need. For either method, make sure that you are going +around the outside of your stocking, rather than the inside.
To measure, you can use a flexible measuring tape to go around your stocking and note how many inches it is. If using a rigid ruler, you can lay your stocking flat, measure one side, and double the measurement. If your stocking is especially thick, you may also want to add a little extra to that measurement to account for where the stocking is folded.
If you don’t have a measuring tape or ruler on hand, or if you’d like to just skip this step, it is possible to go straight to chaining the length that you need for your topper.
Crocheting the topper piece
To start the topper, chain as many stitches as it takes to go around the top of your stocking. If you measured your stocking, you can simply use that number as a guide. If you didn’t measure, simply work chain stitches until you are able to wrap your chain around the top of your stocking with the ends touching (without stretching your work). Add one or two more chains, and ss the first and last stitches to join your round. If you choose to download the pdf directions for the star stitch stocking, you’ll see that there are already exact stitch counts included for that size of fur topper.
After setting up the foundation chain, making the fur topper is as simple as working rounds of single crochet until your topper is the width that you want. This will depend on how large your stocking is, as well as your own personal preference. Whenever you have enough rounds, you can bind off the yarn and trim the yarn ends short (ends of the fur yarn can’t really be woven in, and trimming them short hides them right away).
Attaching the fur topper to your stocking
When the fur portion is done, how you attach it to the stocking will depend on what kind of stocking you have.
If you have a stocking that is knit or crochet, you can use a tapestry needle and some yarn to quickly stitch the top of the fur topper to the stocking.
You can use the whipstitch, running stitch, or any other basic hand sewing stitch for this step. You can even use a smaller hook and use slip stitches to crochet the two pieces together.
If your stocking is made of fabric or very tightly woven, a tapestry needle may not work. Unless you have a very small crochet hook, slip stitches are probably not a practical choice. In this case, using a regular sharp sewing needle and sewing thread is a better choice.
Whatever type of stocking you have or method you use, using smaller yarn or thread and working fairly small stitches will help you create a discreet join.
Keep the Crafting Delightful!
Amelia
Crocheting a fur topper for your Christmas stockings will give them a whole new look and use only a little bit of fur yarn for each one.
You might also like:
PS: Don’t forget to pin this for later!


Pingback: The 2020 Crochet (Christmas) Spree ~ Amelia Makes