Making Small Pom Poms With a Fork
Why buy when you can make? Pom poms are one of those craft add-ons that can take even the simplest finished project and give it a burst of personality and fun. Best of all, you can make all sorts of different size pom poms with no additional tools (although those special pom pom makers at the craft store can come in handy sometimes).
If you have a fork in your kitchen drawer, you already have everything you need to get started making pom poms.
Curious about other DIY pom pom options? I also made my own pom pom aid in this post HERE
I’ll also be walking you through how different yarn types and fork sizes change the look and feel of your finished pom poms, so you can get exactly the results you’re after.
Jump to:
- Making Small Pom Poms With a Fork
- Free Crochet projects that love a pom pom
- What You Need to Make Fork Pom Poms
- How Fork Size and Yarn Weight Affect Your Pom Poms
- Cotton vs. Acrylic: How Yarn Type changes the look of your pom pom
- How to Make a Pom Pom With a Fork: Step-by-Step
- What to Do With Your Fork Pom Poms
- Final Thoughts
Free Crochet projects that love a pom pom
If you’re already excited about pom poms, here are some of my free patterns where pom poms make a wonderful finishing touch:
- Crochet Pillow Cover
- Herringbone Baby Bonnet
- Julia Baby Booties (consider adding mini poms to the laces)
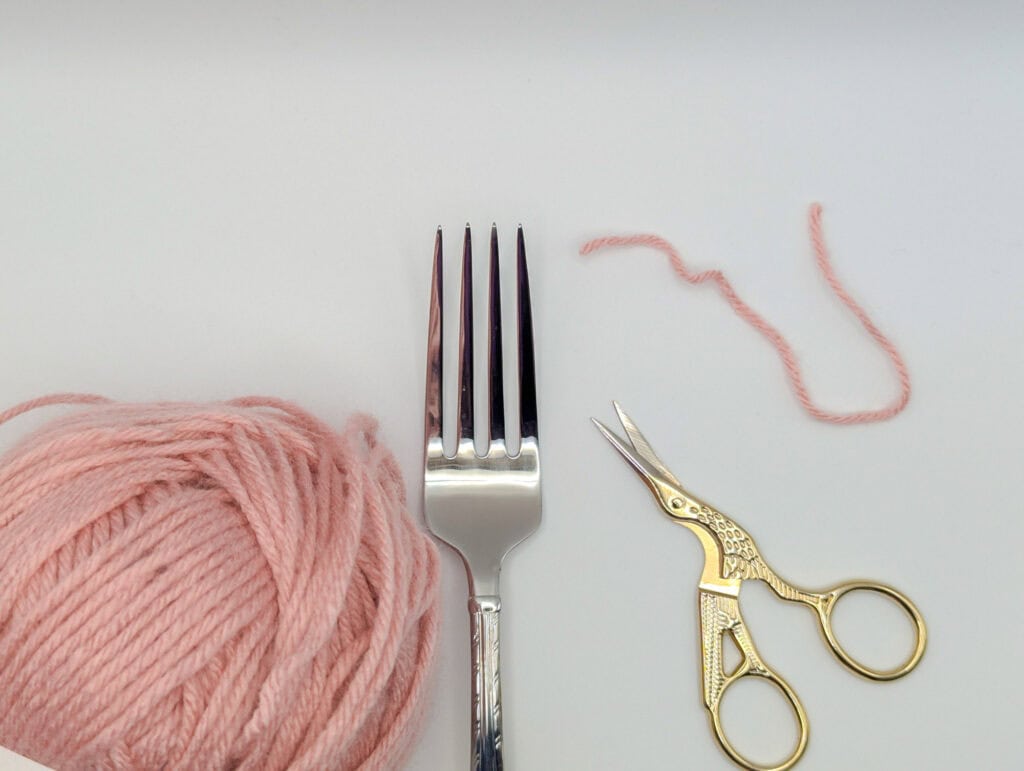
What You Need to Make Fork Pom Poms
The supply list here is wonderfully short:
- A fork (more on sizing below!)
- Yarn in any weight or fiber
- A pair of scissors
- A short length of yarn or thread for tying
That’s it. No pom pom maker, no cardboard, no special notions required.
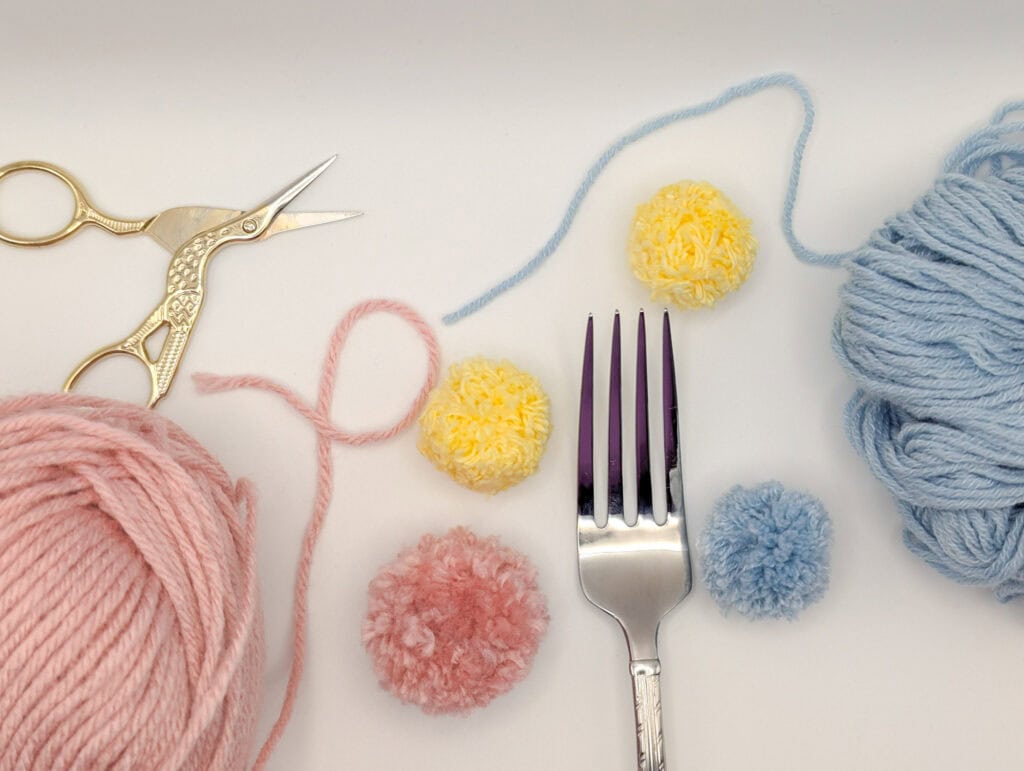
How Fork Size and Yarn Weight Affect Your Pom Poms
This is one of the most fun things to experiment with, because small changes in your tools and materials lead to noticeably different results.
Fork size is the main factor controlling the overall diameter of your finished pom pom. A standard dinner fork will give you a small, tidy pom pom, around 1 to 2 inches across. A wider salad or serving fork will yield a slightly larger, fuller pom pom. If you want to go even smaller, a cocktail fork would make a tiny pom pom, although it may be fiddly to tie and cut but it would be fun to try!
Yarn weight can also affect the size of the pom pom.
- Lace or fingering weight yarn would require extra wraps around the fork and, depending on how you trim the resulting pom, can make one that is quite small.
- Sport or DK weight yarn trimming a pom made of these yarns could yield a very dense, and small pom pom
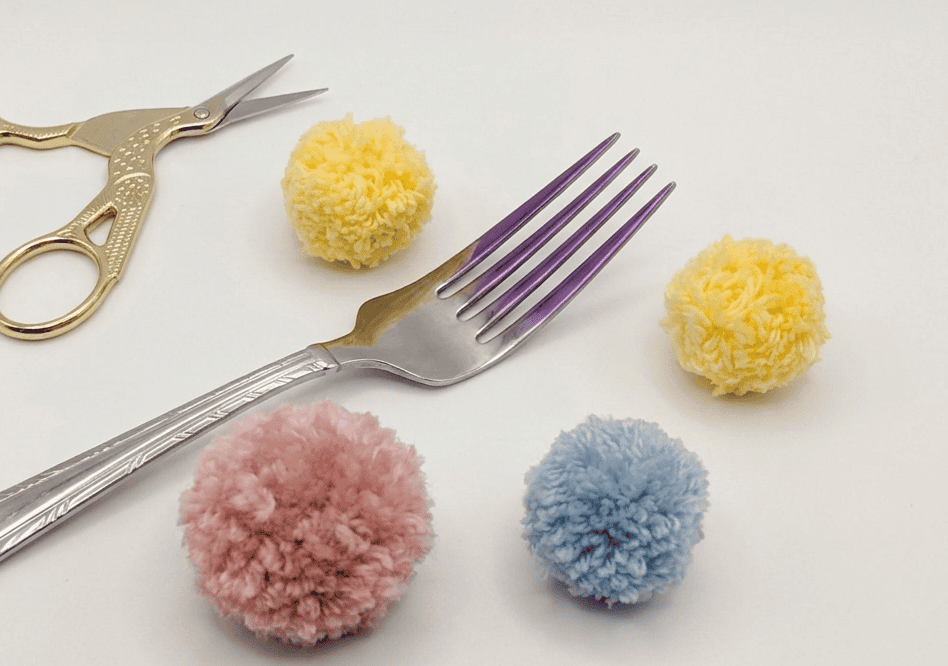
- Worsted weight yarn would make a very standard homemade looking pom like the ones you see pictured in this article
- Bulky yarn great for a large serving fork and can create a unique modern pom for the tops of hats
In general, more wraps mean a fuller, rounder pom pom. Fewer wraps give you something lighter and a little more relaxed. There’s no single right answer here, so it’s worth experimenting to see what you like best!
Cotton vs. Acrylic: How Yarn Type changes the look of your pom pom
Beyond weight, the fiber content of your yarn makes a big difference in how your finished pom pom looks and feels.
Cotton Yarn: Rustic and Understated
Cotton yarn produces pom poms with a more structured, matte appearance. The fibers don’t separate and fluff outward the same way synthetic fibers do, so the finished pom pom has a tighter, more compact look with a slightly rustic, natural feel.
This makes cotton pom poms a beautiful choice for earthy, bohemian, or farmhouse-style projects. They hold their shape very well over time and don’t pill the way some acrylics can.
Acrylic Yarn: Fluffy and Full
Acrylic yarn is where you get those big, cloud-like pom poms that really pop. The synthetic fibers fluff up beautifully when trimmed and brushed, giving you that classic round, fluffy look.
If you’re making pom poms for a garland, a hat topper, or anything where you want a playful, eye-catching effect, acrylic is your best friend. It’s also typically very affordable and comes in an enormous range of colors.
A quick tip: after trimming your acrylic pom pom, try gently brushing it with a soft-bristled brush or even a pet slicker brush. It opens up the fibers even more and gives you an even fuller, rounder finished pom pom.
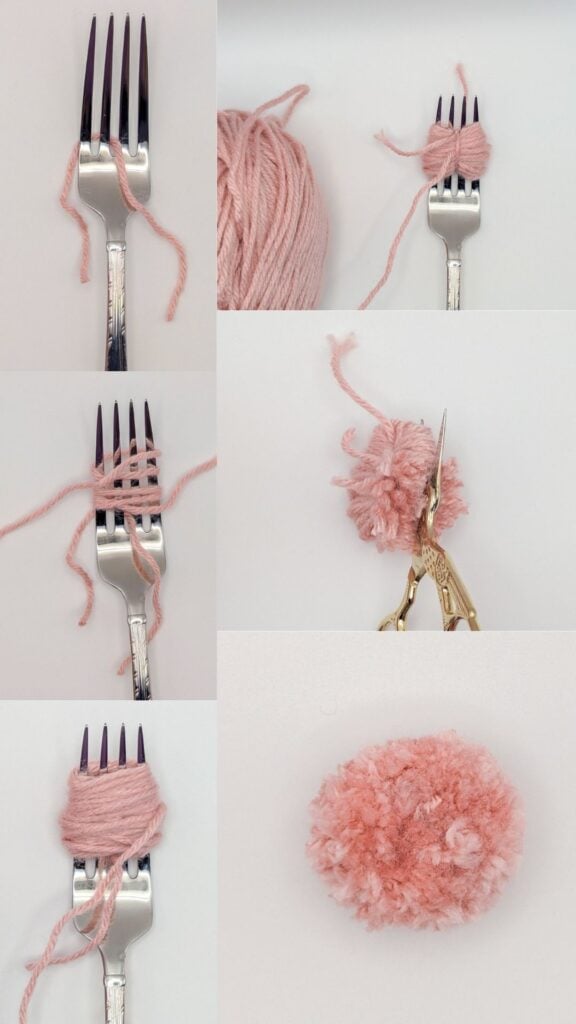
How to Make a Pom Pom With a Fork: Step-by-Step
Okay, here we go! Grab your fork and yarn and follow along with these simple steps:
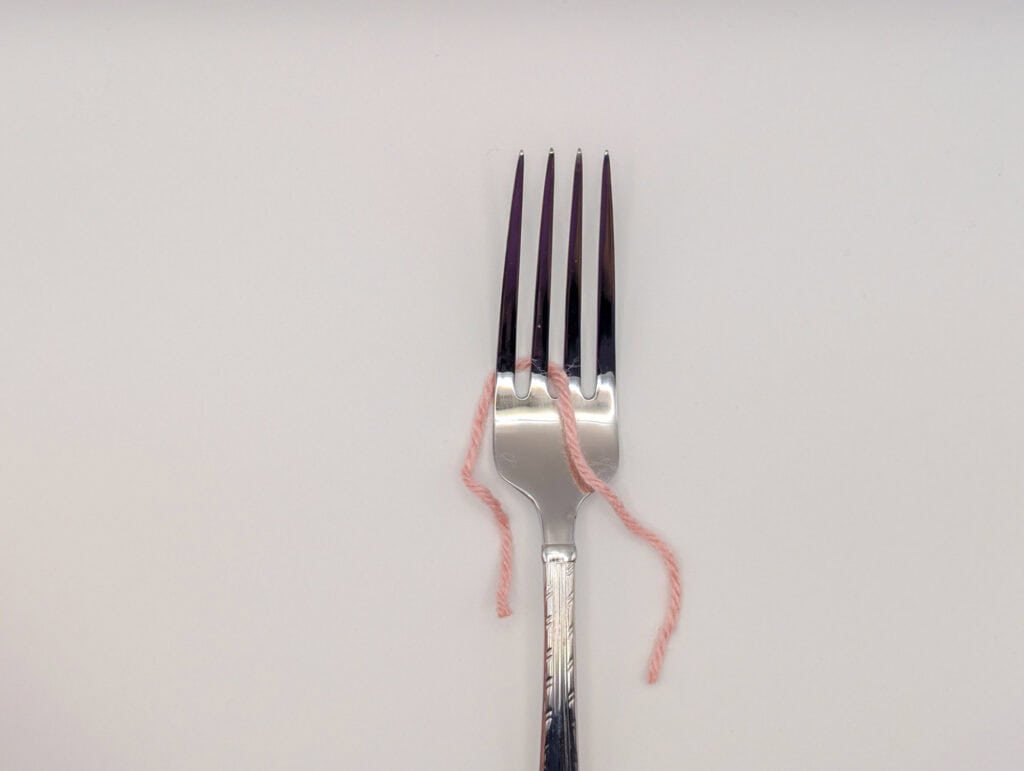
Cut a short tie piece first. Cut a piece of yarn about 8 inches long and place it through the center notch in your fork. You’ll use this to tie off your pom pom.
Start wrapping. Hold the tail of your yarn against the back of the fork and begin wrapping the yarn lengthwise across the fork prongs, going around and around. Keep your wrapping tension even and consistent.
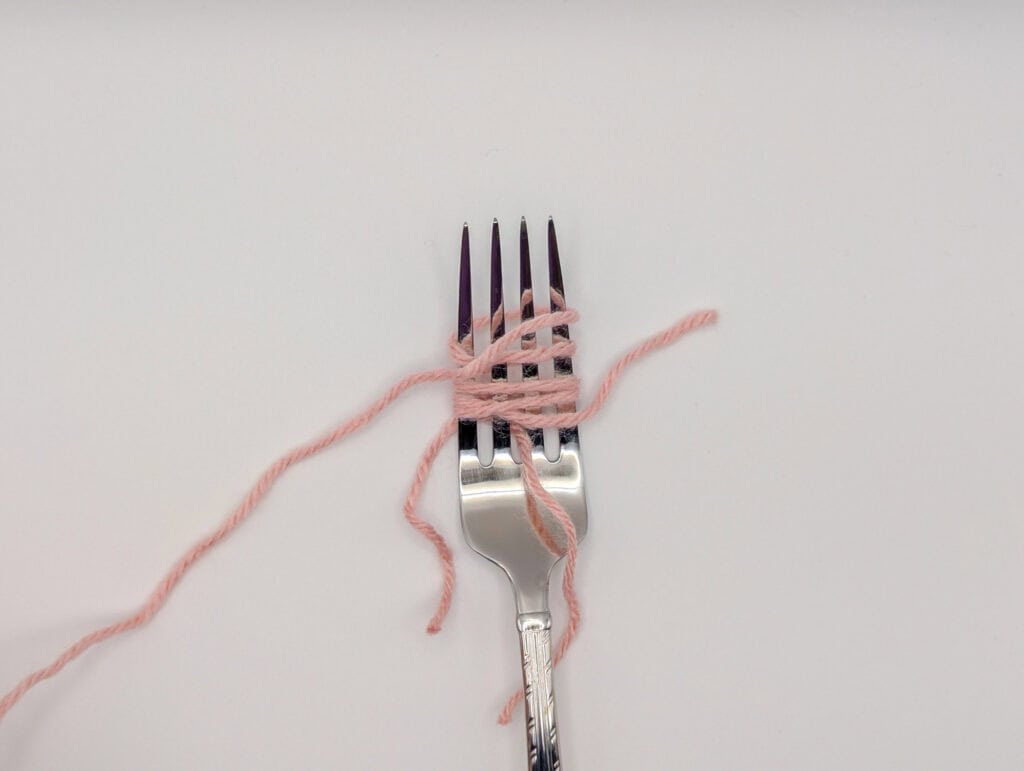
Keep wrapping. For a full pom pom in worsted weight yarn, aim for around 50 to 80 wraps. For thinner yarn, you may want more. For bulky yarn, fewer wraps will do. Don’t worry about being exact, more wraps mean more fullness!

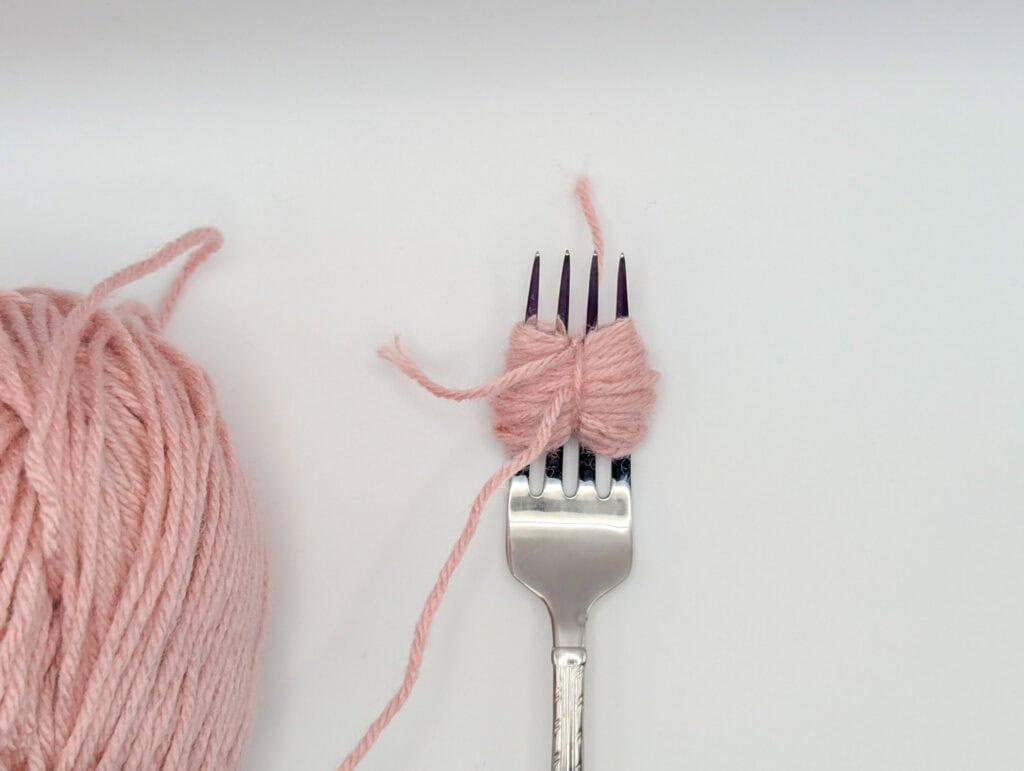
Tie it off. Using your yarn tying strand that is waiting in the perfect spot, tie it tightly around all of your yarn wraps. Making sure that this yarn is secure is very important, I’ve definitely lost a pom or two!
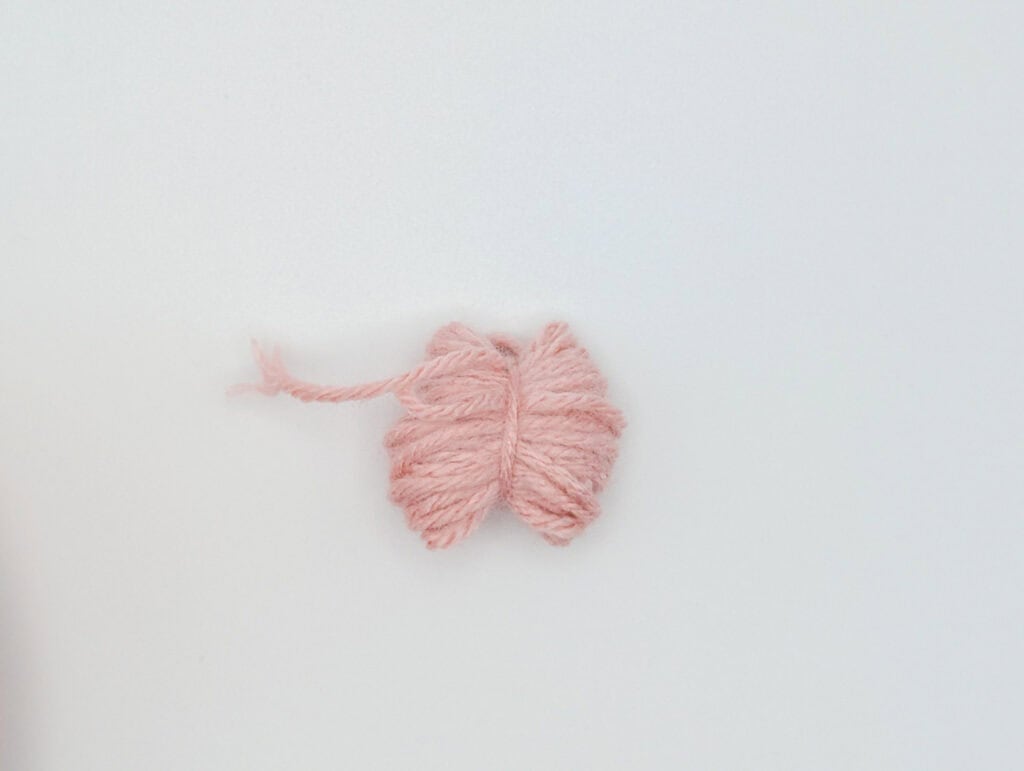
Slide off the fork. Carefully slide your bundle of wrapped yarn off the fork tines, keeping that center knot tight. Once it’s off the fork, consider crossing your tying strand and knotting it again under the pom.
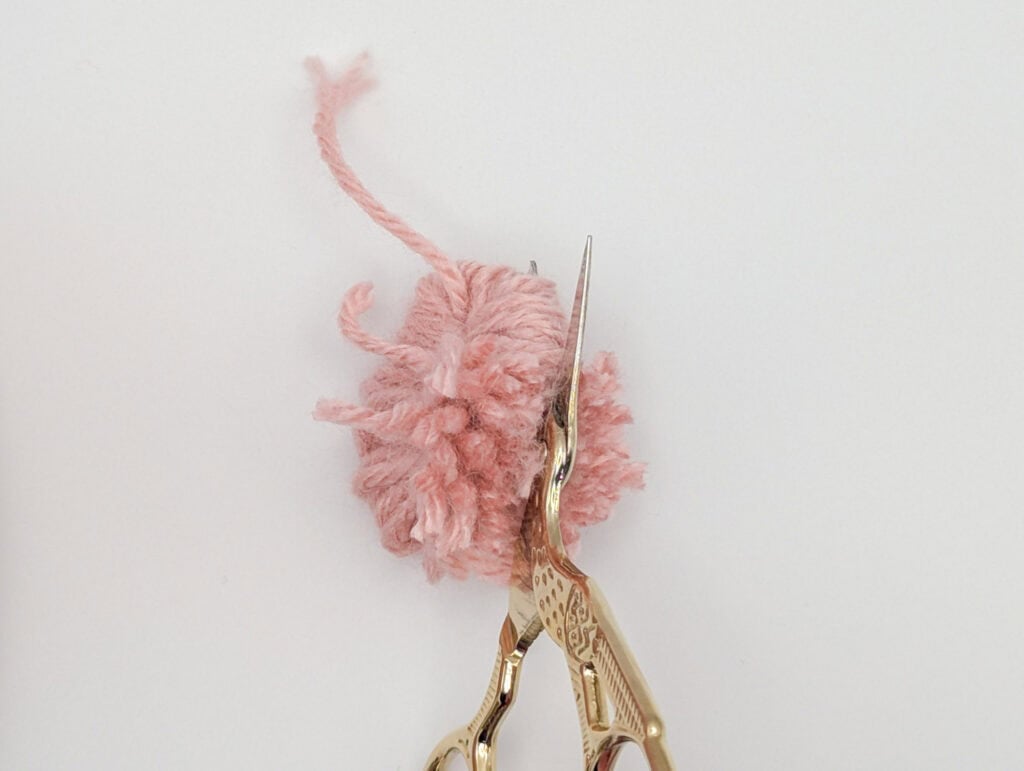
Cut the loops. Use your scissors to cut through all the loops on both sides of the center knot. And, although this pretty pair of craft scissors is in the picture, I did in fact have to run and grab the stronger kitchen scissors to make this easier to do.

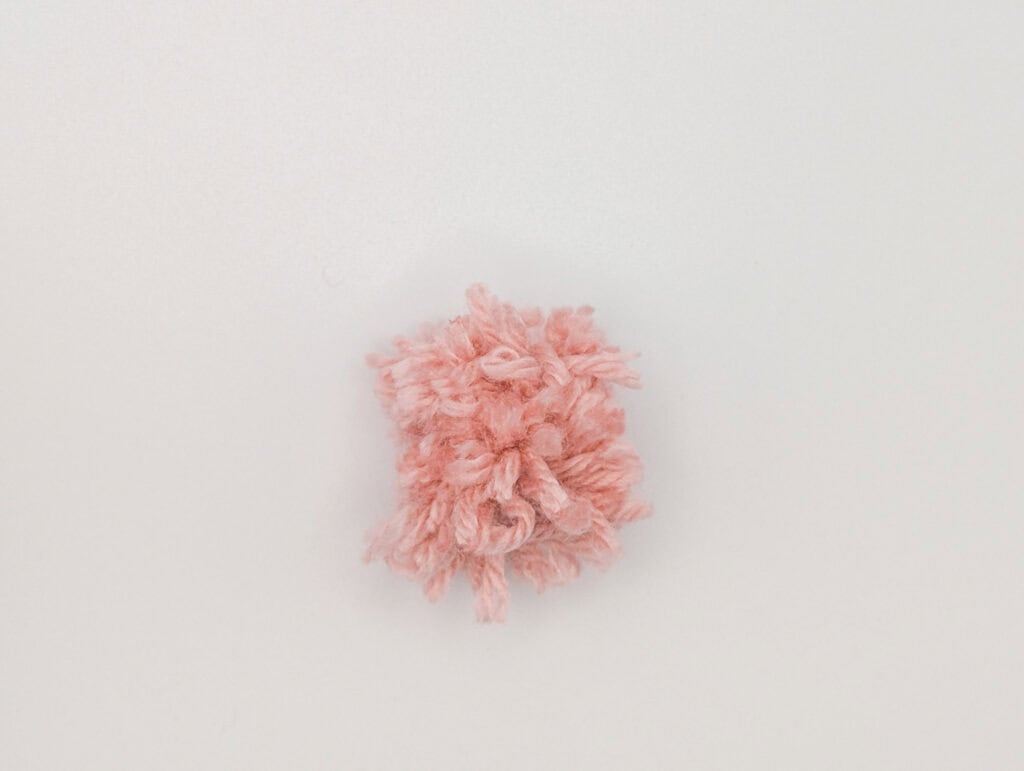
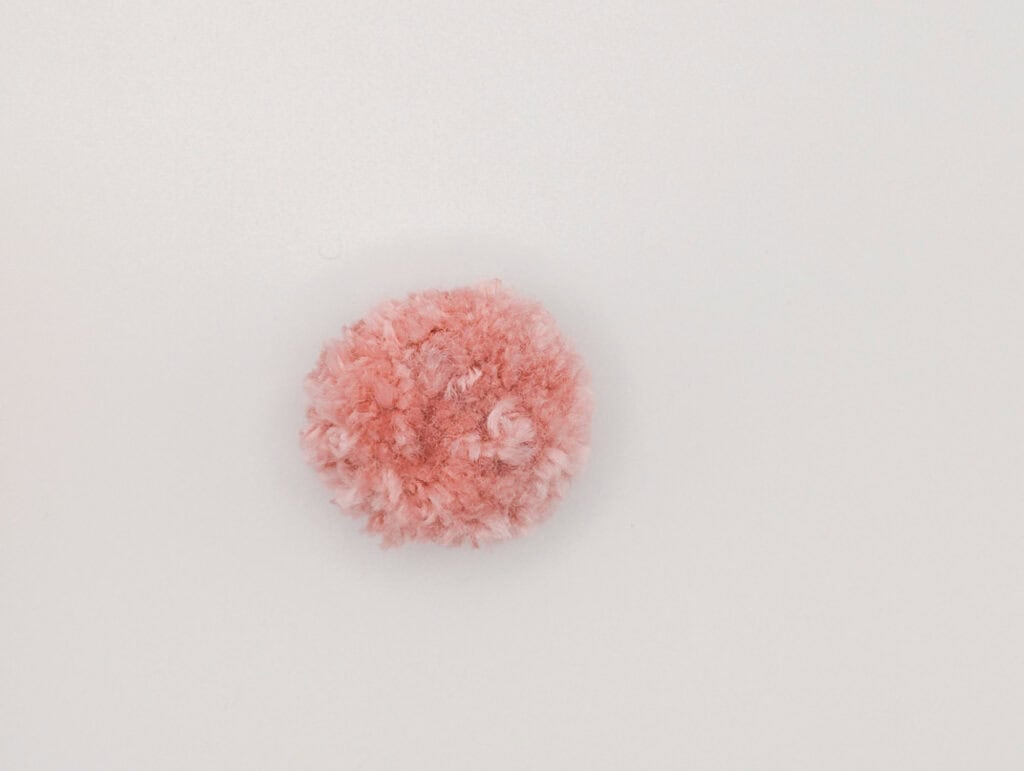
Trim and shape. Fluff your pom pom out and then trim any uneven ends to create a nice, round shape. Don’t be afraid to trim generously. The more you shape it, the better it looks! It also makes the pom smaller
What to Do With Your Fork Pom Poms
Now that you know how to make them, the fun part: putting them to use! Here are some ideas to get you inspired:
- Pom pom garland: String a series of pom poms onto a length of twine or thin cord, spacing them evenly, for a charming and customizable garland. You can do all one color, a gradient, or a cheerful mix of colors. These look wonderful strung across a mantel, along a bookshelf, or above a child’s bed.
- Hat toppers: A single pom pom on top of a crocheted or knitted hat is a classic for a reason. Fork pom poms in a worsted or bulky weight work perfectly for this.
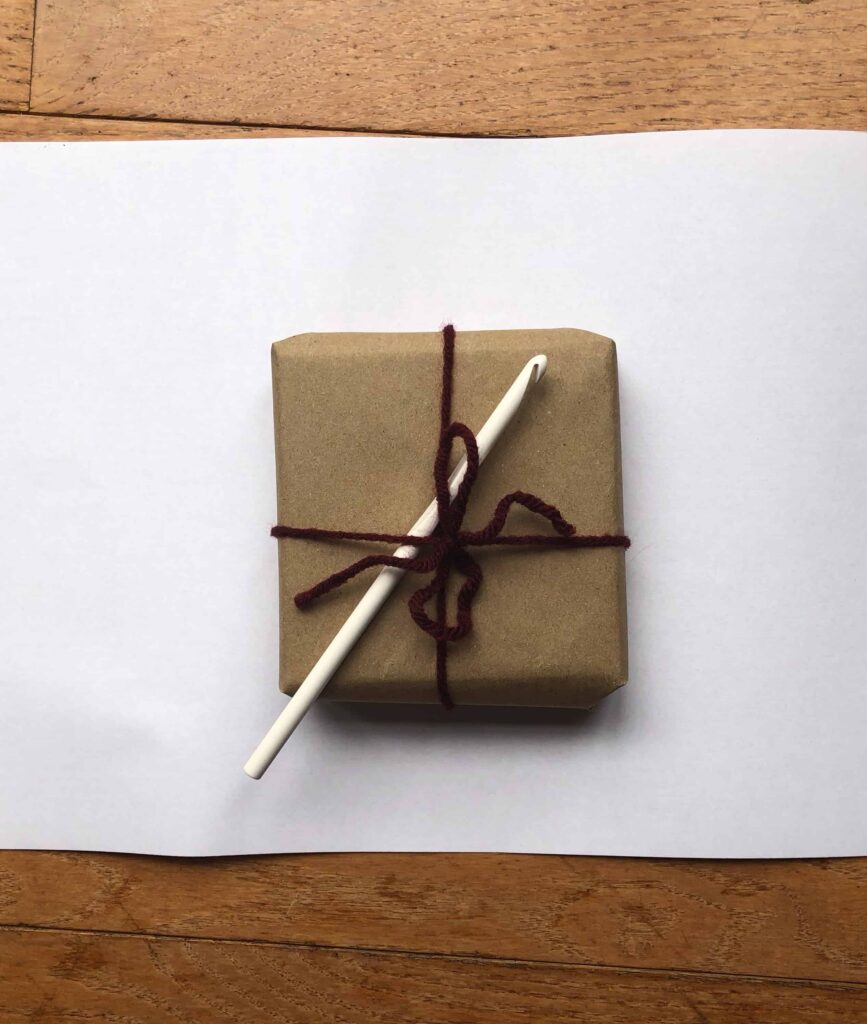
- Gift wrap embellishment: Instead of a bow, tie a pom pom onto your wrapped gift. It’s reusable and a lot more personal.
- Bag charms: Attach a pom pom to a zipper pull or bag handle for a fun, textural accent.
- Bookmarks: Attach a small pom pom to a ribbon or length of yarn for an adorable handmade bookmark.
- Wreath embellishments: Tuck pom poms into a wreath for a cozy, textural look that works for almost any season.
- Pillow or blanket trim: Stitch a row of pom poms along the edge of a pillow cover or throw blanket for a playful, finished look.
I recently put this technique to good use, making several pom poms for a darling Easter garland! I documented the process in this post:
Final Thoughts
Making pom poms with a fork is one of those techniques that sounds a little strange at first but once you try it, you’ll love how easy it actually is. The best thing about this method is that you can make use of scraps in your stash at no additional cost! So pull open that yarn stash, grab a fork, and see what you can make!
If you give this a try, I’d love to see your results. Tag me on Instagram at @ameliamakesblog so I can cheer you on!
Keep the crochet delightful,
Amelia