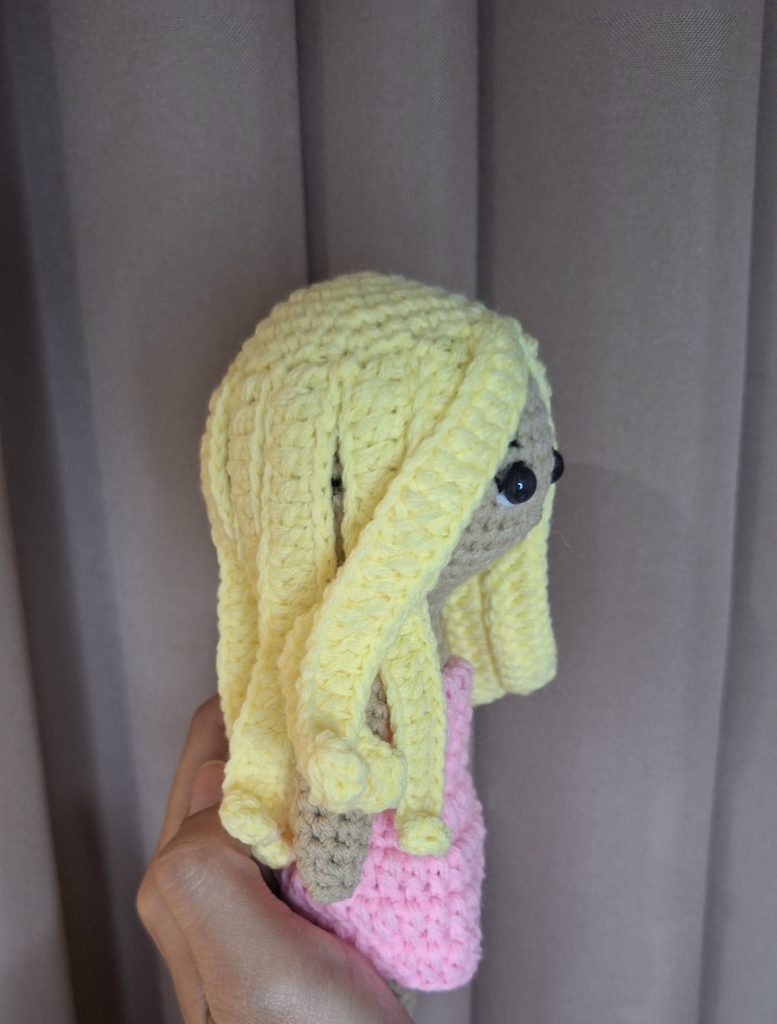
Crochet this simple and easy amigurumi doll with an adorable pink dress that makes as a meaningful gift for our little ones!

Growing up, I used to love playing with dolls, and having a pretend tea party where all my friends (the dolls) get together and drink tea. These were great times!
As I got older and learned how to crochet, I realized I could create my own amigurumi dolls and design them any way I liked. This really excited me, especially as we started diving into amigurumi here at Amelia Makes.
That’s why we decided to design and crochet this adorable and easy amigurumi doll that is inspired by Barbie!
I wanted to make this pattern easy and beginner-friendly, especially if you’re new to amigurumis. So, if you’re just starting out with amigurumis, this is a great first pattern to practice with, and it makes as a perfect gift for a little girl!

Prefer The PDF Pattern?
Grab the ad-free, printable PDF pattern.
You can view it on your computer, phone or tablet or download and print it at home.
Tips on How to Crochet Amigurumis
Amigurumis have become a trend over the last few years. They are so much fun and fulfilling to crochet, because you’re mainly crocheting it for our little loved ones!
Learn the Basic Stitches
If you’re going to start crocheting amigurumis, I recommend not being an absolute beginner at crocheting in general. It’s important that you already know and practiced the basic stitches.
Learn the Magic Circle
It’s also important for you to know and practice the magic circle and learn how to work in rounds, as that’s what amigurumis are all about.
Learn How to Sew
With most amigurumis, not all of them, you’ll need to learn how to sew the pieces together. With this amigurumi doll pattern below, you’ll see that we separately crochet the head, body, arms, and legs. At the end, we sew all the pieces together for the final result!
Materials Needed for Crochet Amigurumi Barbie Doll
- Acrylic Yarn approx. 110 yards of yarn
- Crochet Hook Size D/3 – 3mm
- Flat eyes
- Fiber fill
- Yarn needle
- Glue
- Scissors
Abbreviation Used
- R- round
- Ch- chain
- mr- magic ring
- Sc- single crochet
- Dc- double crochet
- slst- slip stitch
- Sts- stitches
- Inc- increase
- dec- decrease
Reminders
- Always count stitches of every round
- For this pattern, I used joining rounds
- Secure ends by sewing
Doll height: 7 inches
The Head

Stuff as you go
- R1: (beige)
- Mr, ch1, make 6sc inside the ring, slst
- R2: ch1, inc×6, slst (12sc)
- R3: ch1, (inc, 1sc)×6, slst (18sc)
- R4: ch1, (inc, 2sc)×6, slst (24sc)
- R5: ch1, (inc, 3sc)×6, slst (30sc)
- R6: ch1, (inc, 4sc)×6, slst (36sc)
- R7: ch1, (inc, 5sc)×6, slsr (42sc)
- R8-R12: ch1, 42sc, slst
- R13: ch1, (5sc, dec)×6, slst (36sc)
- R14: ch1, (4sc, dec)×6, slst (30sc)
- R15: ch1, (3sc, dec)×6, slst (24sc)
- R16: ch1, (2sc, dec)×6, slst (18sc)
- R17: ch1, (1sc, dec)×6, slst (12sc)
Do not cut yarn, continue to neck
The Neck
R18- R20: ch1, 12sc, slst
Do not cut yarn, continue to shoulder to body.
Shoulder To Body
- R21: ch1, inc×12, slst (24sc)
- R22: ch1, (inc, 2sc)×8, slst (32sc)
- R23: ch1, 4sc, skip 8 sts, 8sc,
- skip 8 sts, 4sc, slst, (16sc)
- R24-R30: ch1, 16sc, slst

Arms X2
Start anywhere the armhole
R1-R10: ch1, 8sc, slst
R11: ch1, dec×4, slst (4sc)
Secure ends

Legs X2
Start in the middle part of the body
Ch2 then slst to the other side, turn
R1-R12: ch1, 10sc, slst
R13: ch1, dec×5, slst
Repeat R1-R12 for the other leg
Secure ends

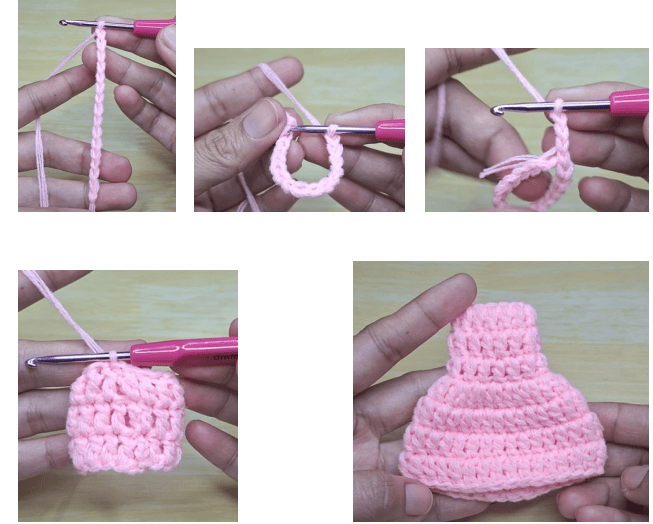
The Dress
Use the light pink yarn.
R1: ch15, slst to the other side, ch3 then
make 1dc in each sts, slst
R2- R3: ch3, make 1dc in each sts, slst
R4: ch3, make dc inc in each sts, slst
R5-R7: ch3, make 1dc in each sts, slst
Secure end
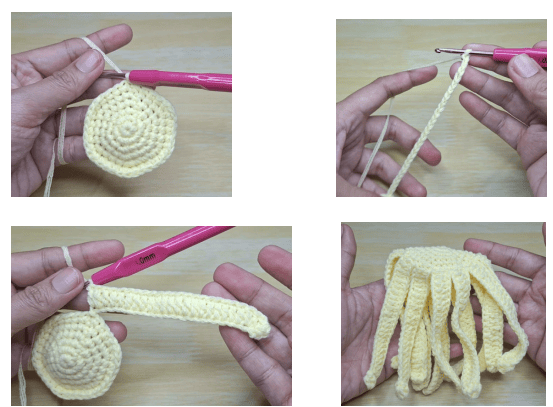
The Hair
Use light yellow yarn.
R1: mr, ch1, 6sc, slst
R2: ch1, inc×6, slst (12sc)
R3: ch1, (inc, 1sc)×6, slst (18sc)
R4: ch1, (inc, 2sc)×6, slst (24sc)
R5: ch1, (inc, 3sc)×6, slst (30sc)
R6: ch1, (inc, 4sc)×6, slst (36sc)
R7: (hair strands)
ch25, starting from the 3rd ch from the hook,
make dc inc×2, then make 1dc in each 21sts,
skip 2sts then slst to the next
- Make a total of 12 strands
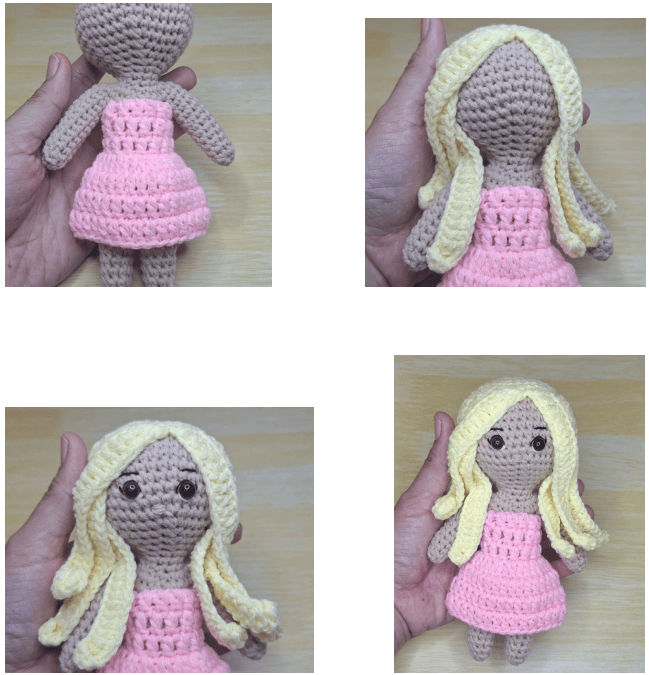
- Wear the dress to the doll
- Glue the hair to the head
- Place and glue the flat eyes
- Embroider other face details
Final Thoughts
Thank you for sharing your precious crochet experience with me! I hope you enjoyed crocheting these easy free Barbie doll pattern.
What’s also great is you can adjust the length of the hair, depending on your preference!